Shippo
Connecting Shippo and FullStro’s API is way simpler than you think. It’s just some easy steps that you need to follow.
- Login to your FullStro account. Go to Addon > Addon Integration on the FullStro’s left panel. Click on the Shippo “Connect” button on the shippo widget.
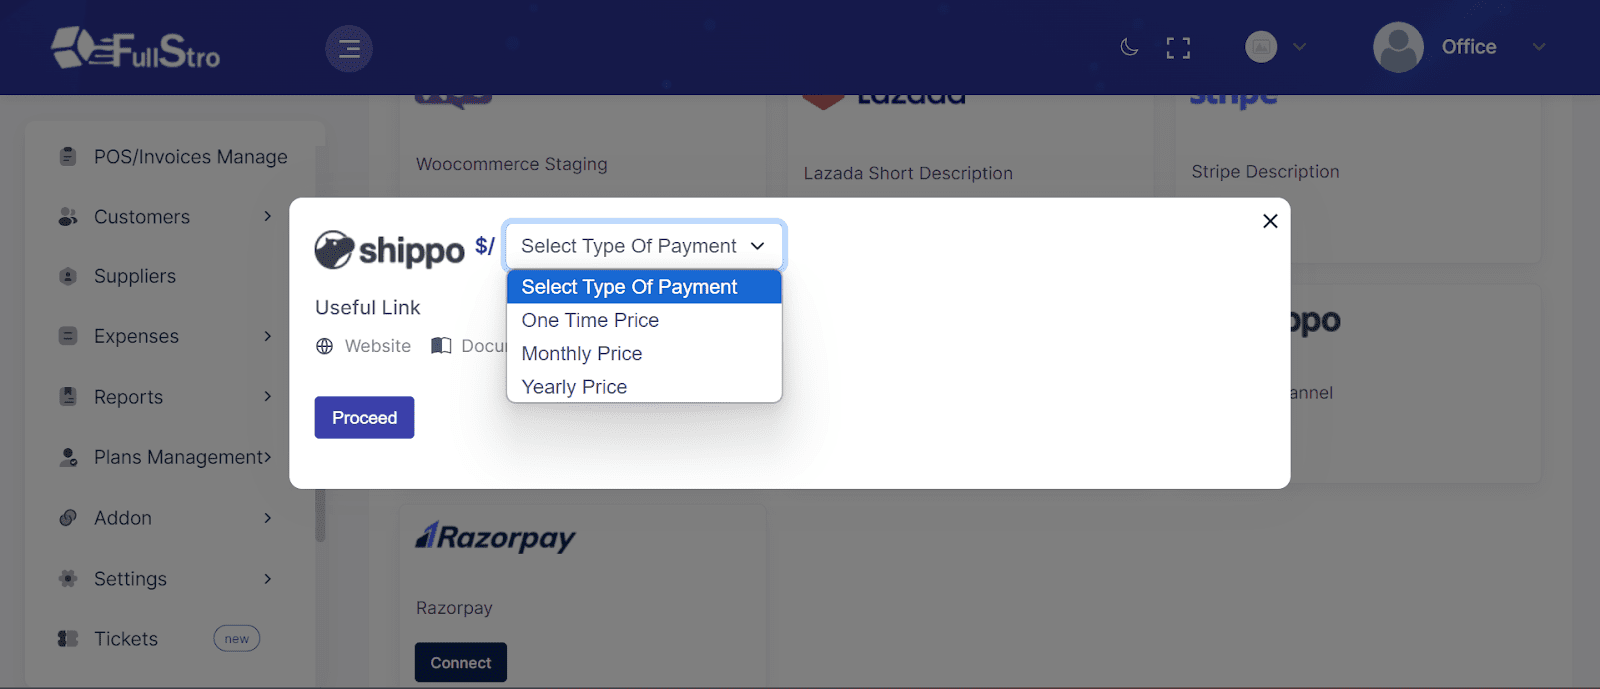
- Now, a pop will appear on the screen. Select your payment type and press “proceed”.
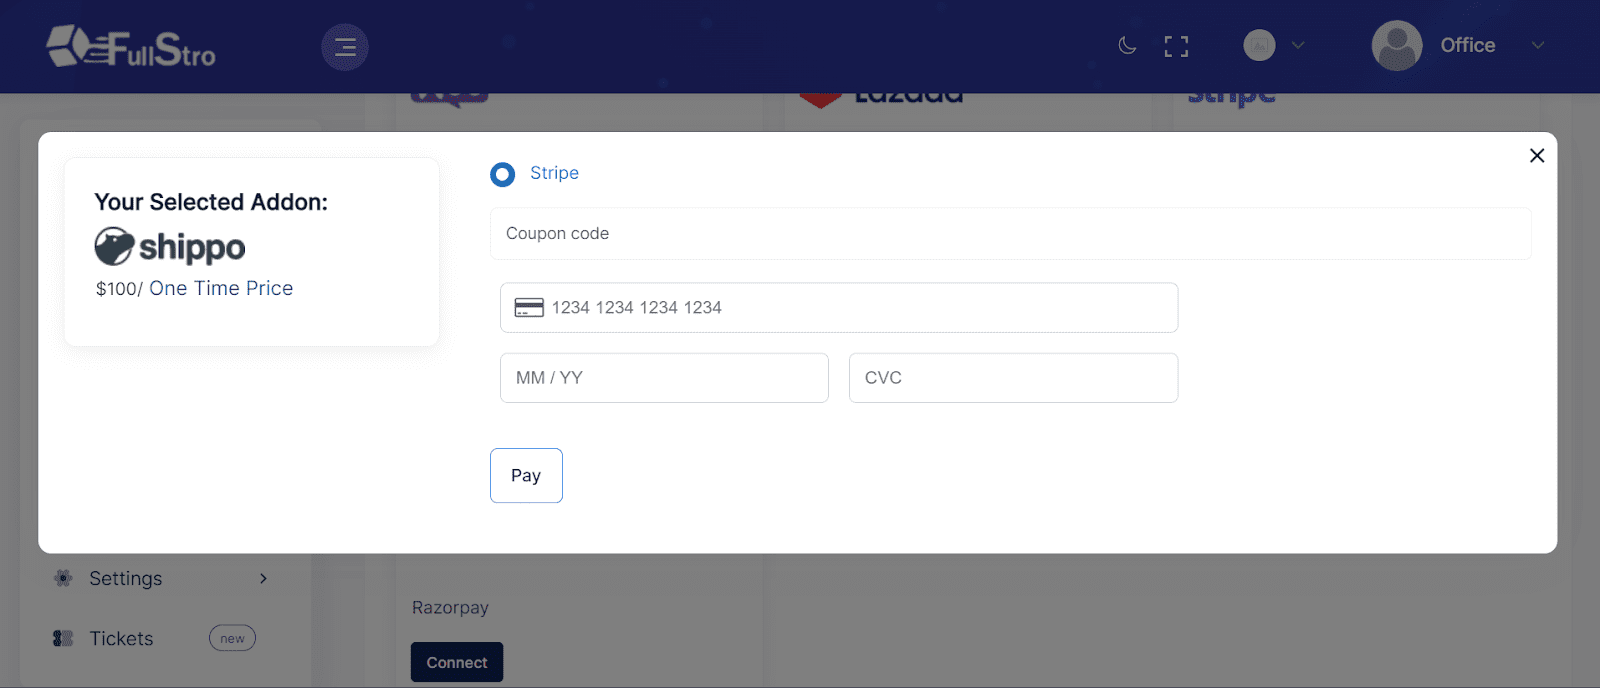
- Another pop-up will appear again for your payment details. Fill up it with proper details and press “Pay”.
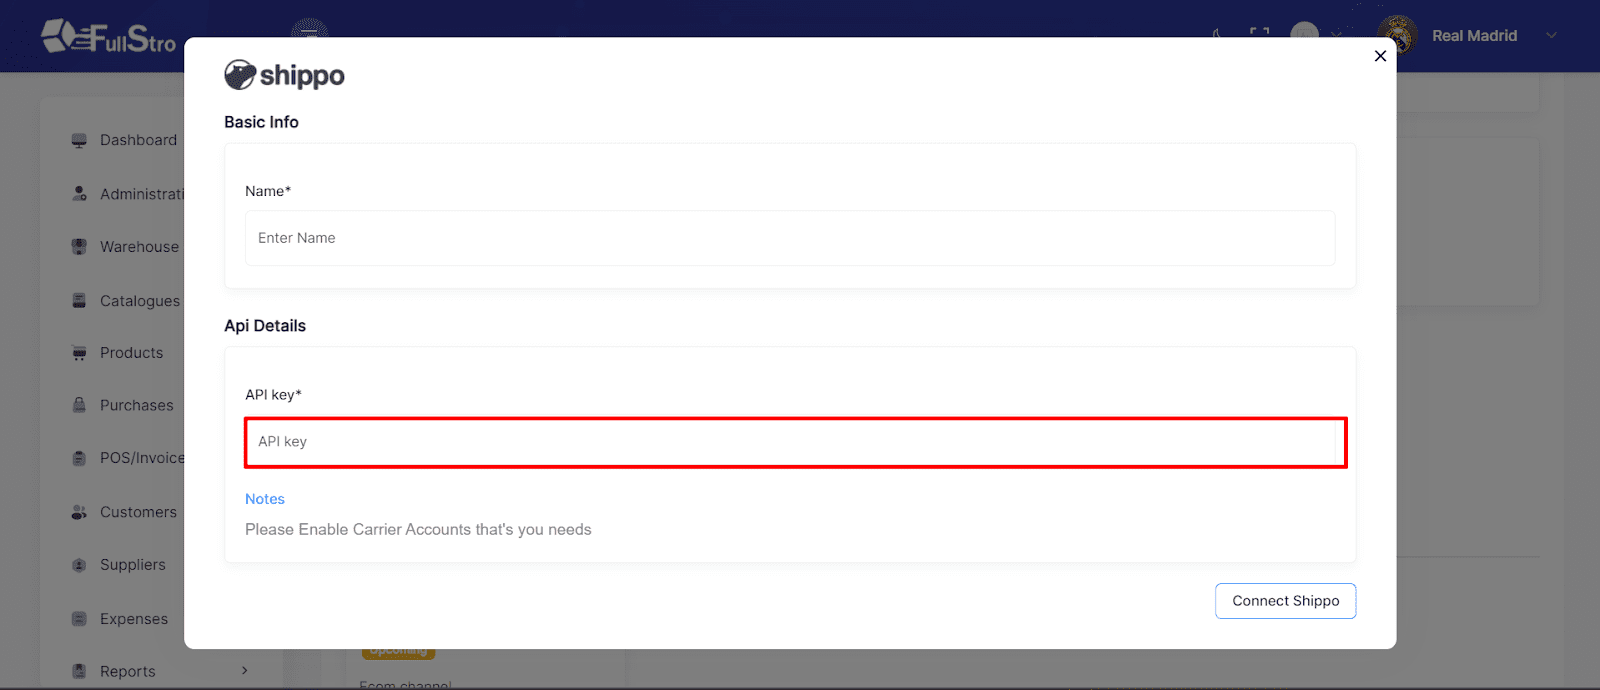
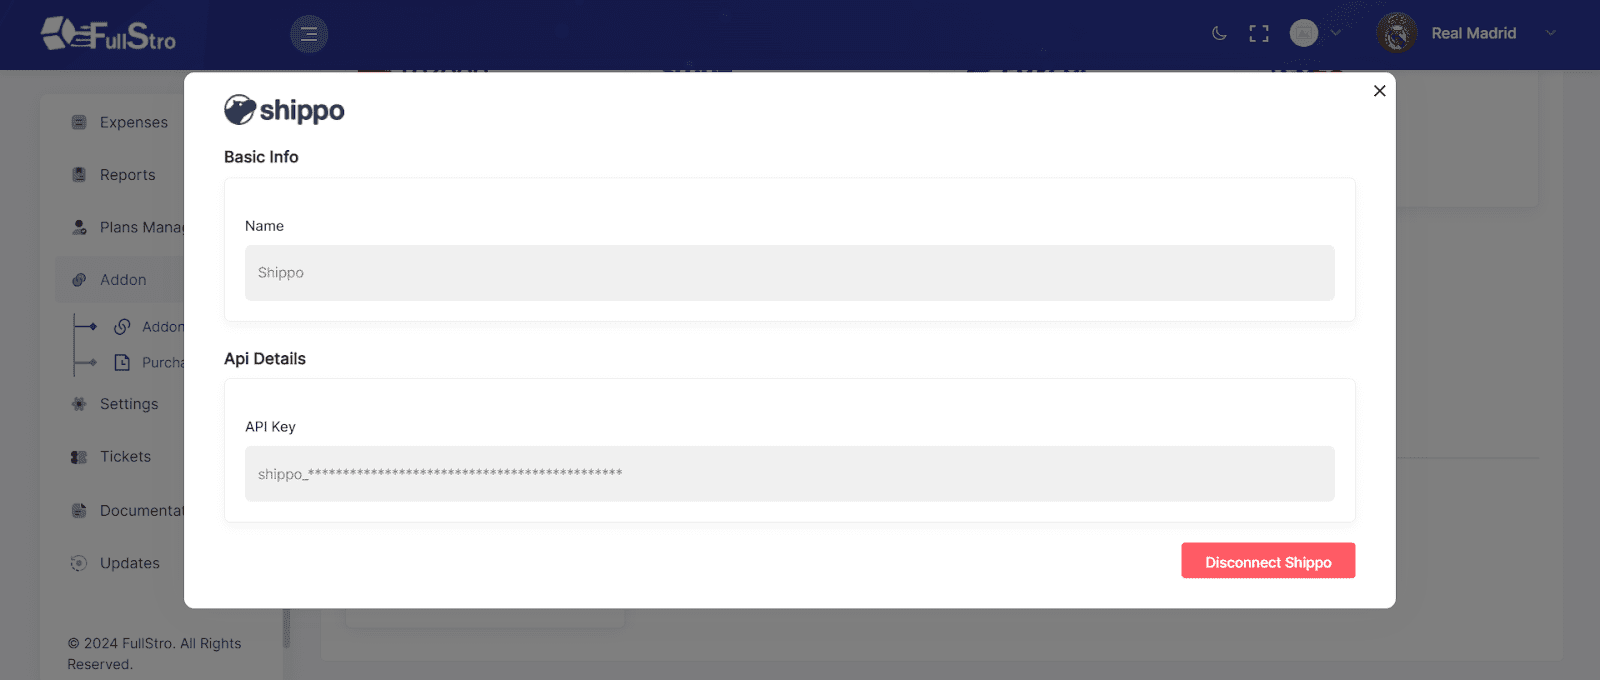
- After completing your payment for Shippo Addons, you will need the Shippo API to connect both APIs. Go to your Shippo account to collect the API key.
- If you don’t have a Shippo account, create one first and then generate the API key. Follow the below steps to collect Shippo API.
- Create your free Shippo account: Open the address https://apps.goshippo.com/join, In your browser. Enter your details such as name, email, a secure password, and click Get Started. Plus follow the given prompts to complete your registration.
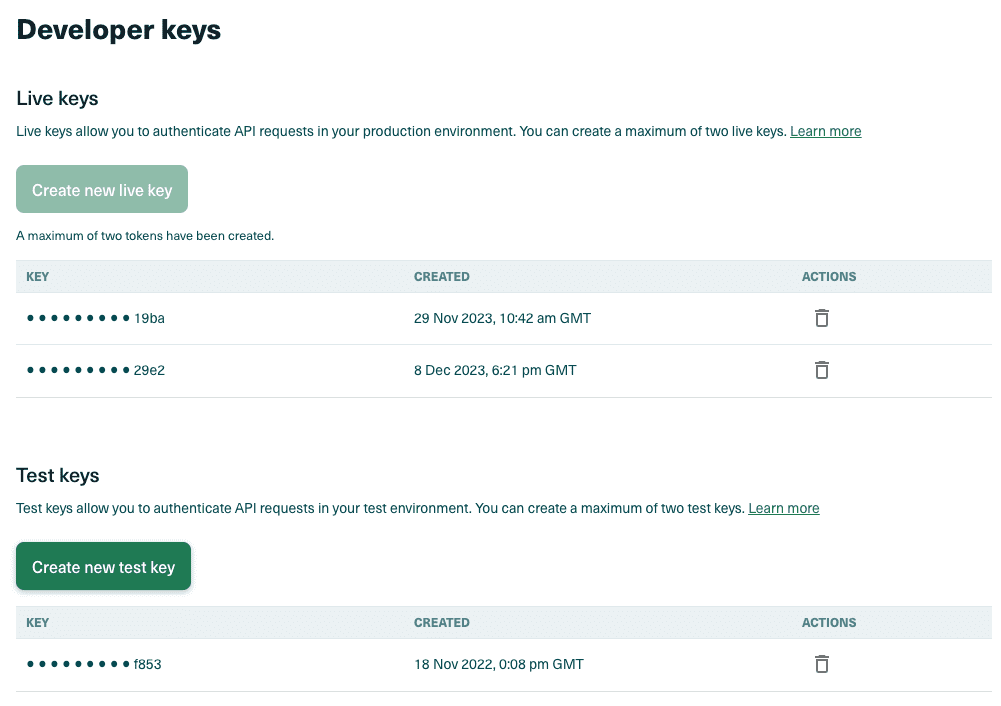
- Generate your secure key: Login to the Shippo API portal using your Shippo credentials. Go to API Configuration > Developer keys, now you can see two options, Live keys and Test keys. Use Live keys for production-ready use of the Shippo API. For testing and development, use the Test key.
Click to create new live key and copy the key.
( i ) Note
You can view your full API key only once, so store it securely. If lost, you can generate a new one.
( ! ) Warning
These keys provide direct access to your Shippo account, so store them securely. If you suspect your key is compromised, delete it from the dashboard and generate a new one.
- Come back to the FullStro dashboard and paste the copied API key on the API details. Your Shippo with FullStro is finally connected and you will be able to create shipping orders from FullStro without needing to login to Shippo again.
- It’s time to utilize Shippo. It includes creating Invoices, giving Address Information, making Labels, and Tracking. Below, we have given an example of how you can use Shippo Integration.
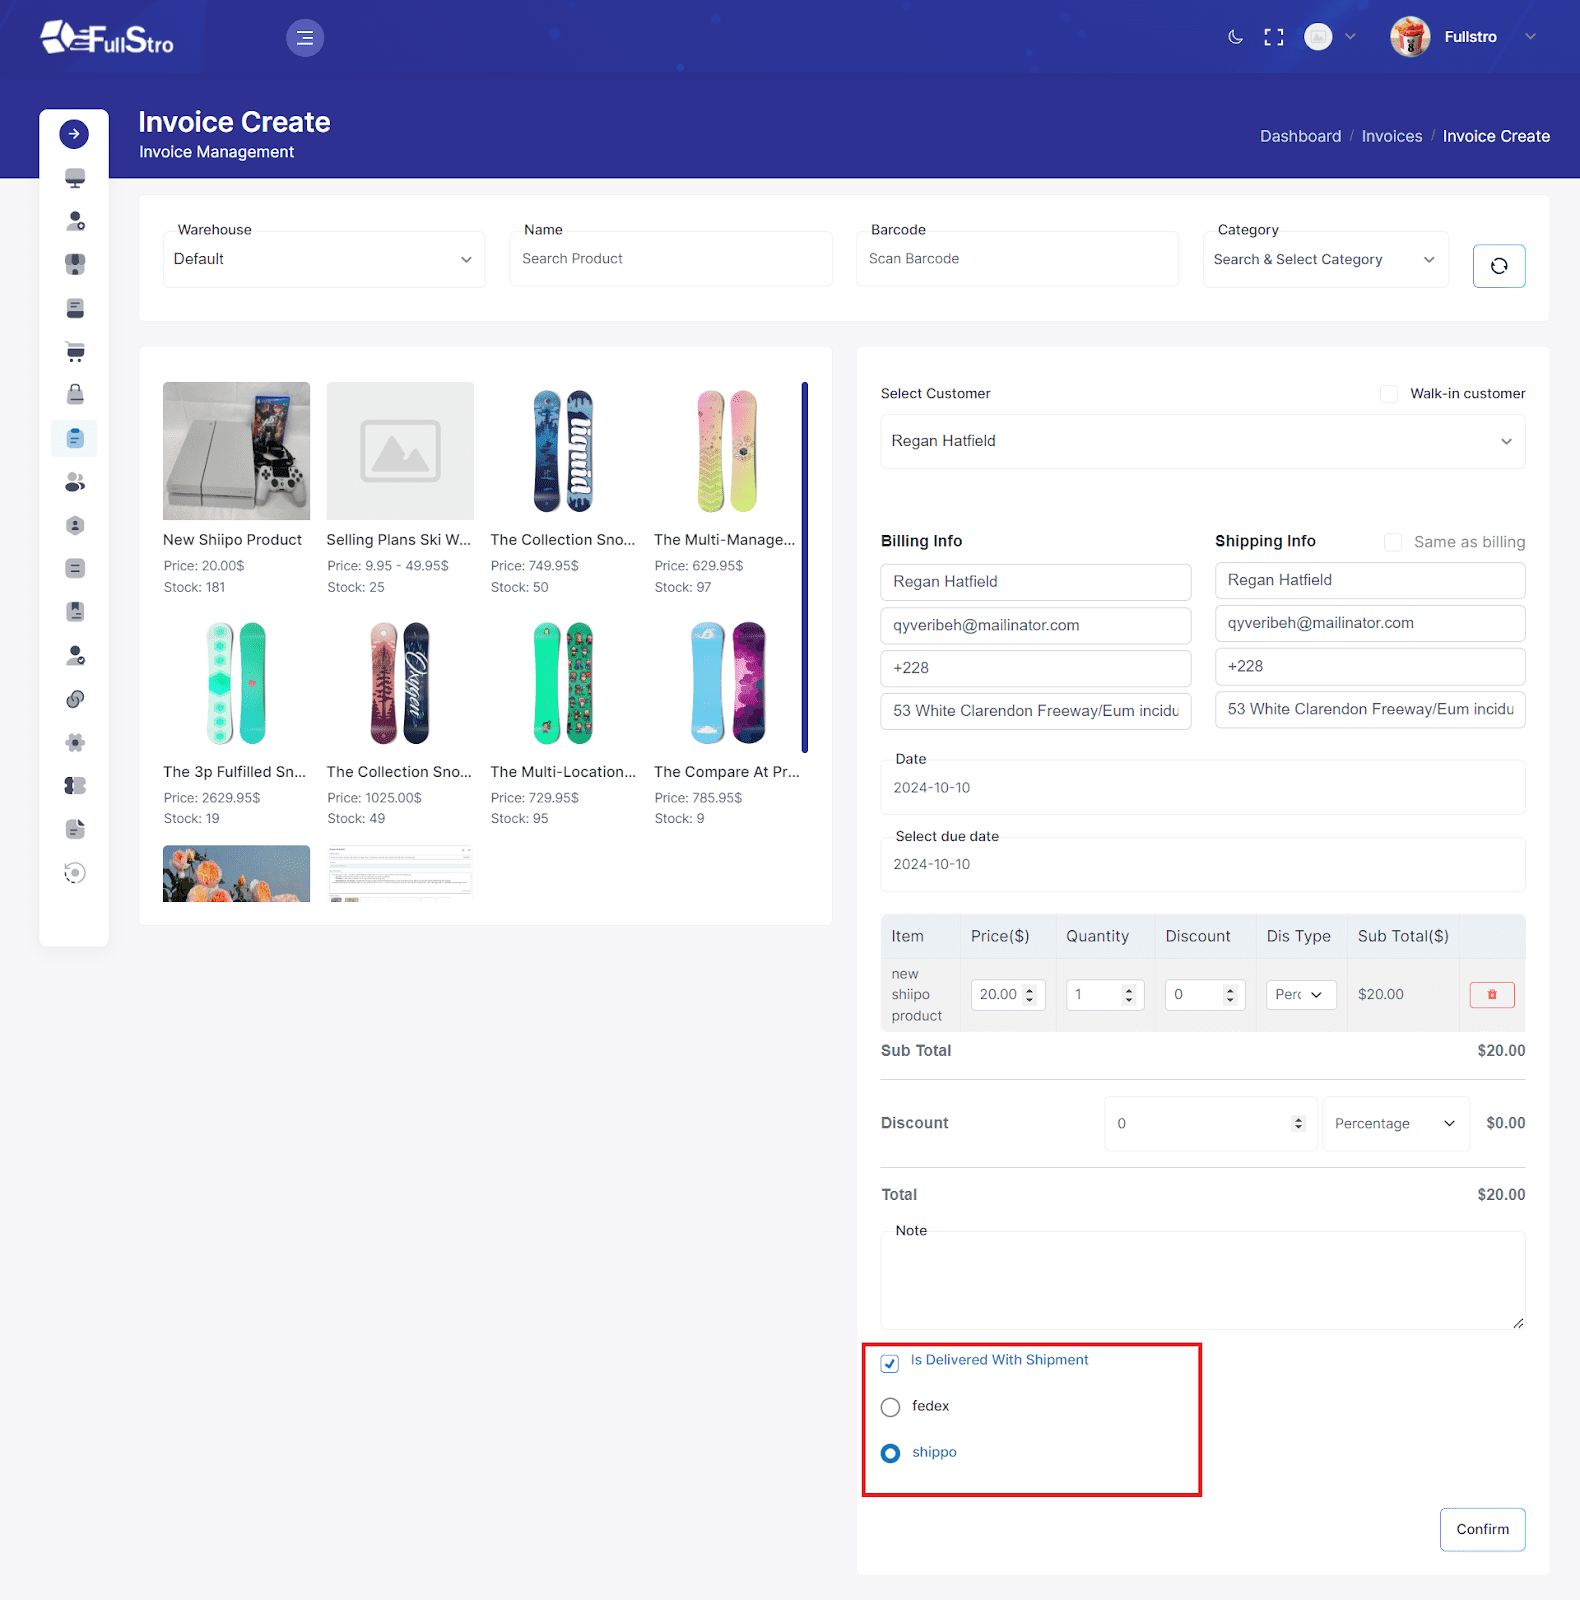
First, go to POS/Invoice Manage on the right panel and click “Add New”. After filling up the section, go below and select “Shippo” for the delivery option. Press “Confirm” to create a shipment.
- To create a shipment give the receiver information for “To Address Information”.
- Put your information in “From Address Information”.
- Now, enter the parcel details information and press “Create Shipment”.
- After creating a shipment, you have to make a label for the specific shipment. Choose and select any label from the dashboard and tap the “ Make Label” button.
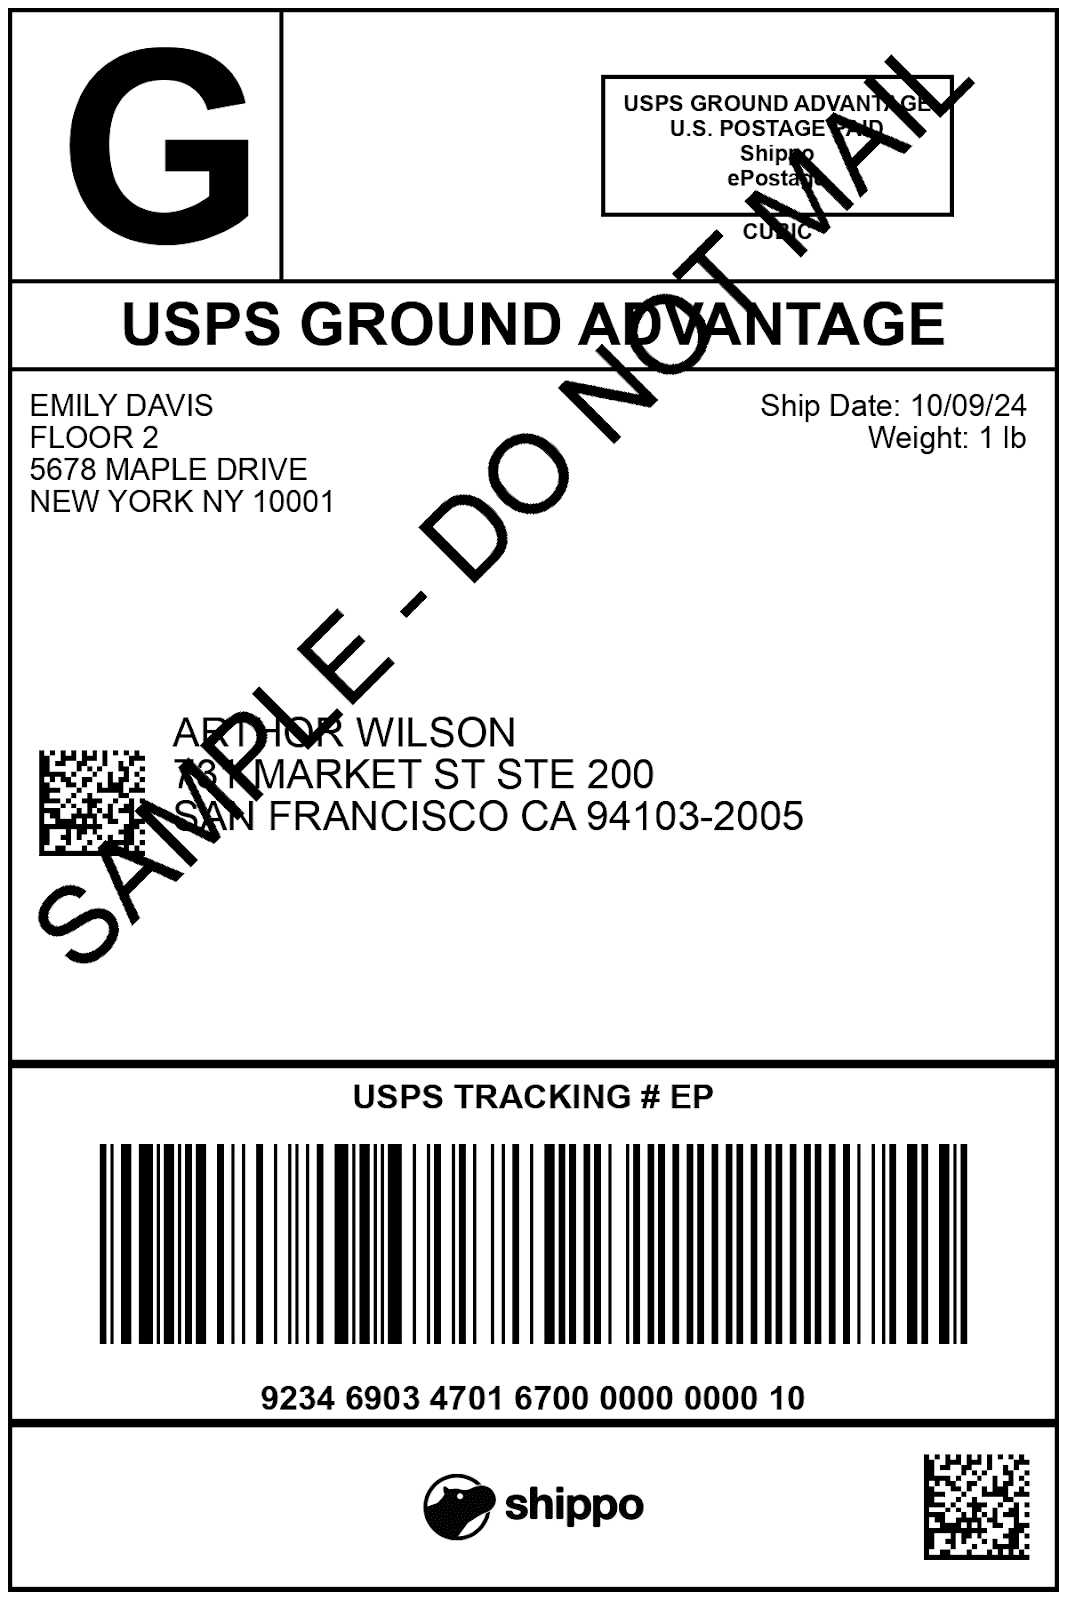
- Here, you can see the billing info. To get the shipping label, download it by clicking the “Shipping Label” button. Plus, click the tracking number to get the tracking details.
An example of a Shipping Label:
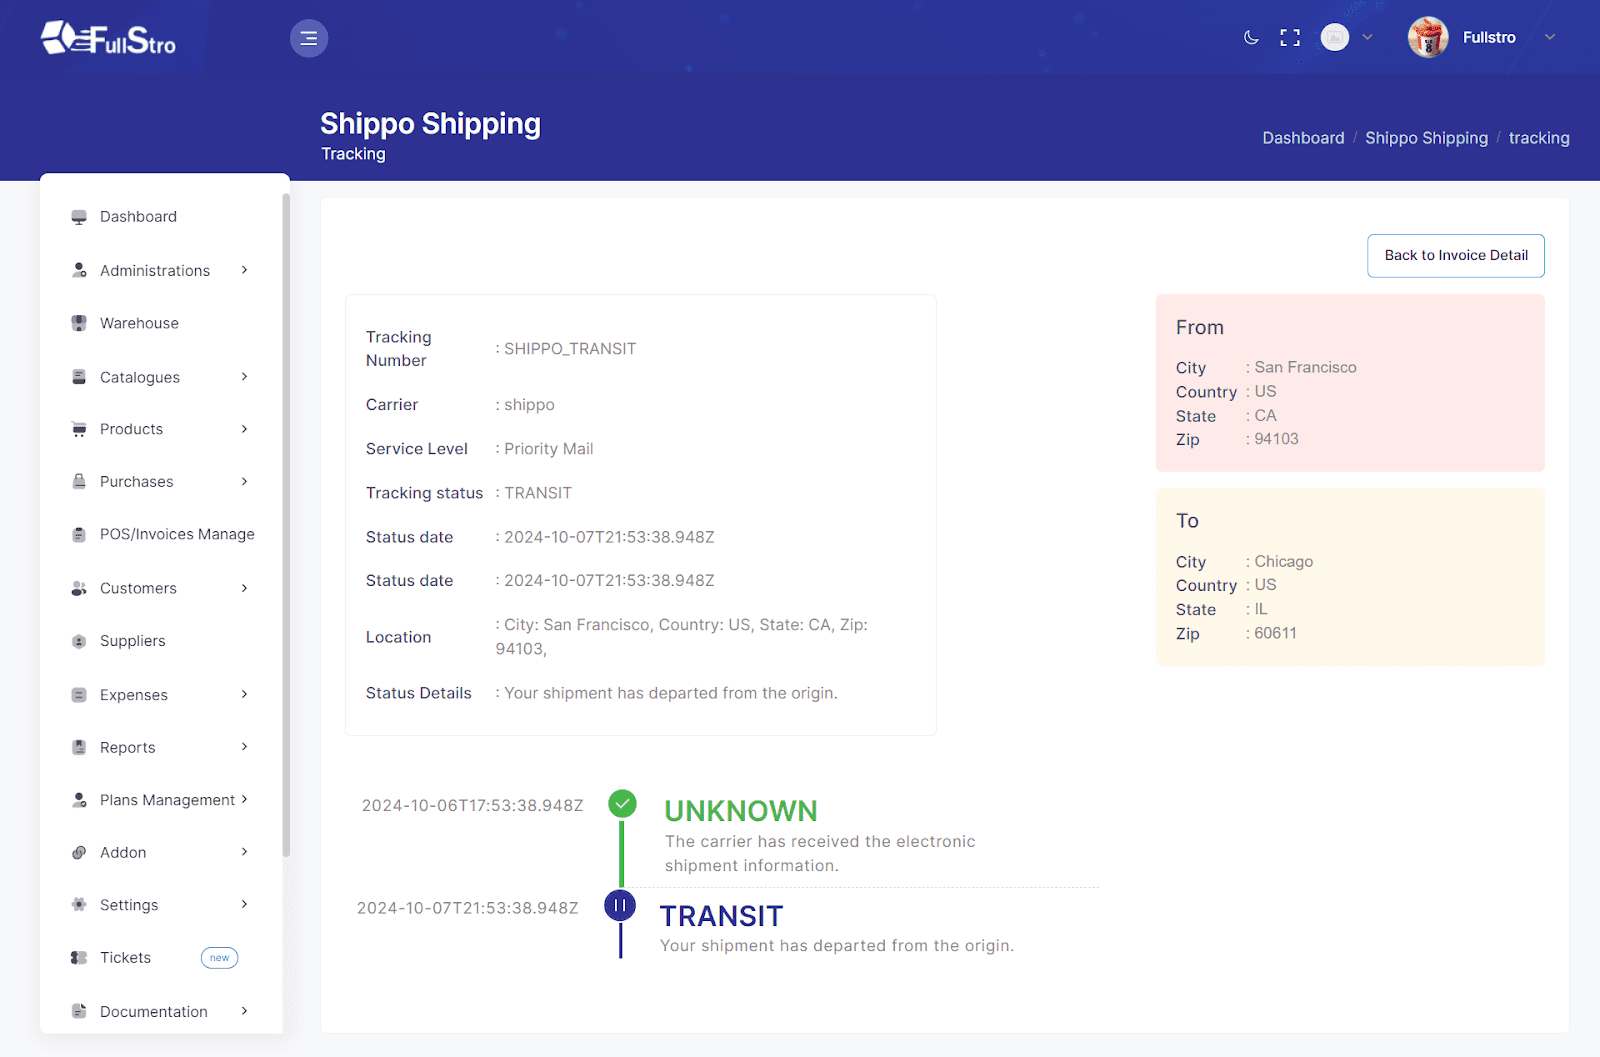
- From here, you can track the shipment until delivery.
You are all set with Shippo. Now you can use Shippo without logging into your Shippo account and manage from FullStro.