Ticketing System on FullStro
Get direct support from the FullStro team by creating and managing support tickets through the Ticket module.
Step 1: Navigate to the Ticket Module
- Log in to your FullStro account.
- From the left sidebar menu, go to:
Ticket
- Click the “Create New Ticket” button to start creating a new ticket.

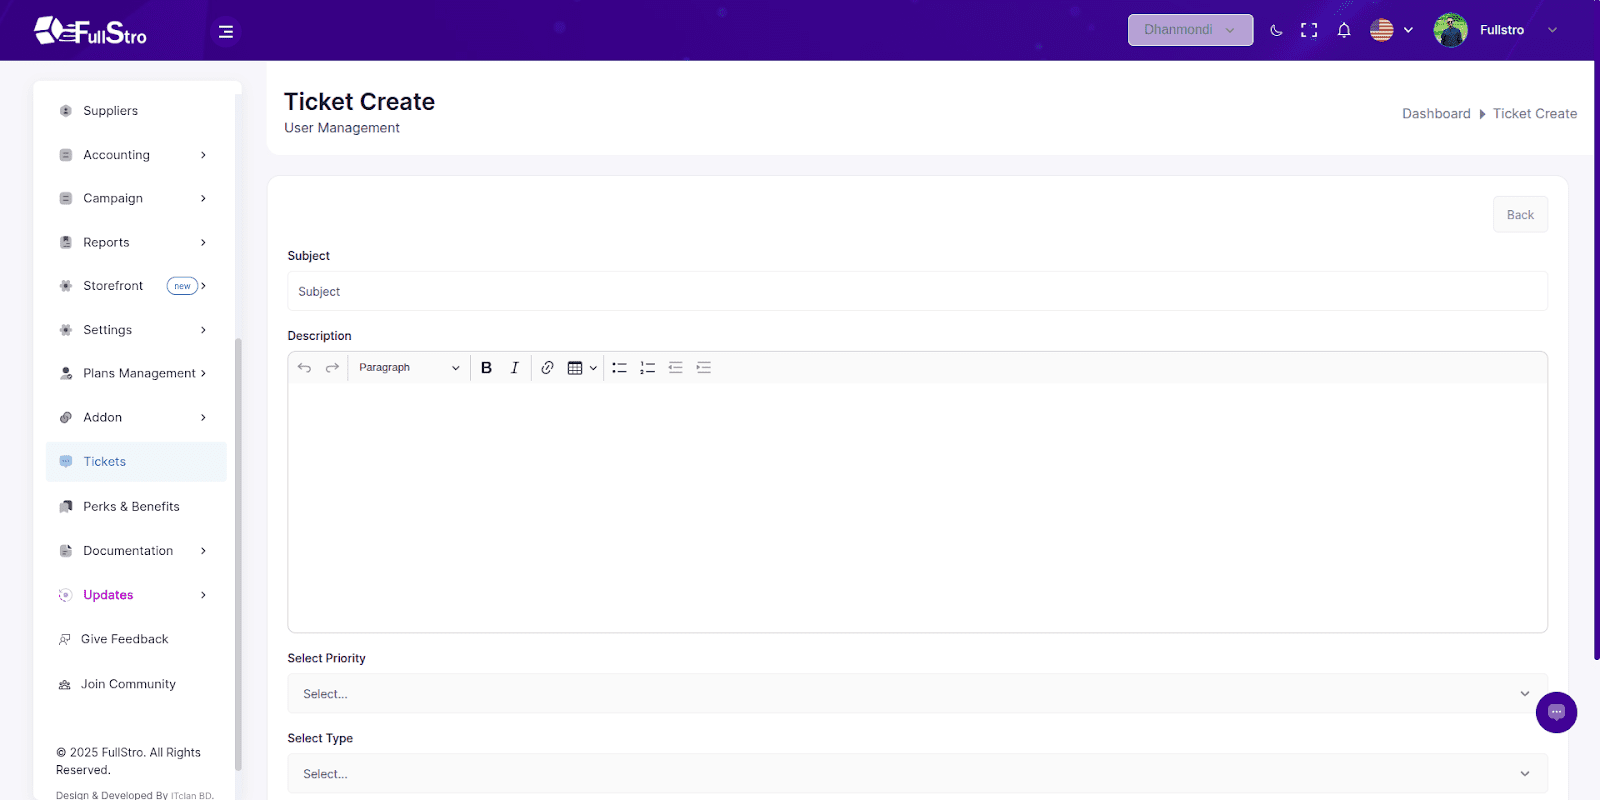
Create a Ticket
When creating a ticket, fill out the following fields:
| Field Name | Description |
| Subject | A brief title describing the issue or request. |
| Description | Detailed information about your issue or question. |
| Select Priority | Choose from options like: Low, Medium, High, or Urgent. |
| Select Type | Choose the type of issue: Technical, Billing, Feature Request, Other, etc. |
| Attachment | Upload files or screenshots to help the support team understand the issue. |
Click Submit to create your ticket.
Ticket List
After submitting the ticket:
- It will appear in the Ticket List section.
- The FullStro support team will be notified and begin reviewing your request.
- In the list, you can view all your tickets with statuses like: Open, In Progress, Closed.

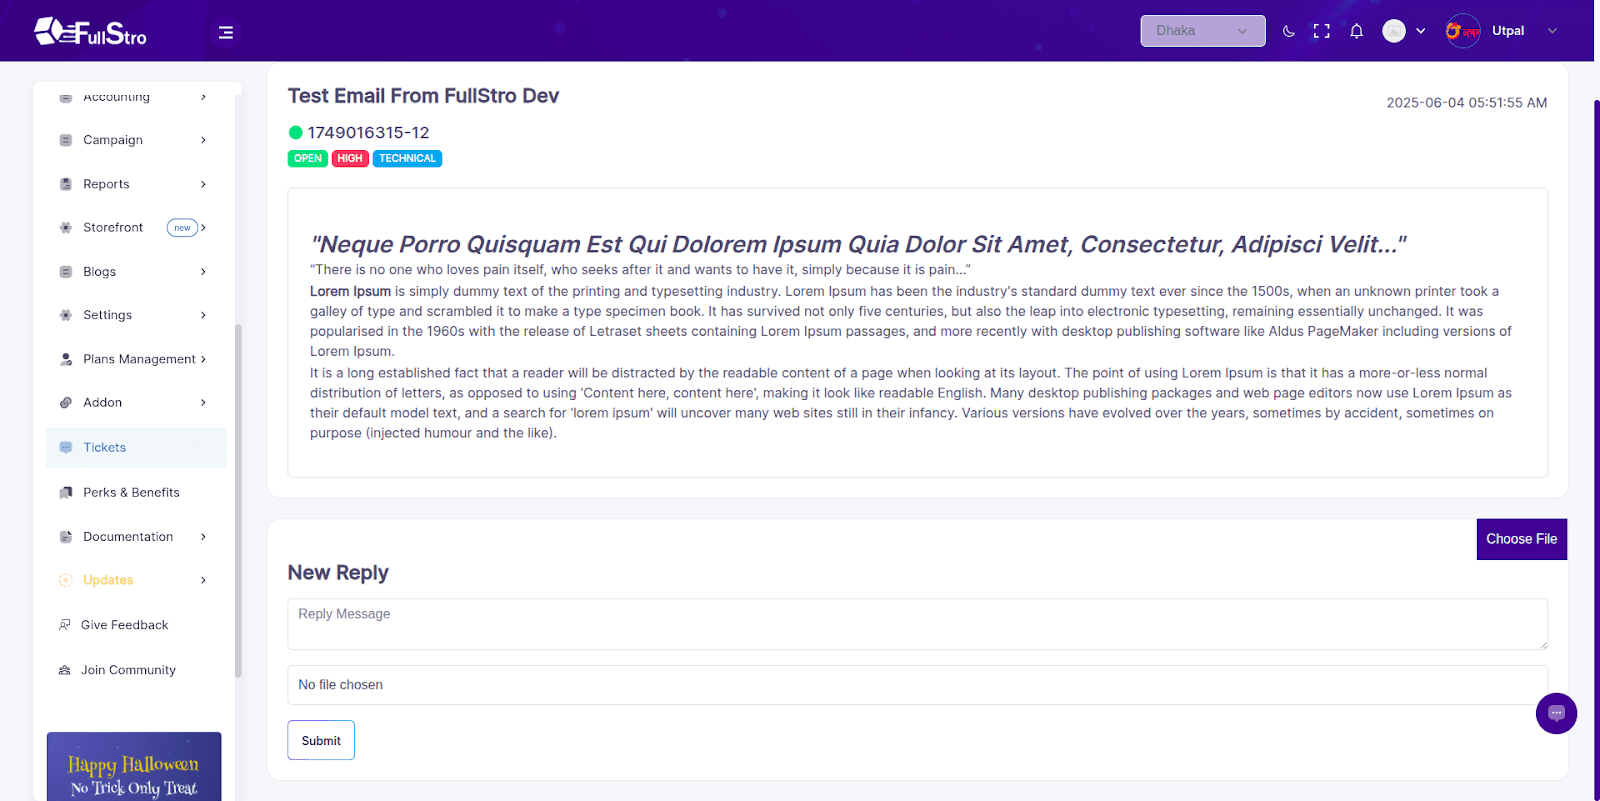
Reply / Show Details
- Click the “Reply” or “Show Details” button from the Action column.
- In the detail view:
- You can see all communications and the history of the ticket.
- Add new replies to communicate with the FullStro support team.
That’s It!
Your ticket is now live. The FullStro support team will communicate with you through this thread to resolve your issue.


