Supplier Management – FullStro Guide
This section covers how to manage suppliers, including creating, listing, editing, deleting, making payments, and viewing detailed records and transaction histories.
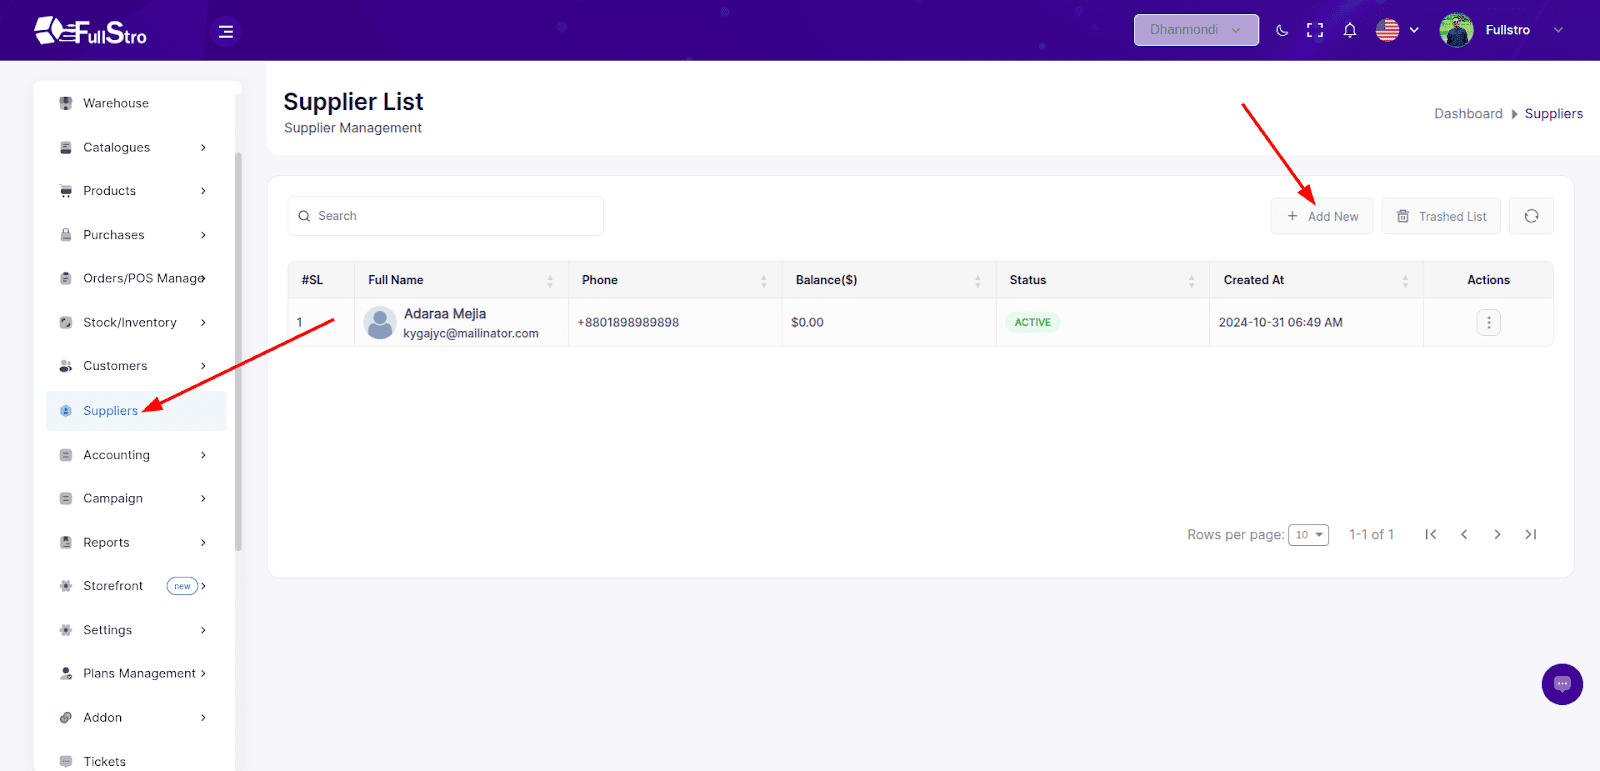
1. Accessing Supplier Management
- Navigate to Supplier from the left sidebar.
- You’ll be redirected to the Supplier List page.
- Use the “Add New” button to create a new supplier.
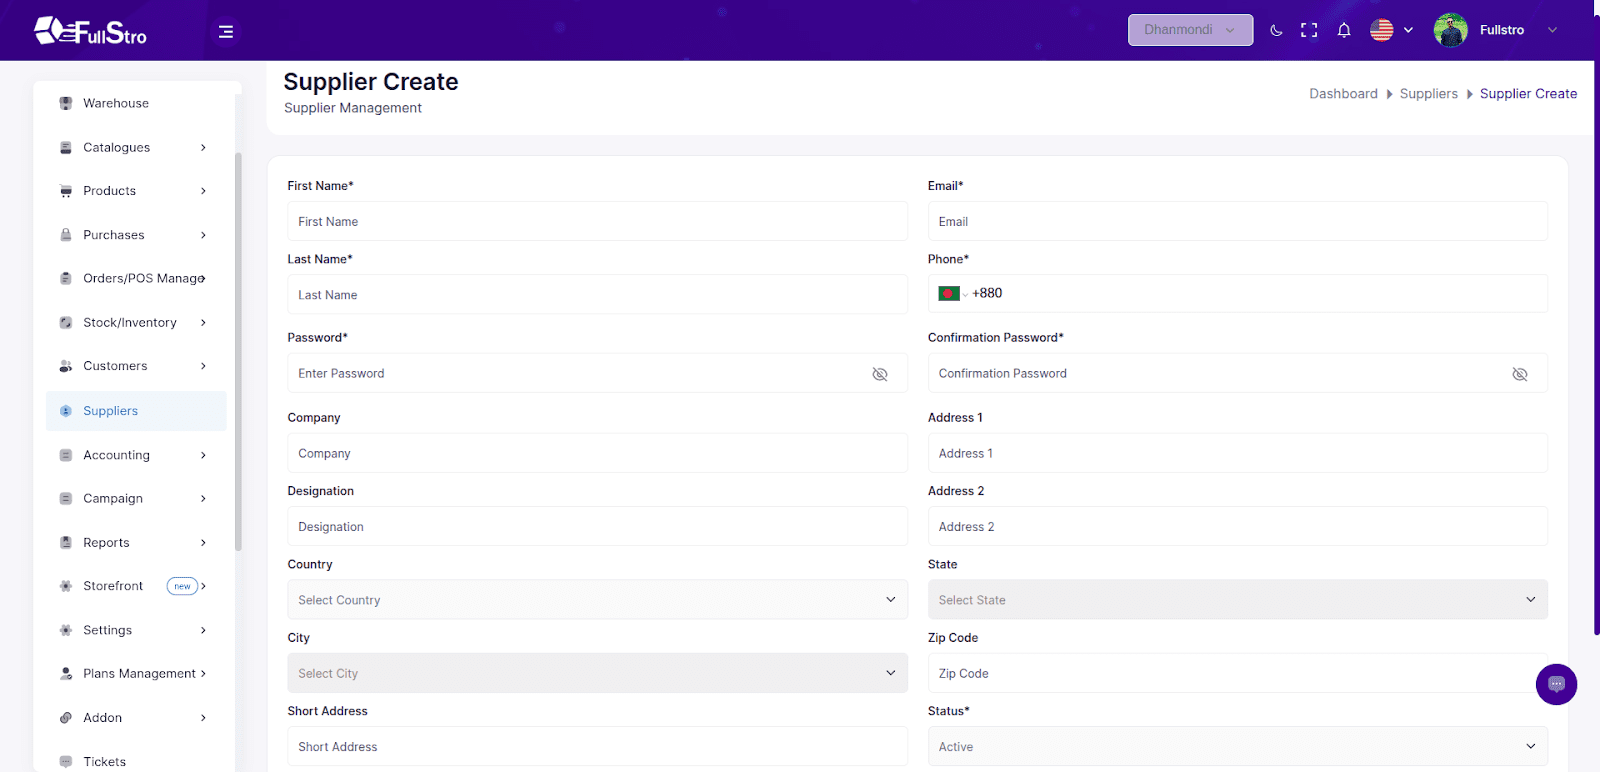
2. Creating a New Supplier
On the Create Supplier page, fill out the following fields:
| Field | Required | Description |
| First Name | ✅ | Supplier’s first name |
| Last Name | ✅ | Supplier’s last name |
| Email | ✅ | Must be unique and valid |
| Phone | ✅ | Contact number |
| Password | ✅ | Secure password |
| Confirm Password | ✅ | Must match the password |
| Company | ❌ | Company name (optional) |
| Designation | ❌ | Role or title |
| Address 1 | ❌ | Primary address |
| Address 2 | ❌ | Secondary address |
| Country, City, State, Zip Code | ❌ | Geographic details |
| Short Address | ❌ | Optional short label |
| Avatar | ❌ | Profile image |
| Status | ✅ | Active / Inactive |
Once filled, click “Submit” to create the supplier.
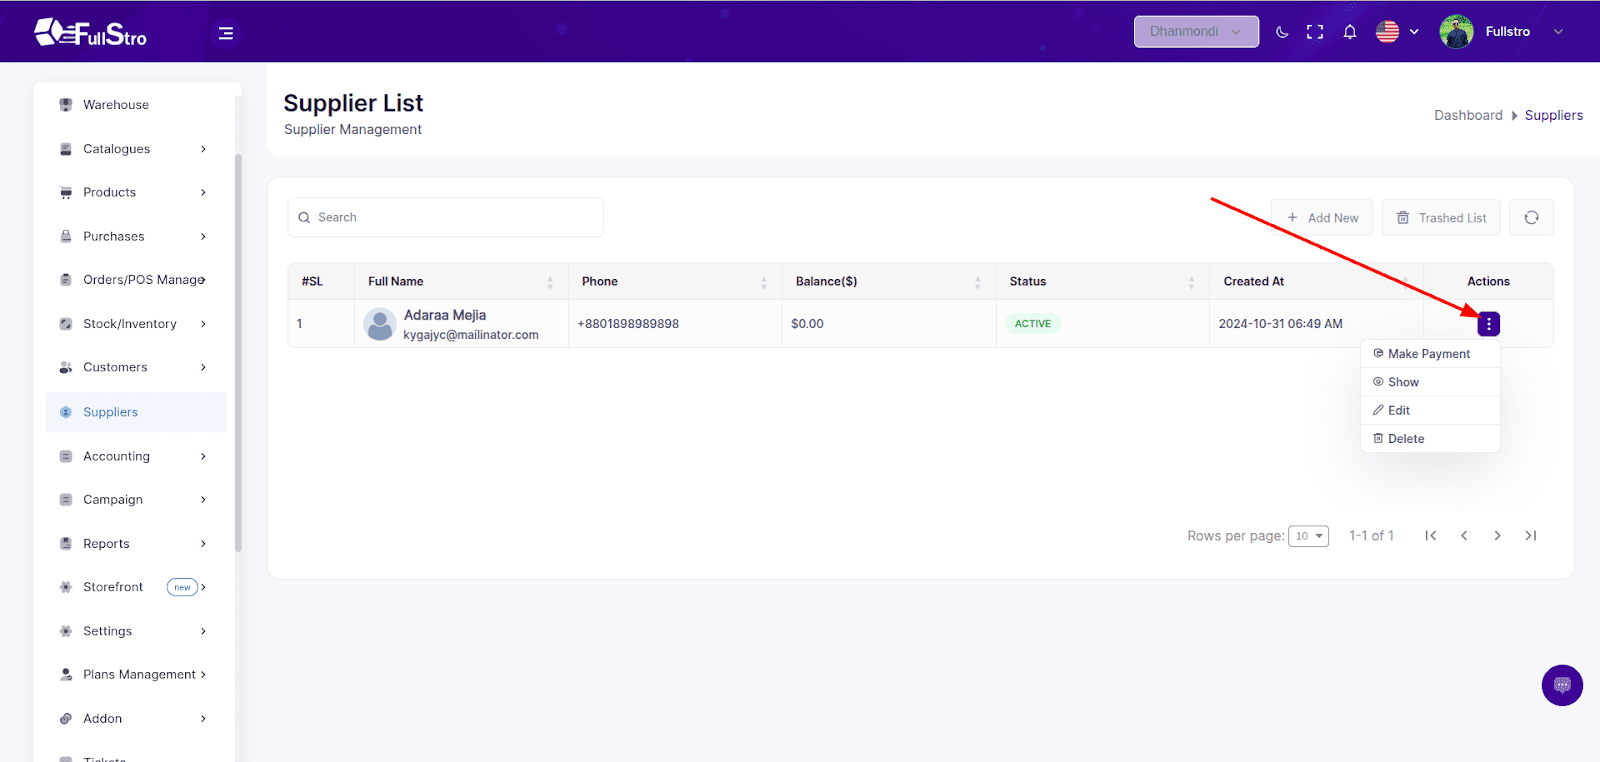
3. Supplier Actions
From the Supplier List, each row has an Actions menu where you can:
- Edit supplier details
- Delete (moves supplier to Trash)
- Make Payment
Show full supplier details
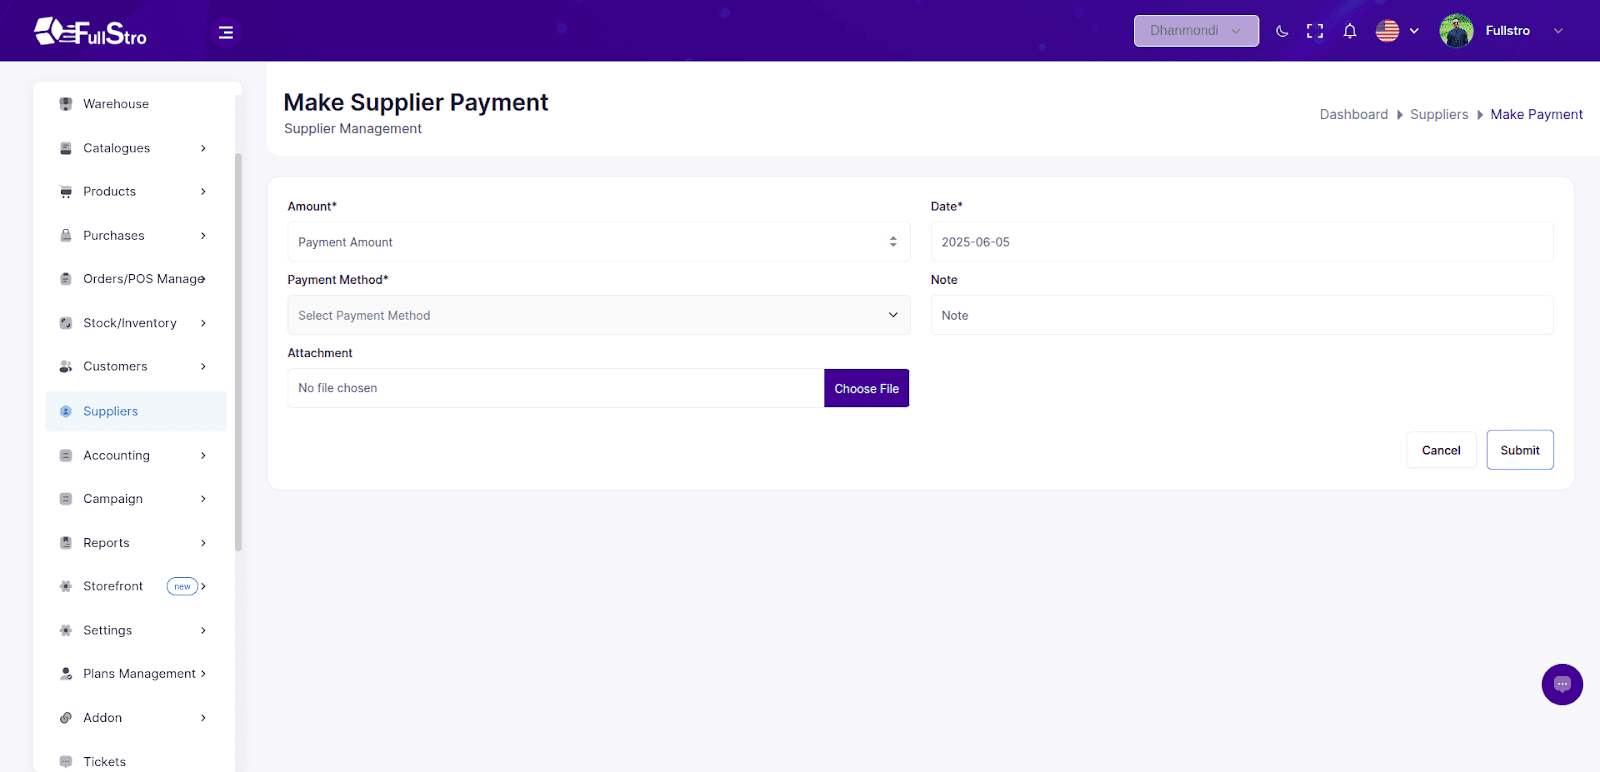
4. Making a Payment
- Click “Make Payment” from the Actions column.
- Fill in the payment form:
| Field | Required | Notes |
| Amount | ✅ | Enter payment amount |
| Date | ✅ | Payment date |
| Payment Method | ✅ | Choose from: CASH, ONLINE, BANK |
| Note | ❌ | Optional remarks |
| Attachment | ❌ | Upload a document or receipt |
Click “Submit” to process the payment.
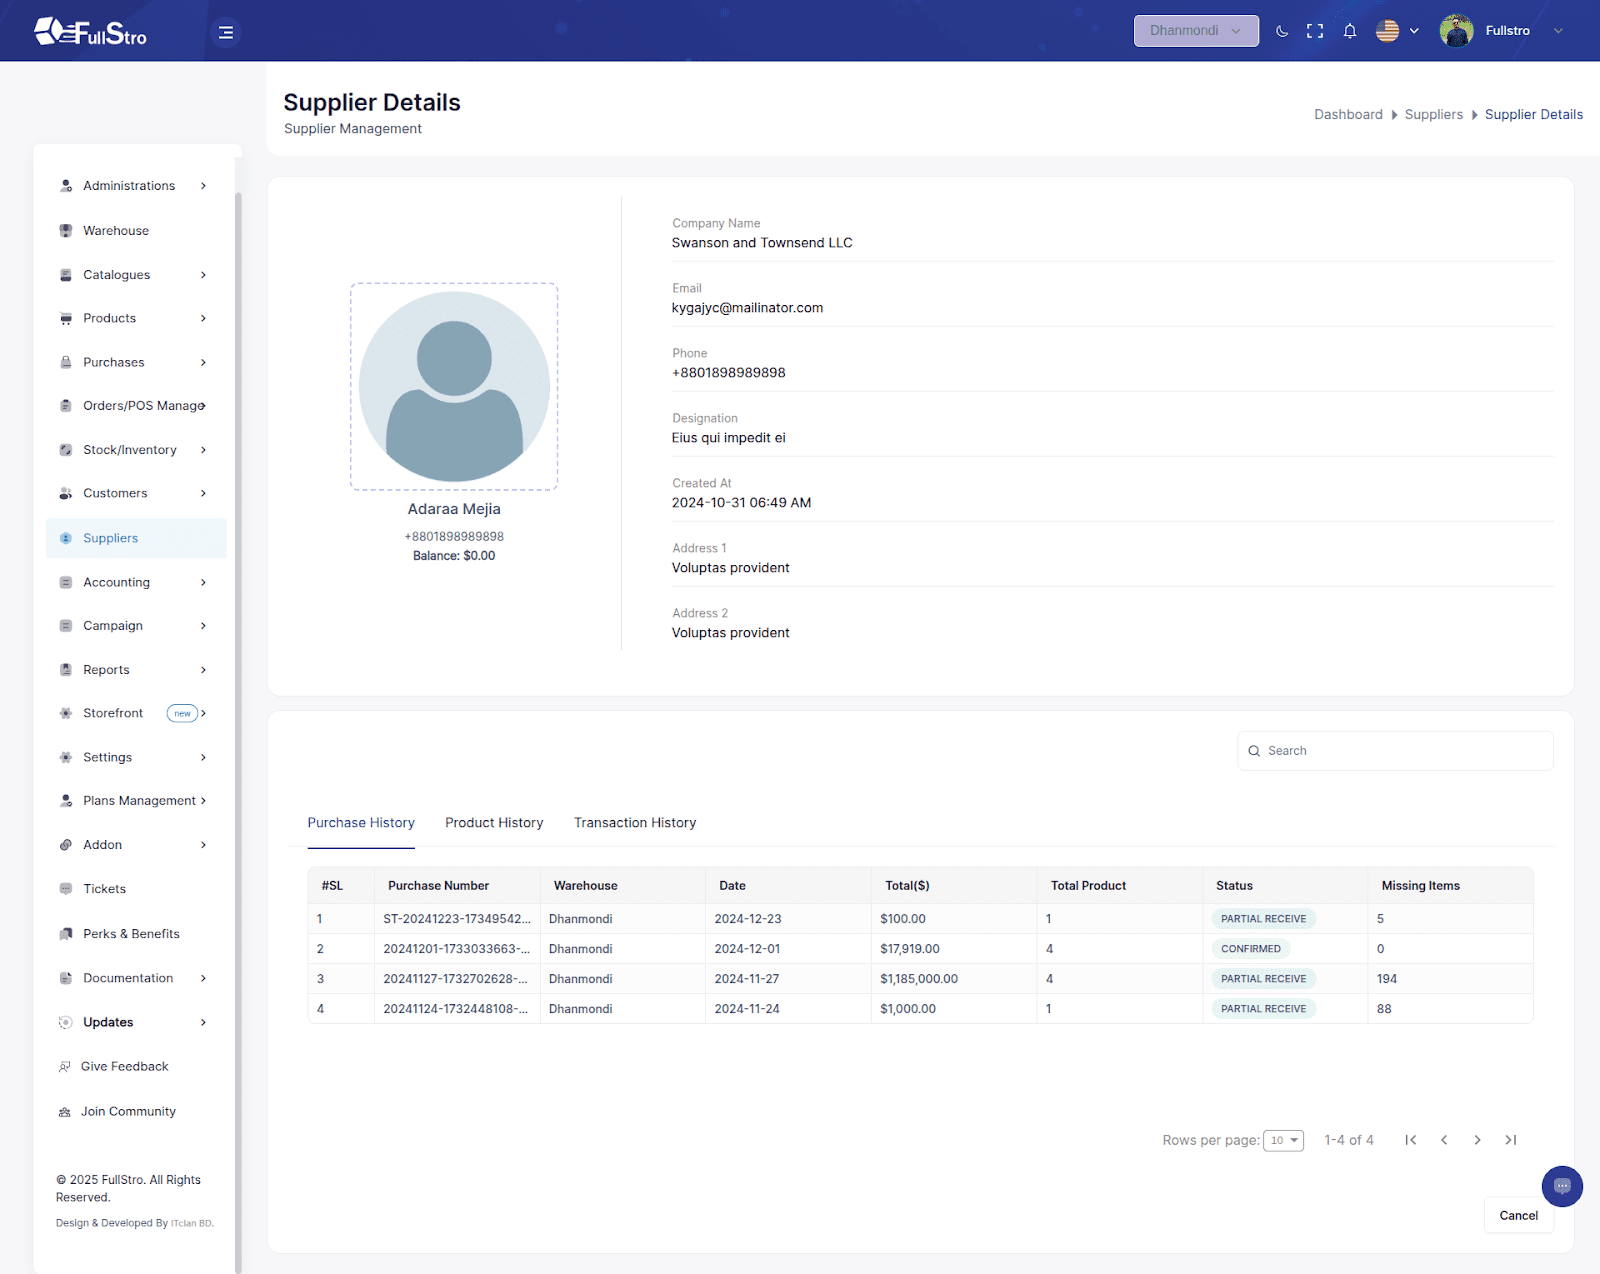
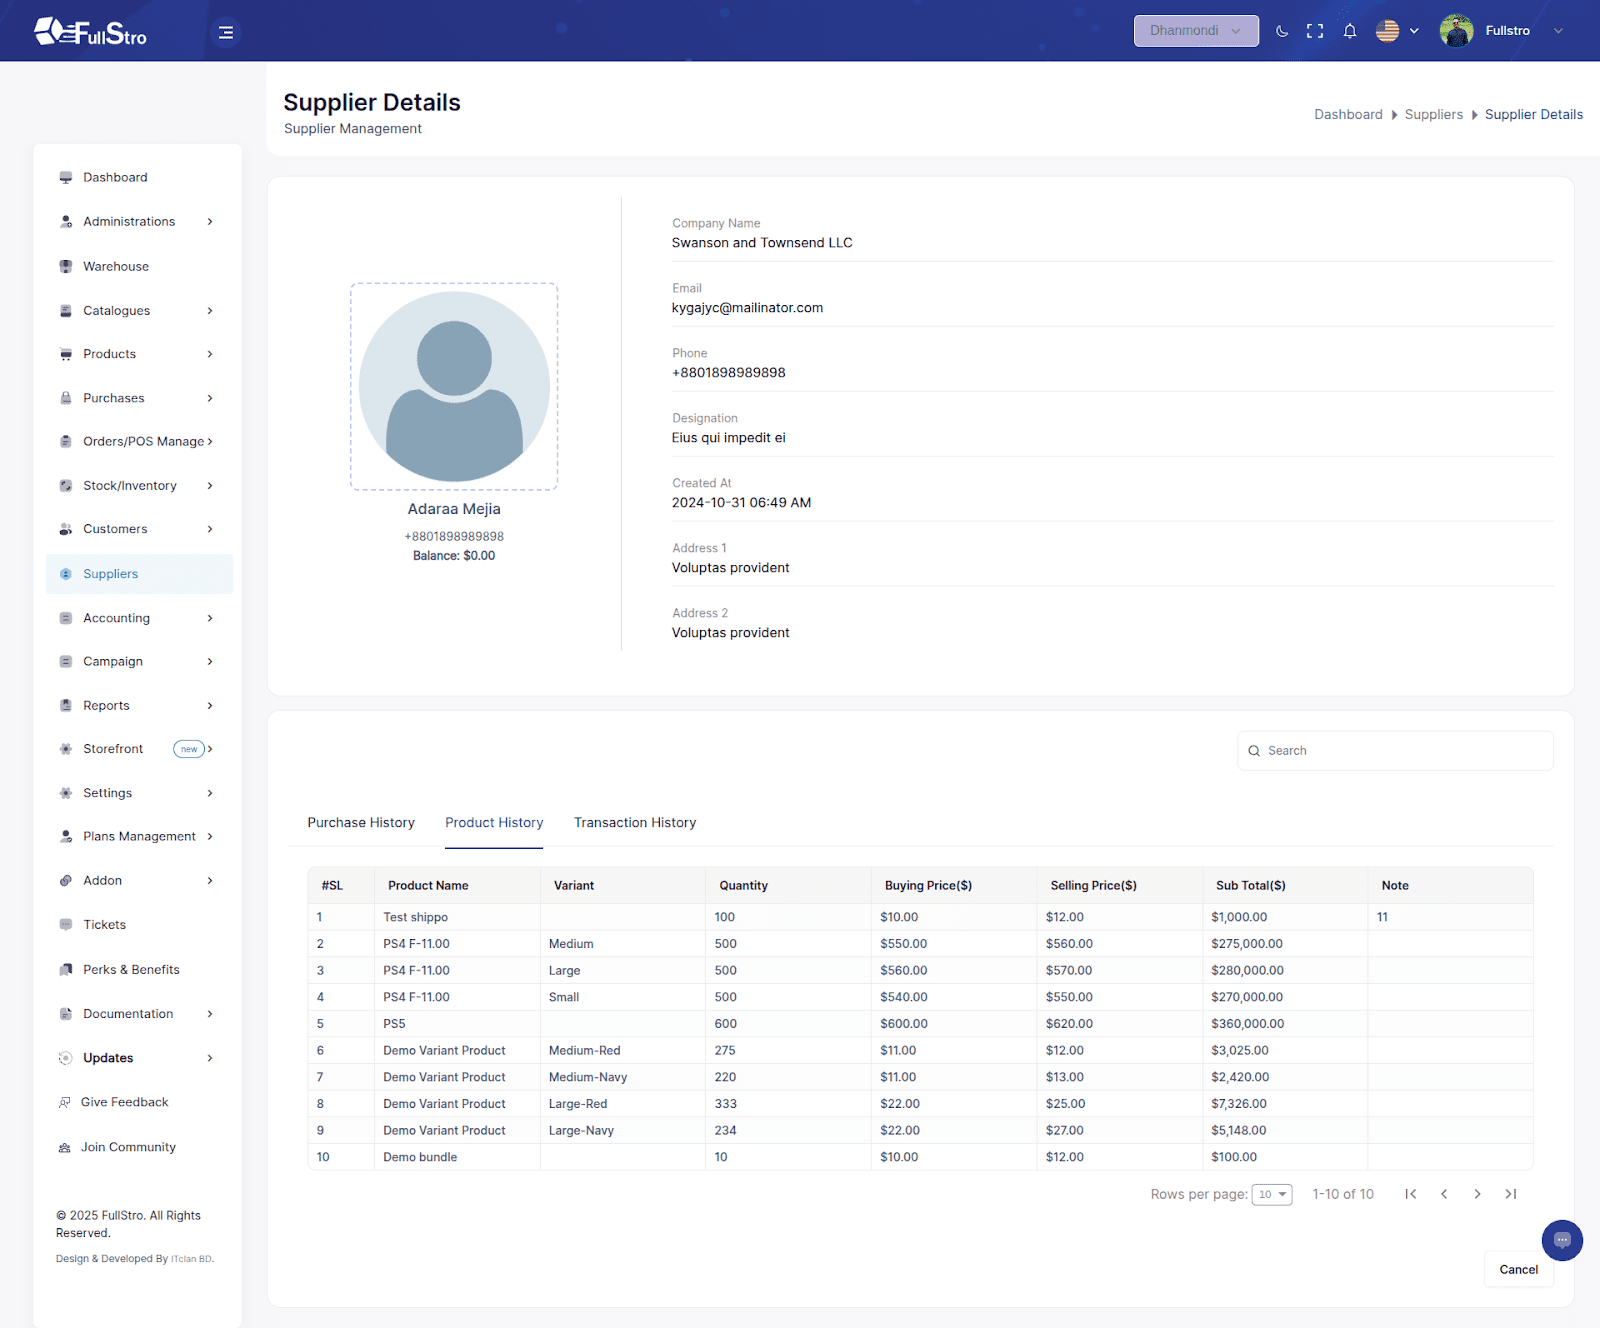
5. Viewing Supplier Details
Click the “Show” button in the Actions column to access:
- Basic Details (Name, Company, Contact, etc.)
- Current Balance
- Purchase History
- Product History
Transaction History