Product Price Range
Set promotional pricing for products within a specific date range to automate discounts on POS and storefront.
Step-by-Step Guide:
Step 1: Navigate to the Product Price Range Module
- Log in to your FullStro account.
- From the left panel, go to: Campaign > Product Price Range
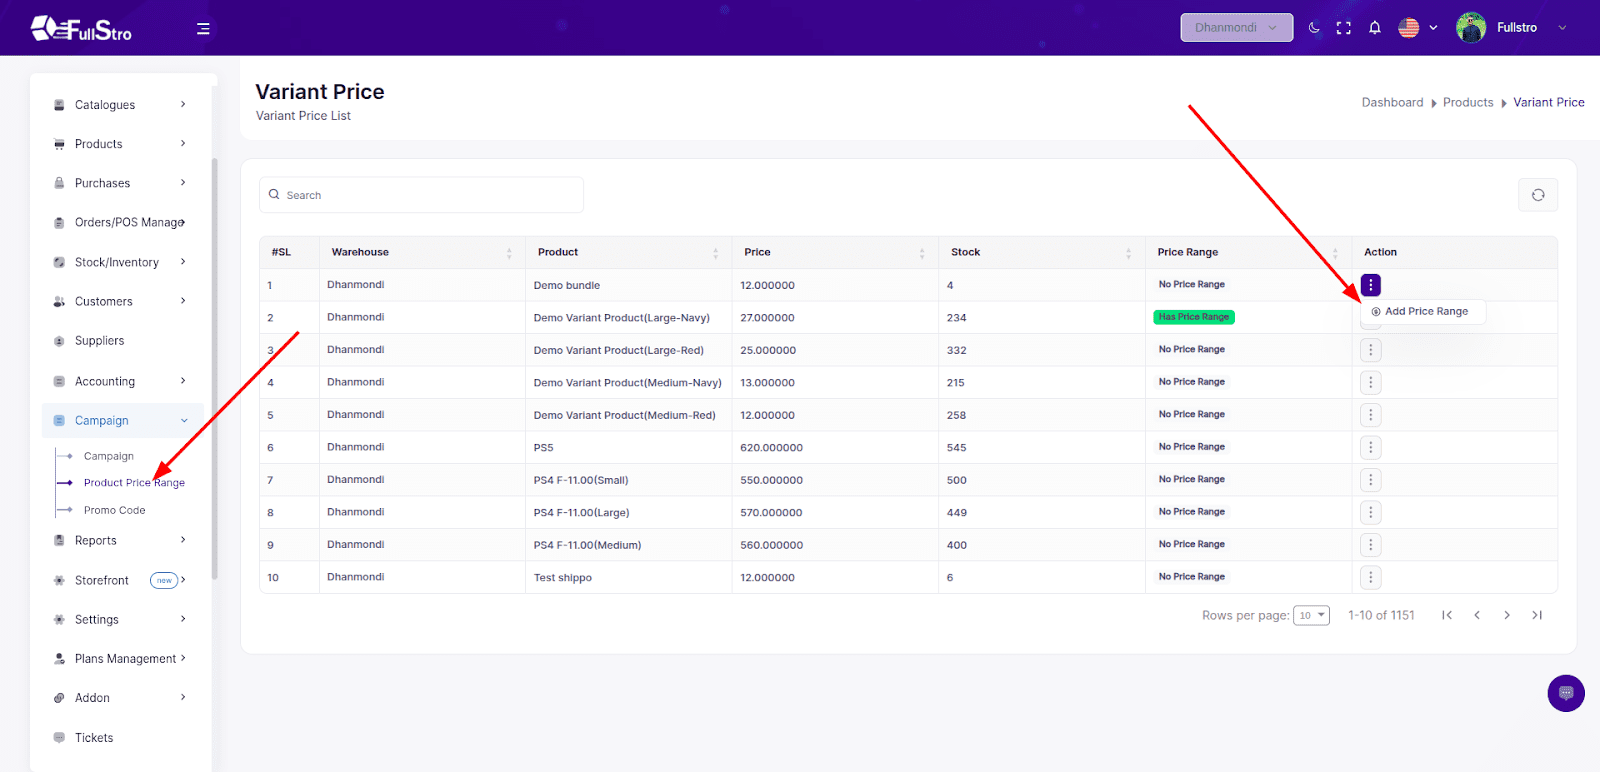
Step 2: Add a New Price Range
- From the Product Price Range list, click the Add Price Range button from the action dropdown beside the product you want to set a price range for.
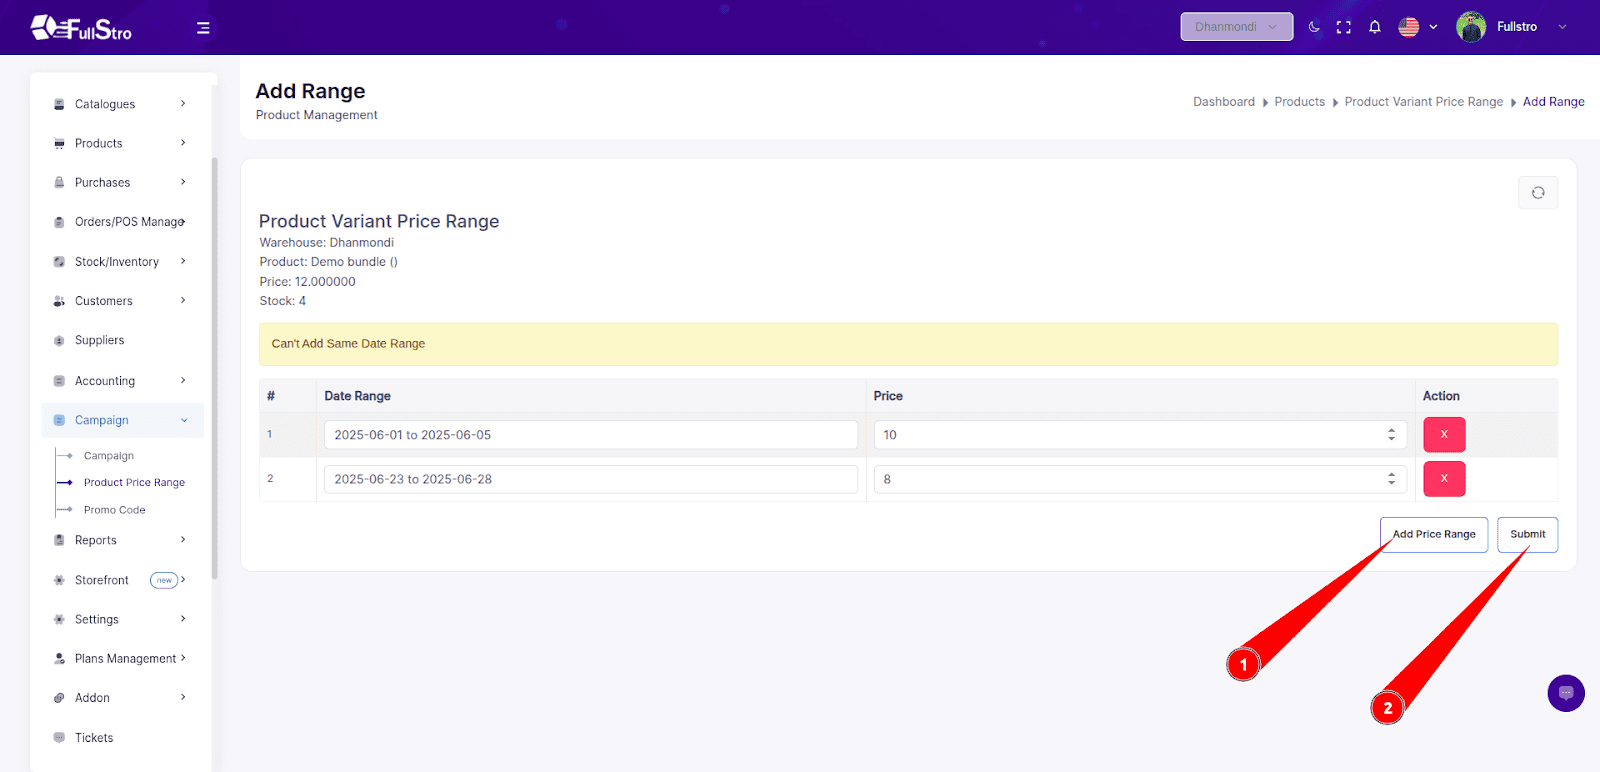
- On the Add Price Range page, fill in the following fields:
Add Details:
- Date Range – Select a start and end date for the promotional price
- Discounted Price – Enter the price that will apply during the selected date range
Step 3: Submit
After filling in the required information, click the Submit button.
Done!
You’ve successfully set a Product Price Range.
The discounted pricing will now automatically apply during the selected date range at checkout in:
Storefront (If Storefront feature is active)


