POS / Order Management
Once you’ve added products to your system, you can begin selling through the built-in Point of Sale (POS) system.
Step-by-Step Guide:
1. Start from Invoice Create Page
Begin your selling process by navigating to the Invoice Create page in your dashboard.

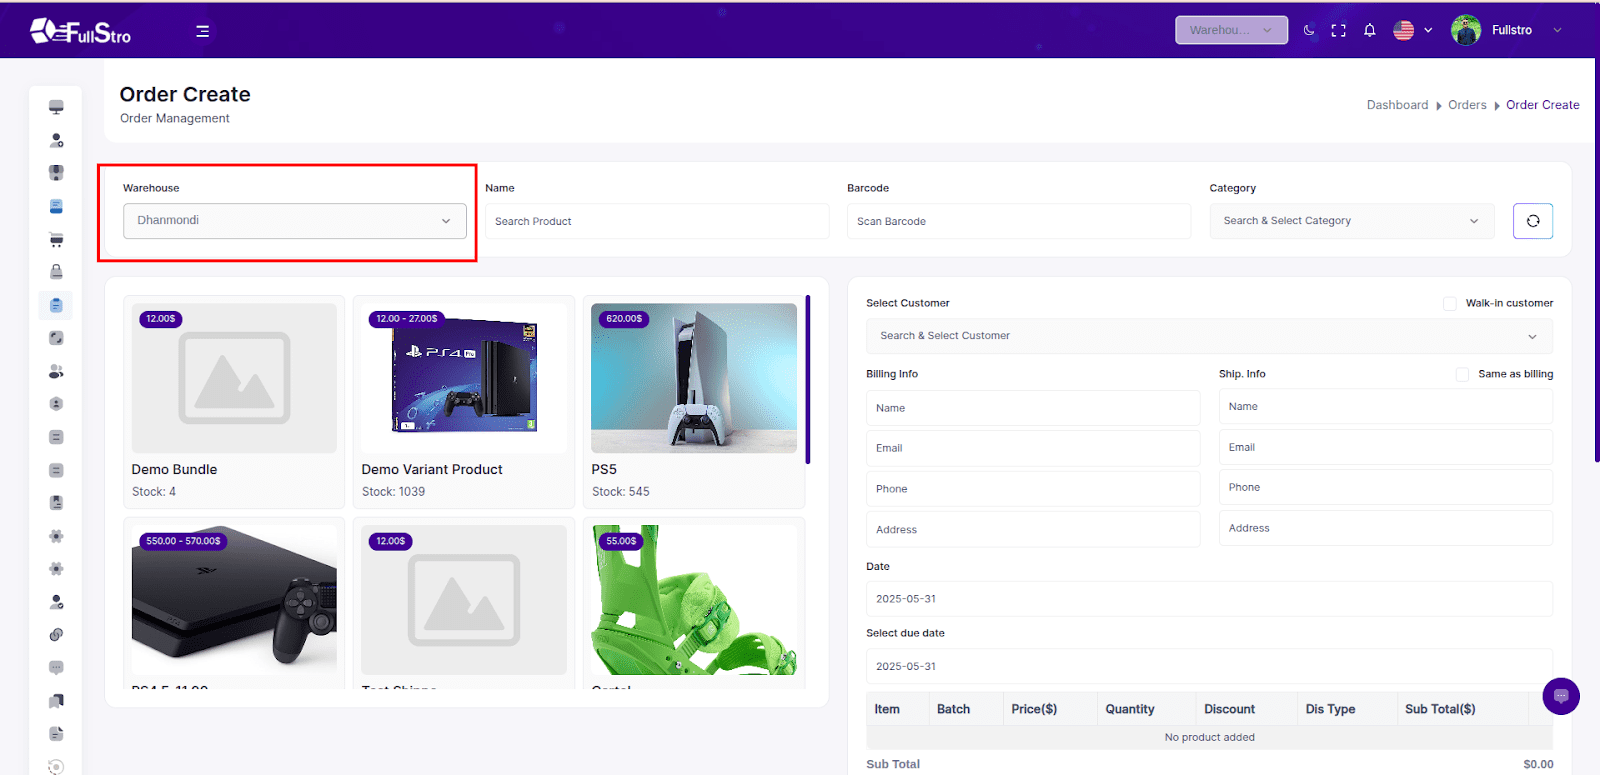
2. Access the POS Page
Open the POS page where sales are managed.
Here, you’ll need to select a warehouse to view all the available products.
Watch this video tutorial for a visual walkthrough of using FullStro’s POS: [POS System Demo – YouTube](https://www.youtube.com/watch?v=wSnKRMGM9Ow)
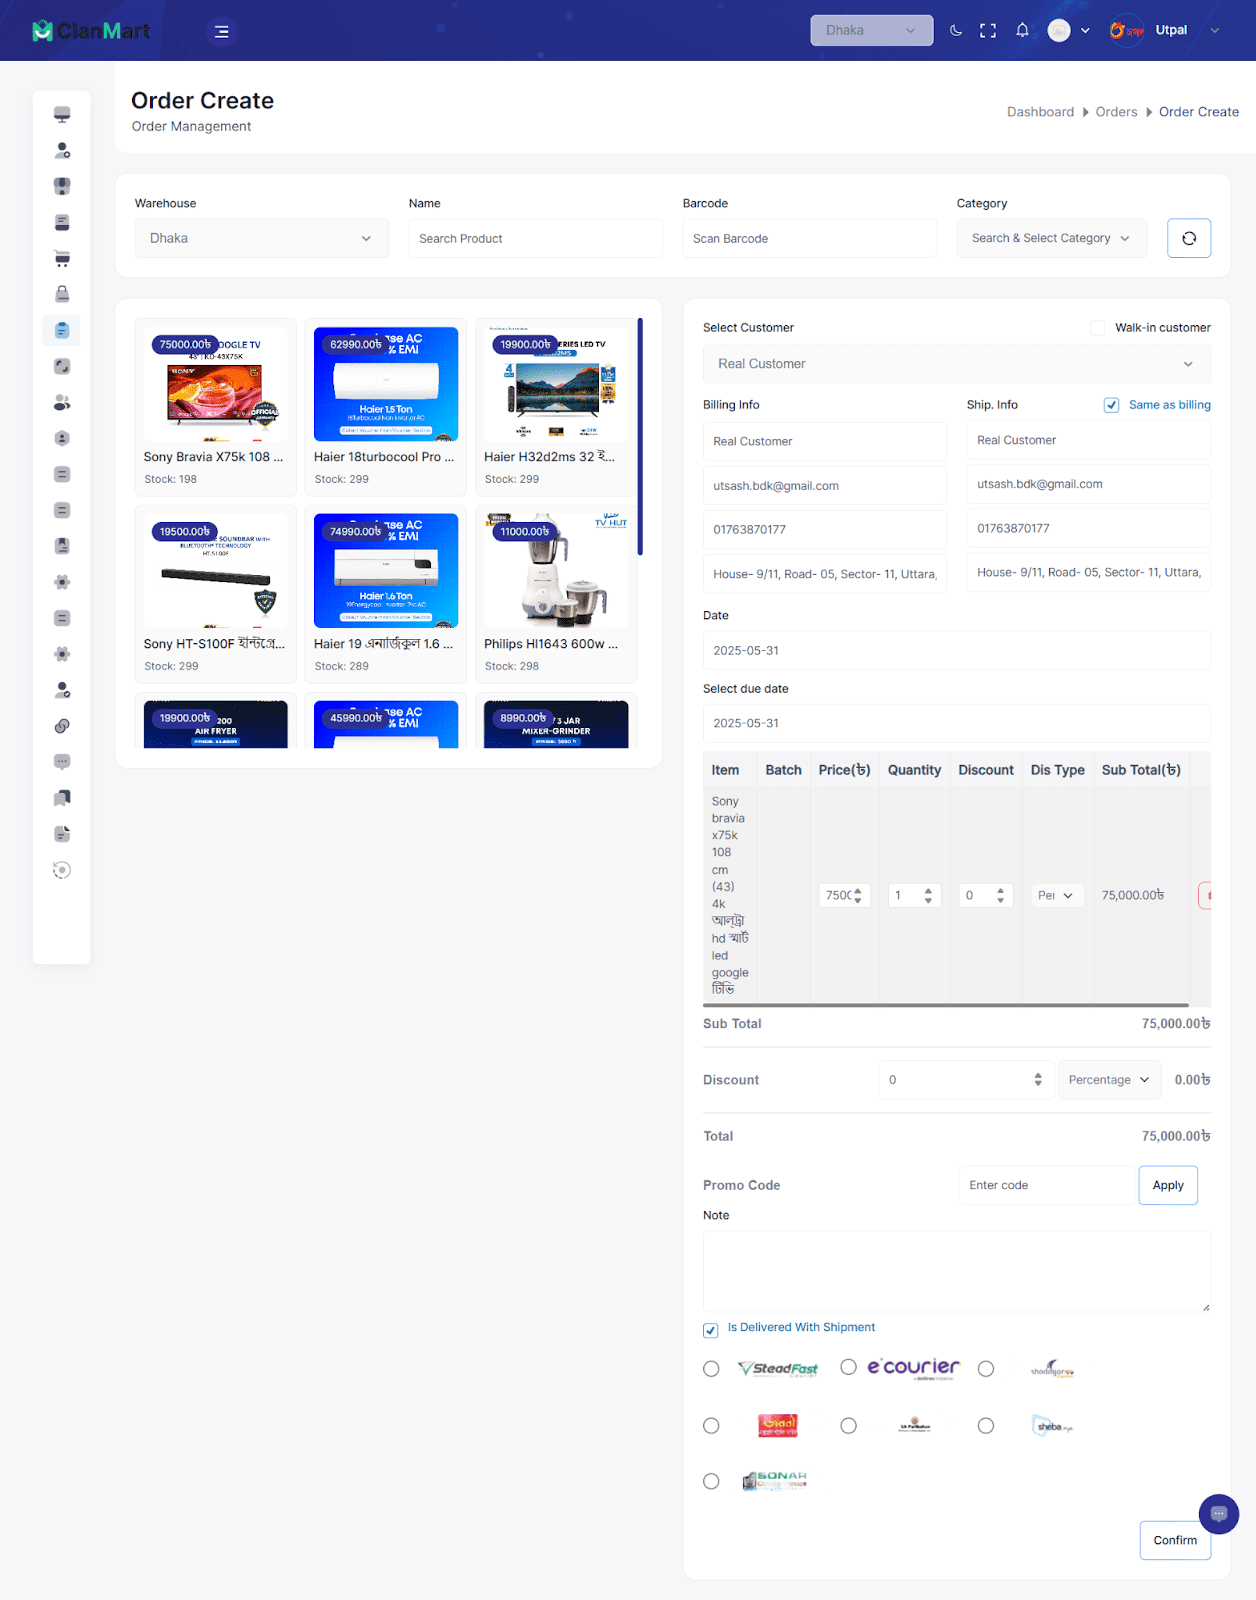
3. Add Products to Cart
After selecting a warehouse:
- Browse and select products from the left panel to add them to the cart
- Choose or enter customer information
- Apply any manual discounts, if applicable
- Provide the payment information (e.g., Cash, Online, Bank).
- If you have connected with shipping channel addons, then you can select the delivery channel from the Delivered With Shipment field
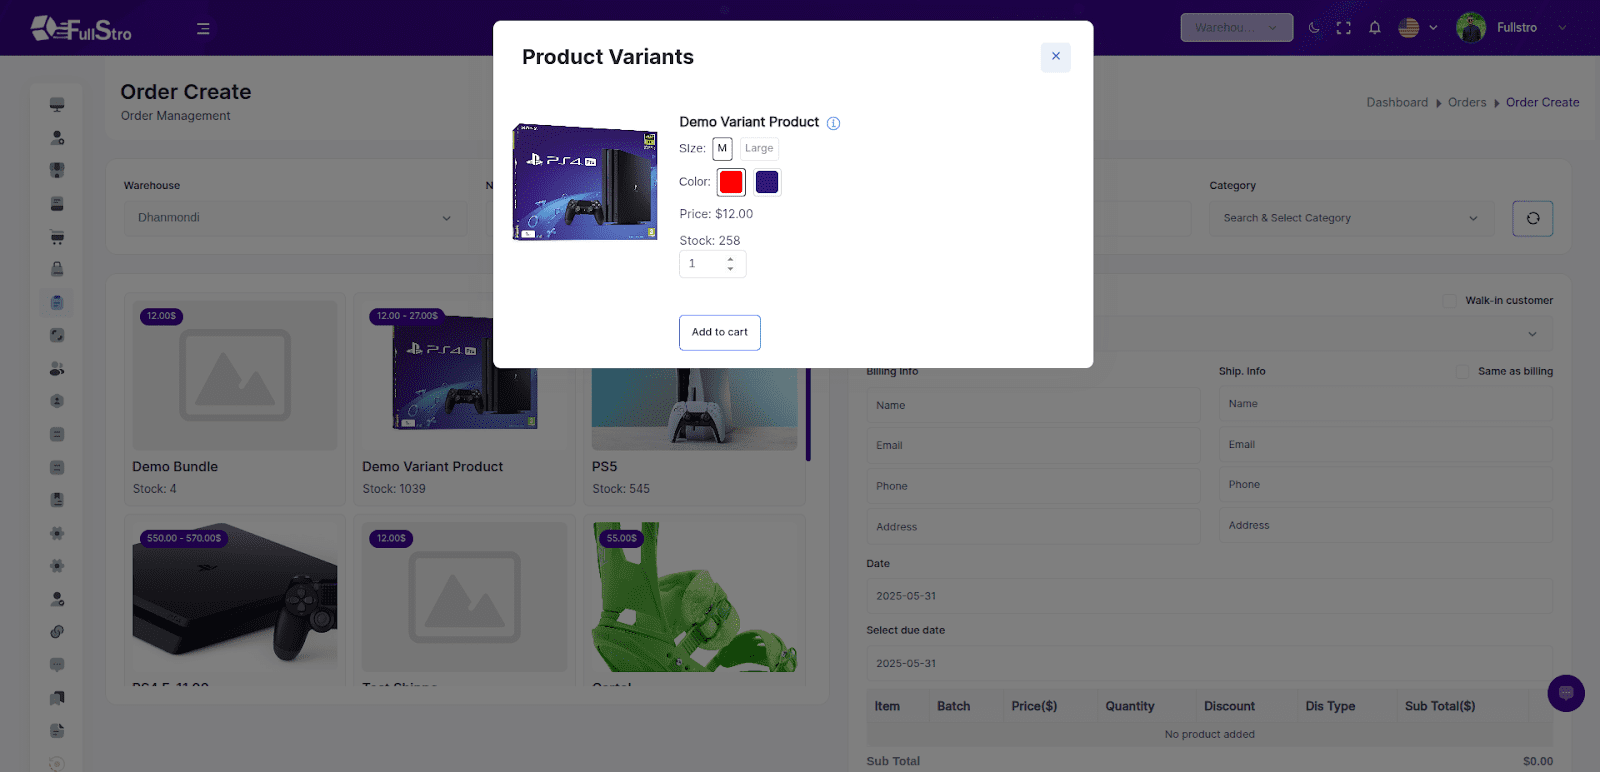
4. Select Product Variants (If Applicable)
If a product has variants (like size, color, etc.),
You’ll be prompted to choose the specific variant before adding it to the cart.
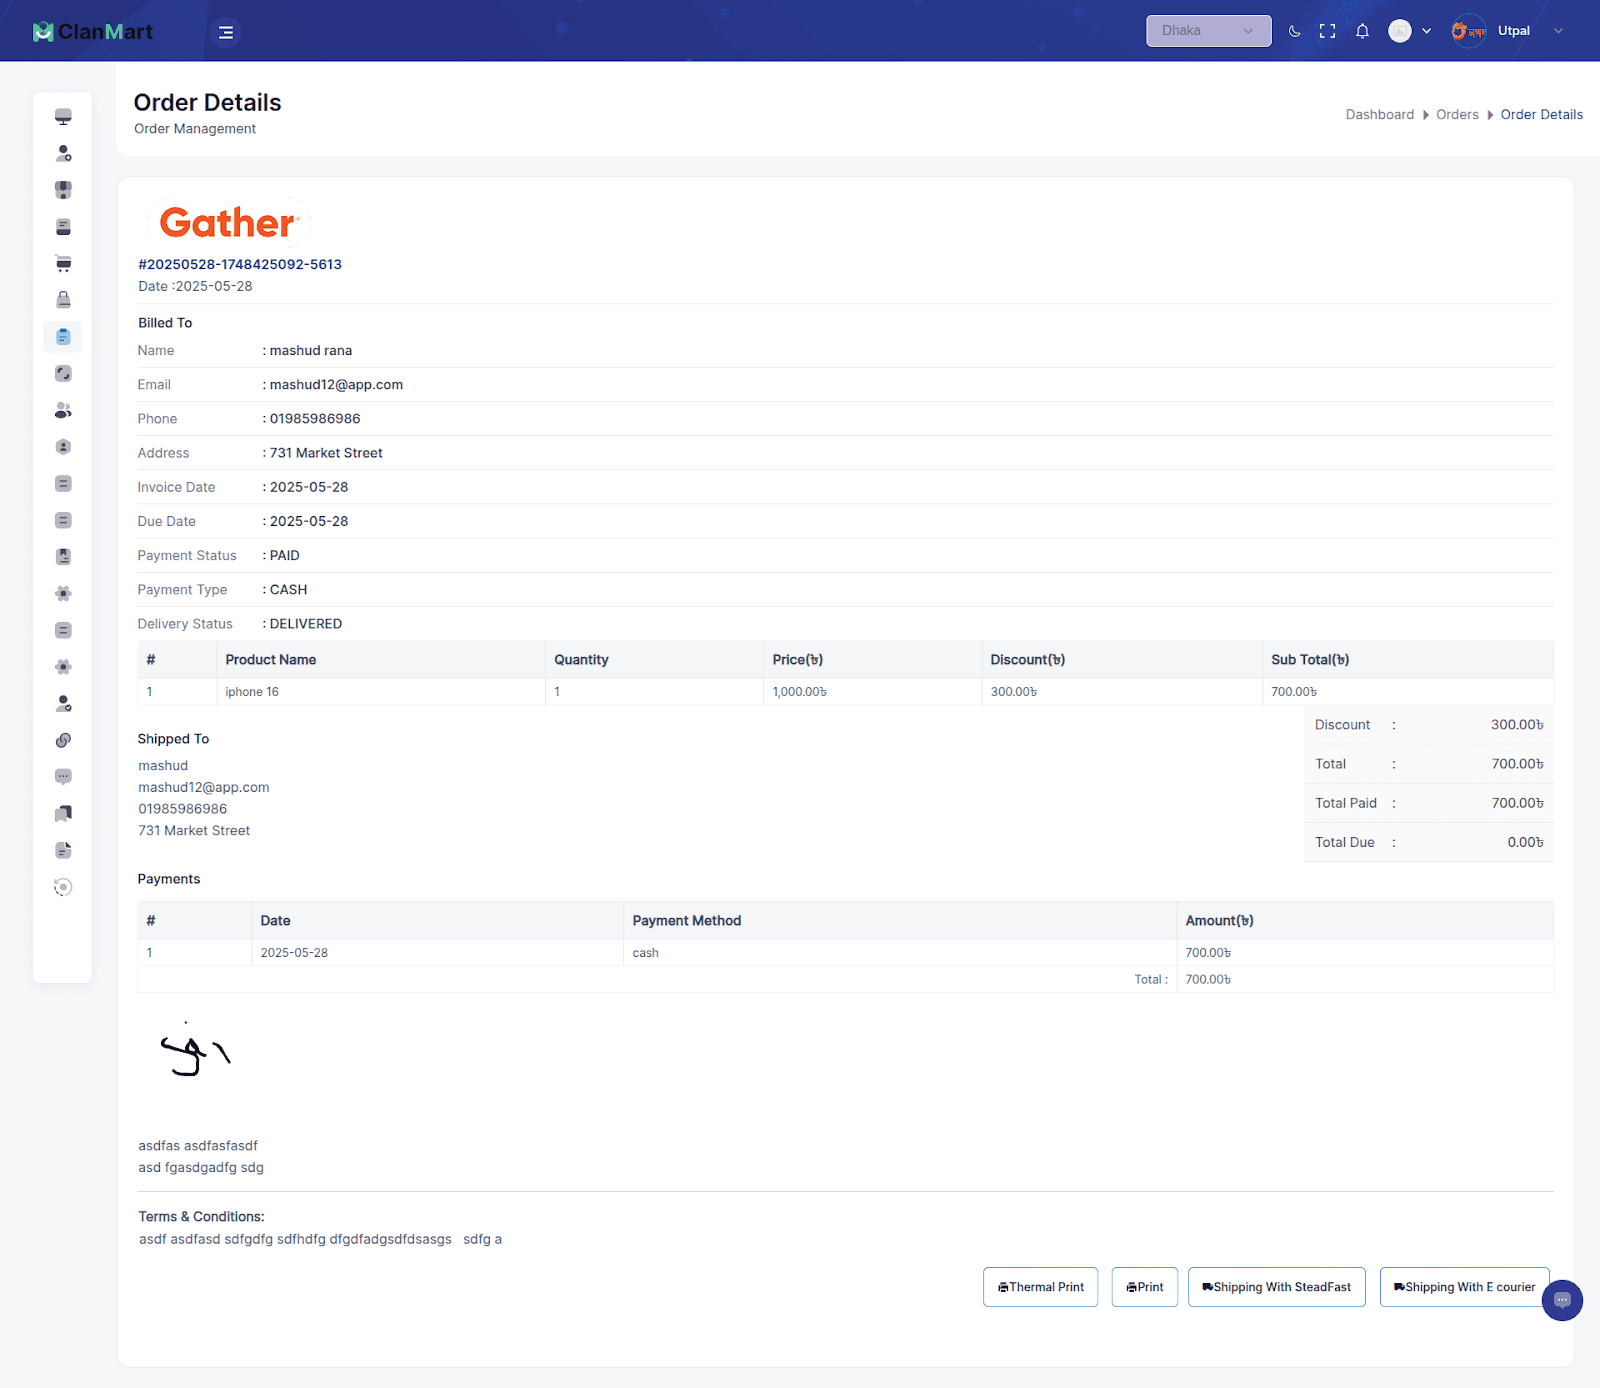
5. Confirm and Generate Invoice
Once all items and details are finalized:
- Click Confirm to complete the sale.
- A new invoice will be automatically created.
- You can view this invoice in the Invoice List section.
- You can print from here.
- You can ship with your shipping channel, and you can track the order if the addons are connected.