Creating a Purchase in FullStro
Before you can sell products through the POS, you must first create a purchase. This ensures accurate inventory tracking and warehouse management.
Step-by-Step Guide:
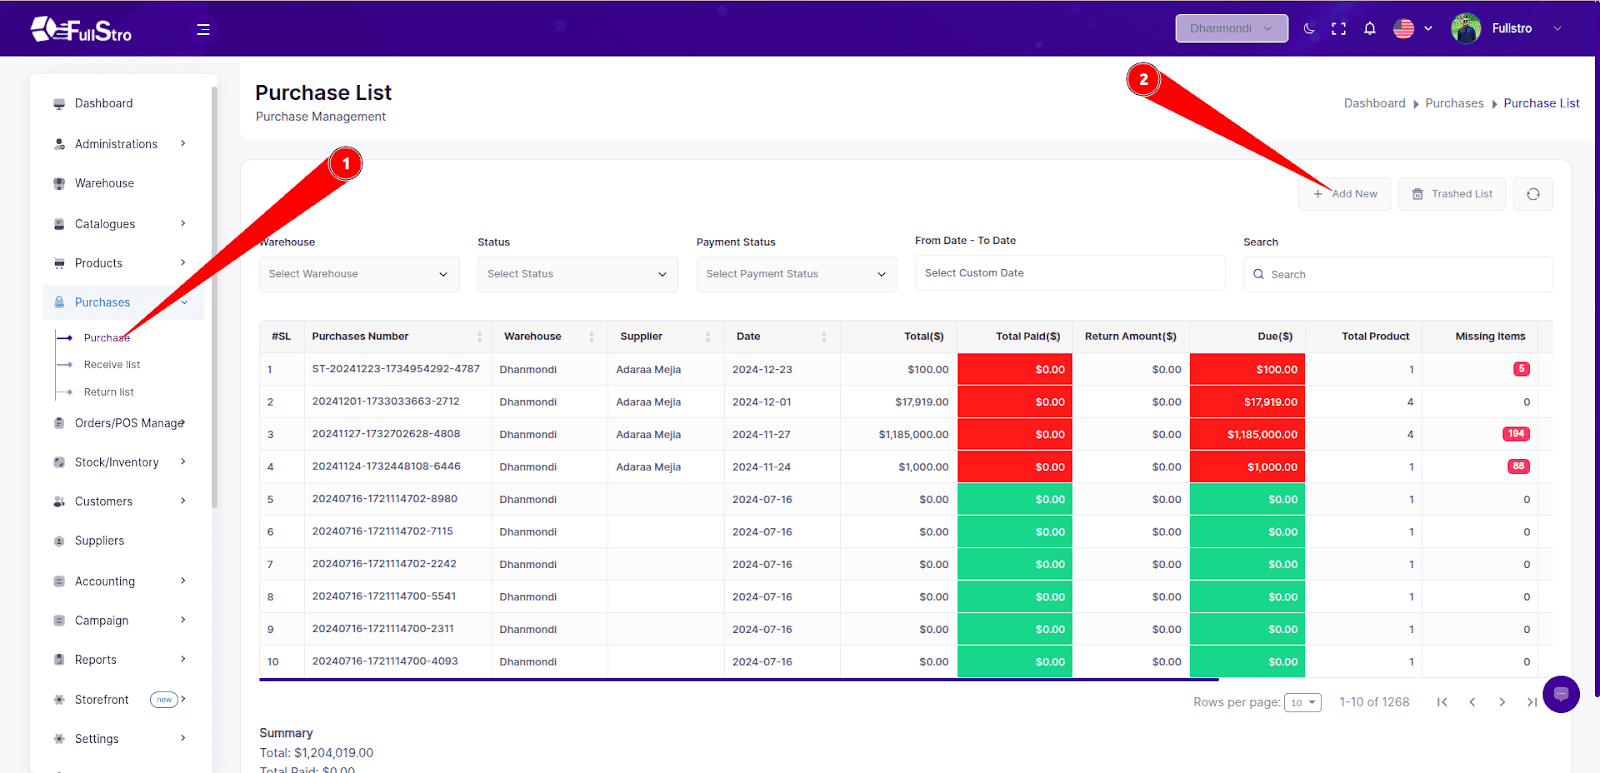
1. Navigate to the Purchase Module
- Log in to your FullStro account. From your FullStro dashboard.
- Go to Purchases > Purchase Integration from the left panel.
Click the “Add New” button to start a new purchase.
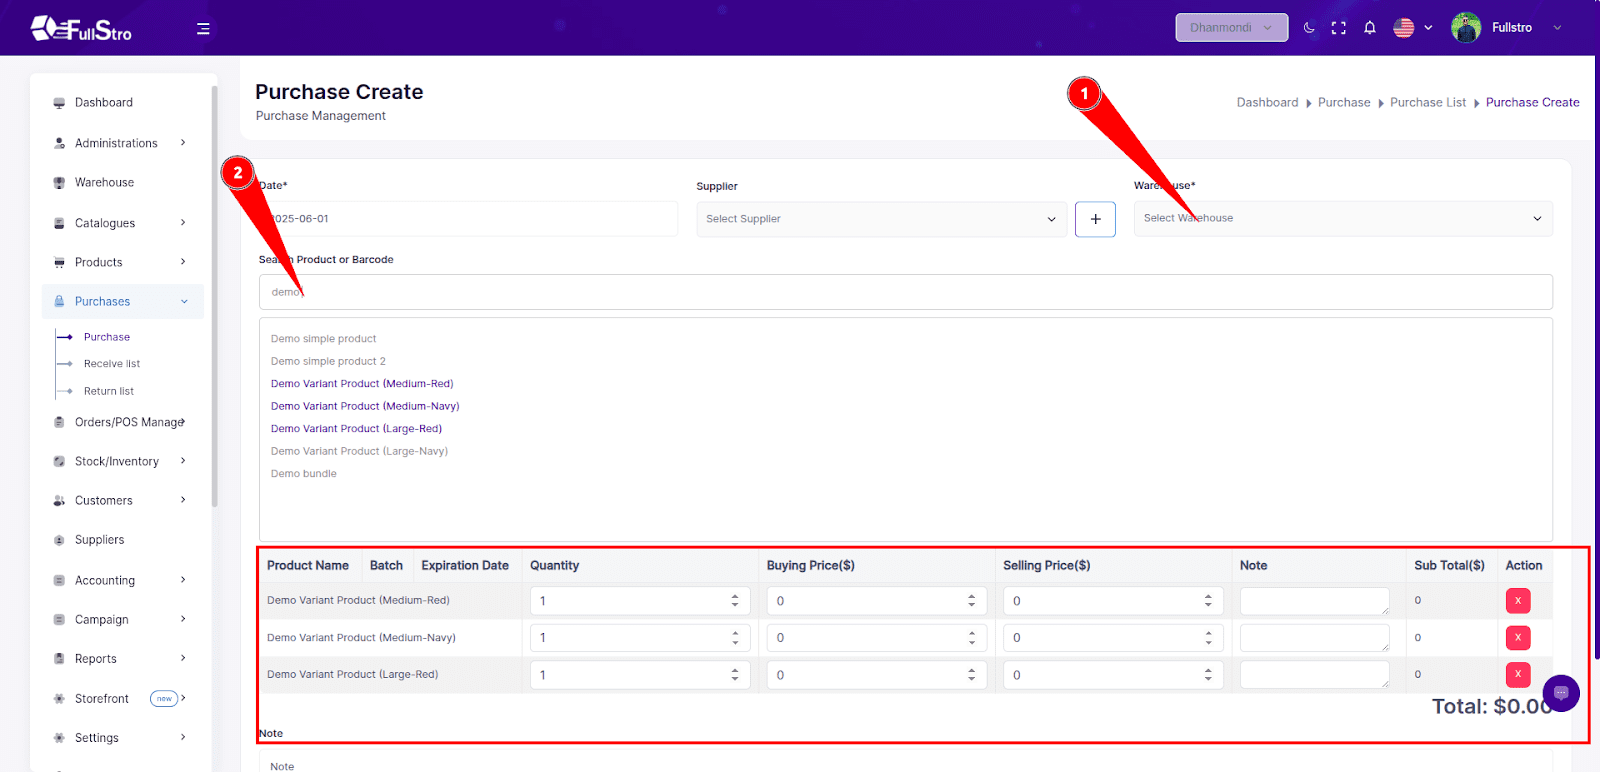
2. Fill Out Purchase Details
- Use the product search bar to find and select the products you’ve previously added via the Product Module.
- Enter the following required information:
- Purchase Date
- Supplier
- Warehouse where the items will be stored
- Quantity
- Buying Price
Selling Price
3. Save the Purchase
- Once you’ve entered the product and purchase details, save the purchase.
Important: At this stage, the products are not yet available for sale in the POS. This is because you’ve only placed the order — the goods haven’t been marked as received.
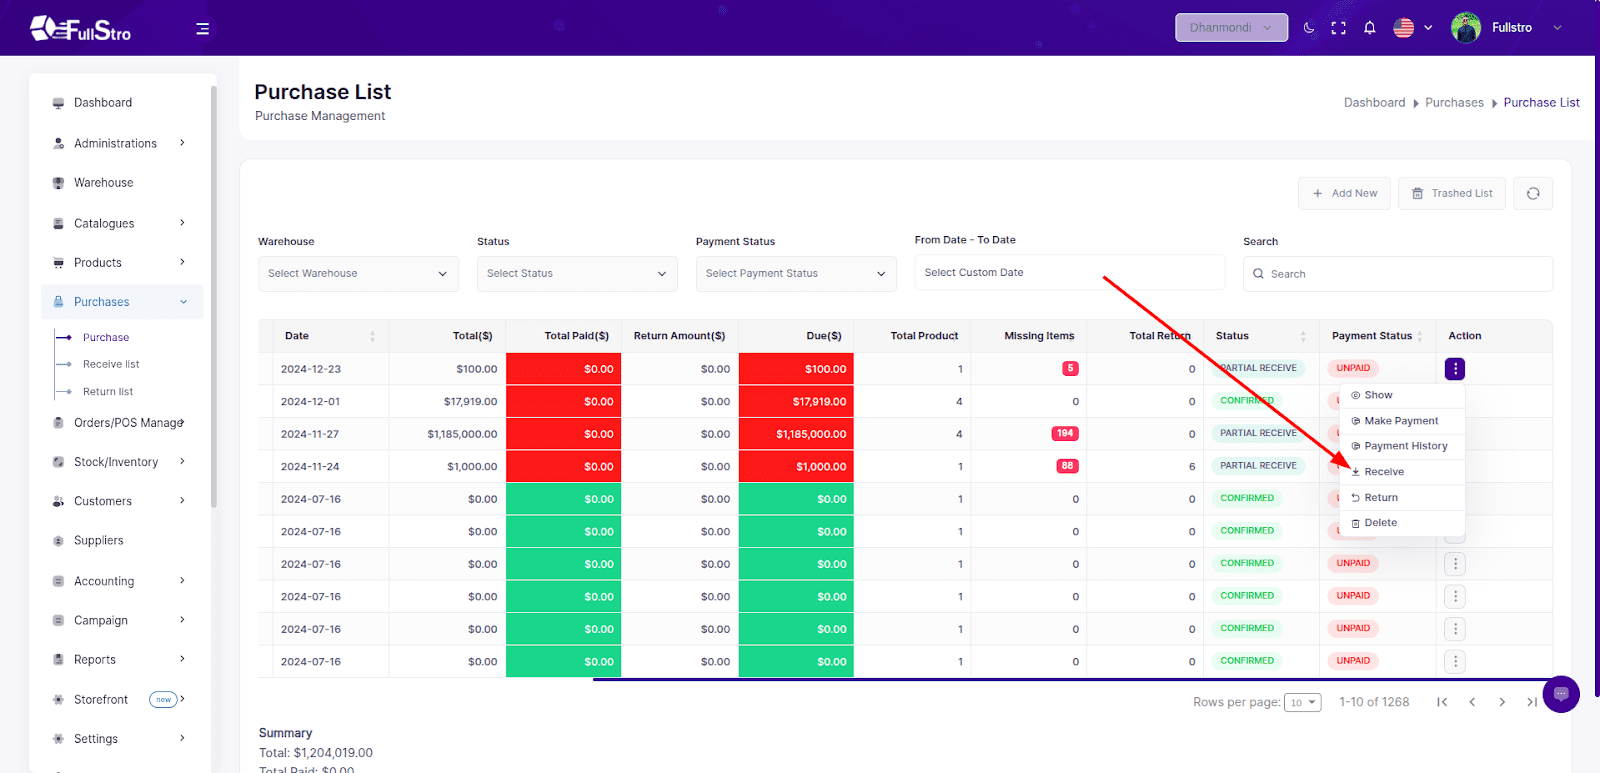
4. Manage Purchase Actions
- From the Action dropdown in the Purchases list, you can:
- Receive Products
- Edit the purchase
Cancel or Delete the purchase
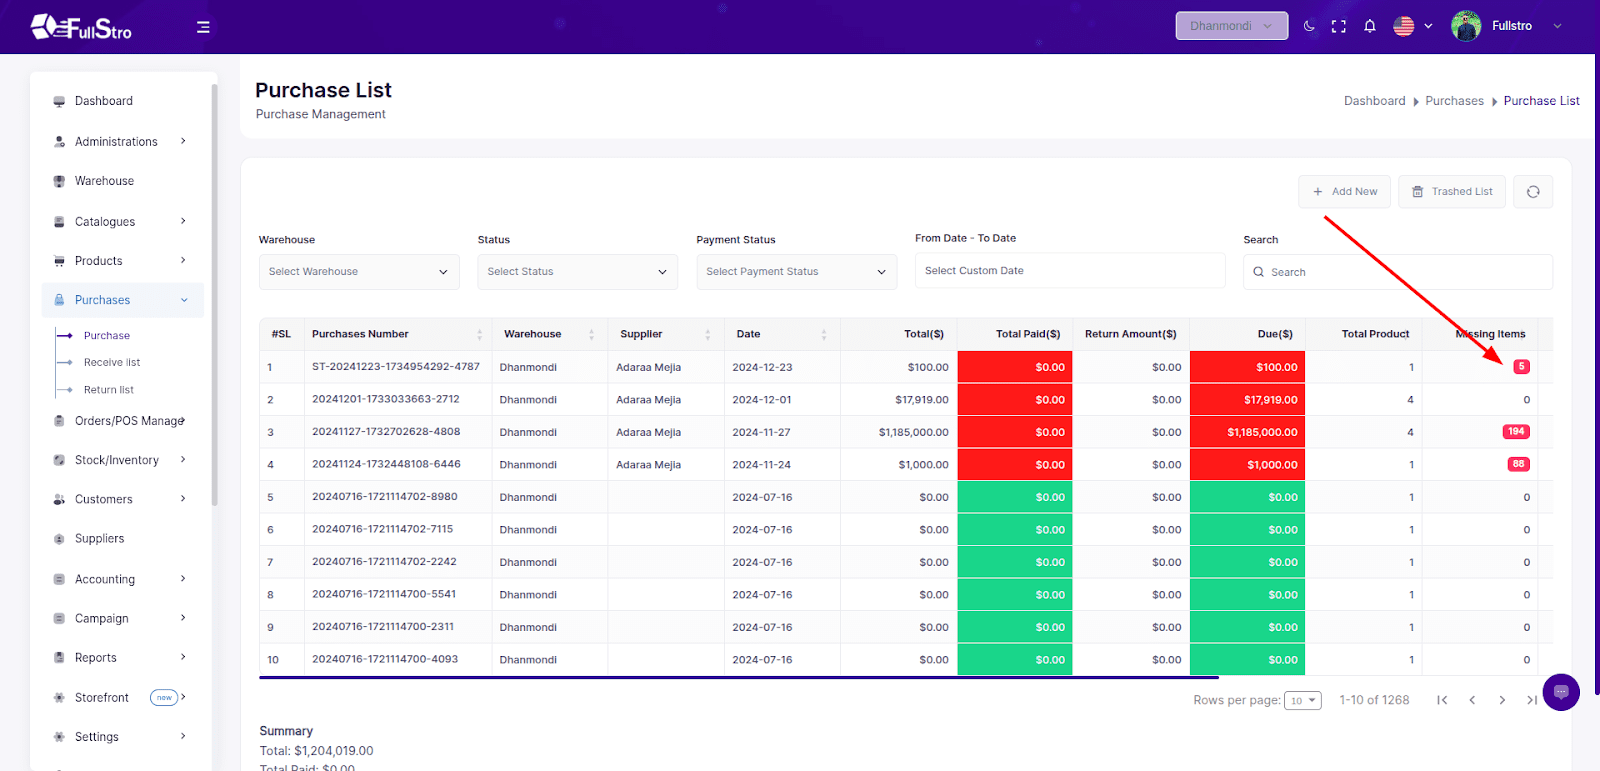
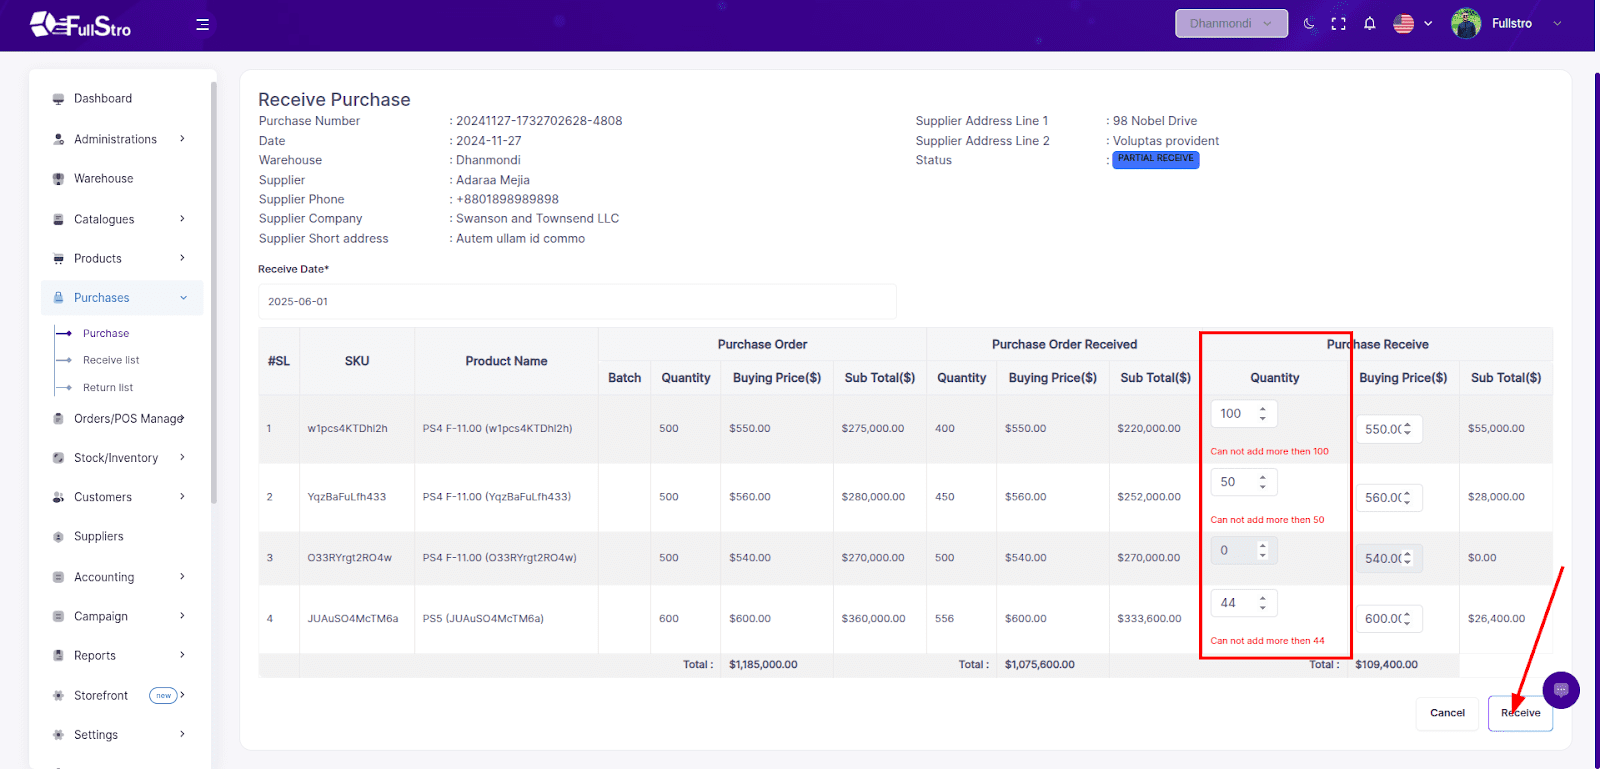
5. Receive the Products
- Click Receive to mark the products as received in your warehouse.
- On the receive page:
- Specify the quantity of each product that has been received.
- You can partially receive items — FullStro will track:
- Fully Received
- Partially Received
- Missing Items
Once complete, press “Receive” to finalize the reception.
Video Tutorials
Watch and Learn for hands-on guidance:
- FullStro Purchase Management Tutorial: Streamline Your Purchases Easily!
Watch now
- Guide for FullStro’s Purchase Receive List: Track, Update & Optimize!
Watch now
- Know Everything about The Purchase Return List for Seamless Inventory Management
Watch now
Now You Can Sell!
Once products are received, they become available in the POS for selling.
This ensures your stock levels remain accurate and prevents selling items that haven’t been physically received yet.


