Adding Products in FullStro
Fullstro’s Product Management module enables efficient organization and monitoring of products, brands, and manufacturers. This tutorial covers key functionalities, including listing products, creating new entries, editing, deleting, managing barcodes, and tracking low-stock products.
Step-by-Step Guide:
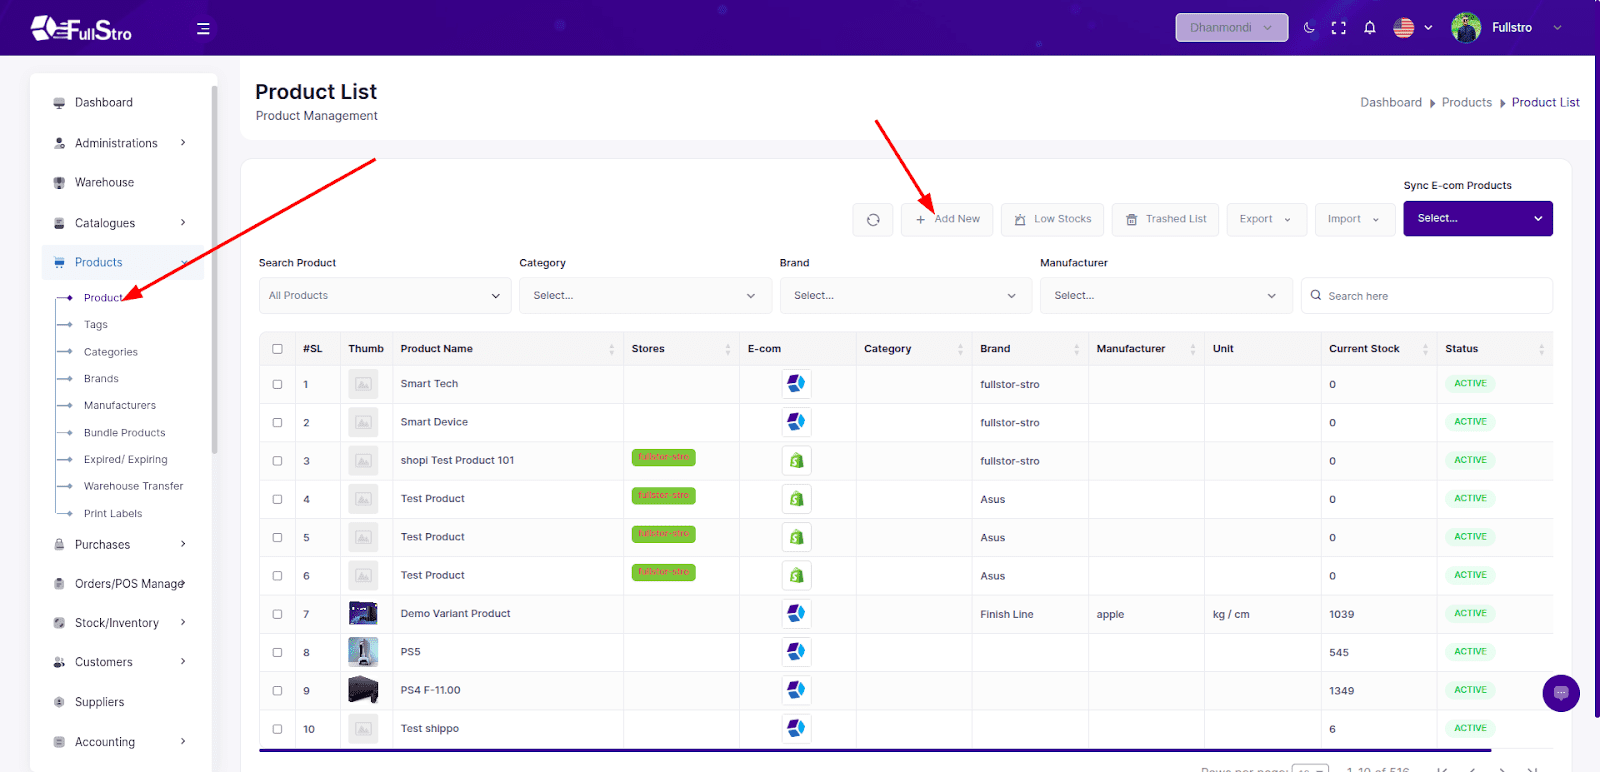
Navigate to the Purchase Module
- Log in to your FullStro account. From your FullStro dashboard.
- Go to Products > Product Integration from the left panel.
- Click the “Add New” button to start a new product.
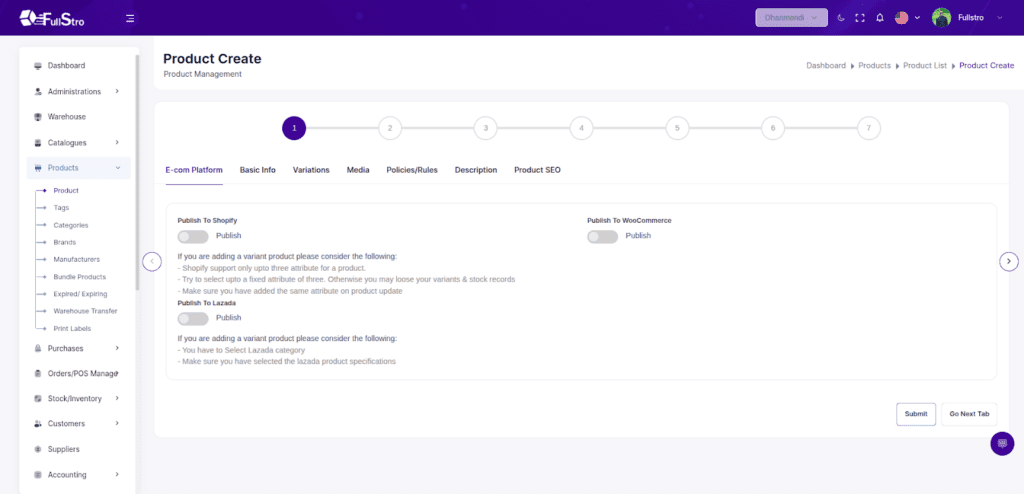
Step 1: E-Com Platform (Optional)
If you’ve purchased the eCommerce Addon, you’ll see an E-com Platform tab.
- Enable product sync with third-party platforms like Shopify, WooCommerce, Lazada, eBay, Amazon, etc.
This step is only applicable if the addon is installed.
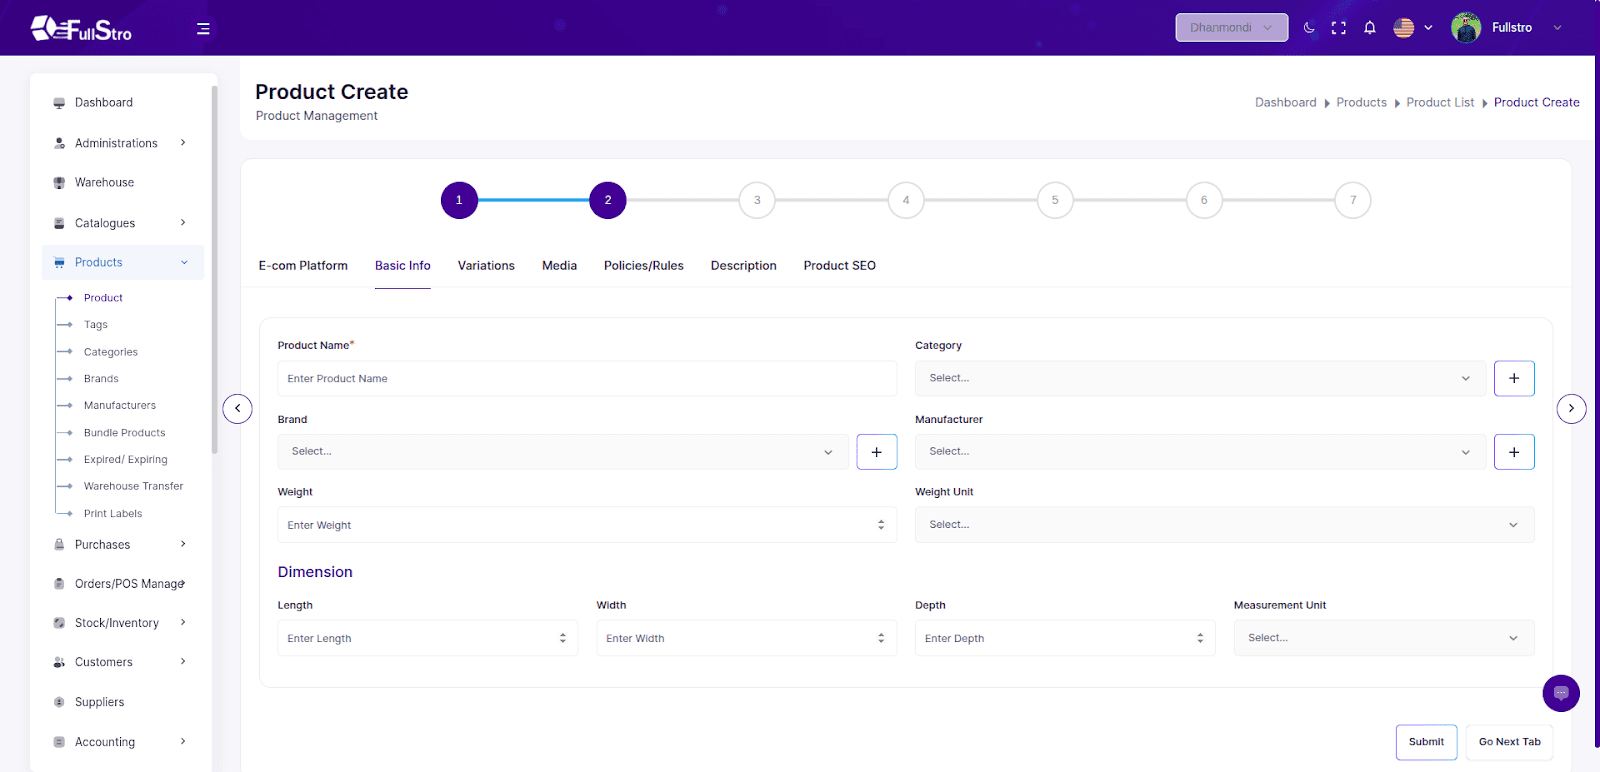
Step 2: Basic Info
- Go to Product Module > Add New.
- Under the Basic Info tab, fill in:
- Product Name
- Category
- Brand
- Weight
- Dimensions
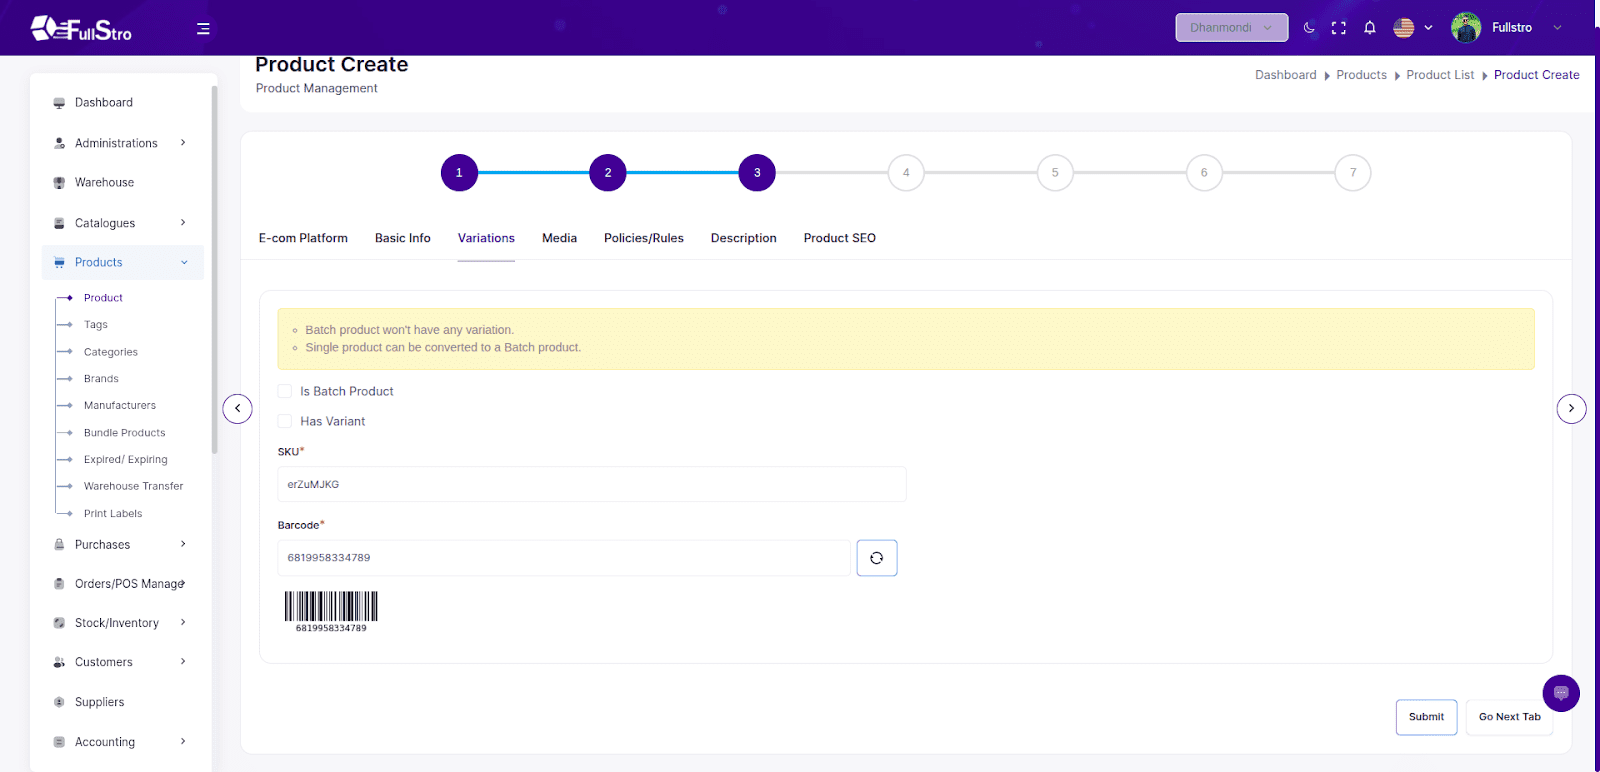
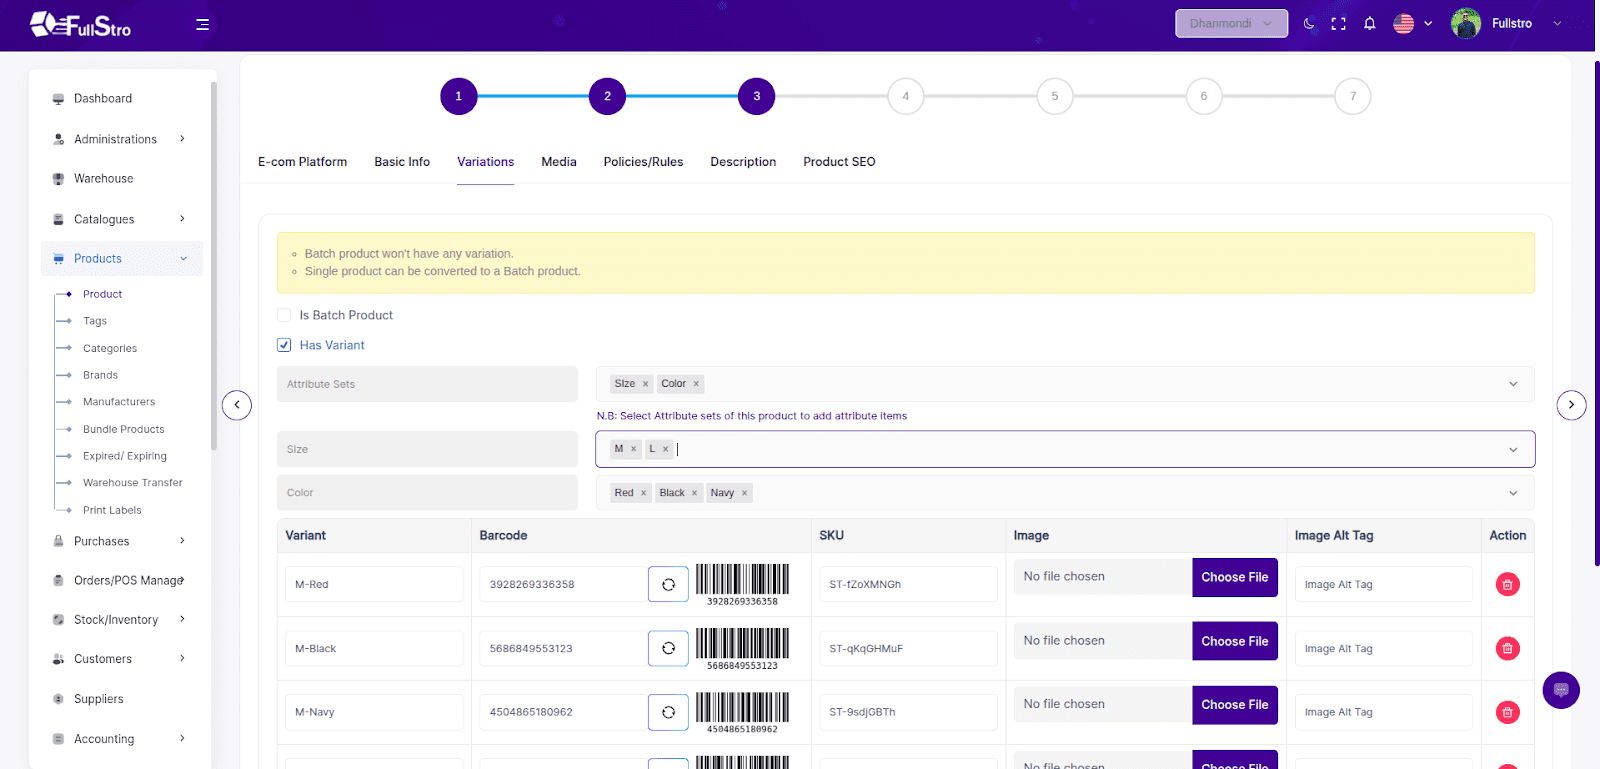
Step 3: Variations / Batch
- Go to the Variations tab.
- Edit:
- For variant products, enable the variant toggle and select:
- Attributes (e.g., Color, Size)
- Attribute Items (e.g., Red, Blue, S, M, L)
- For batch product, just enable the Is Batch Product checkbox
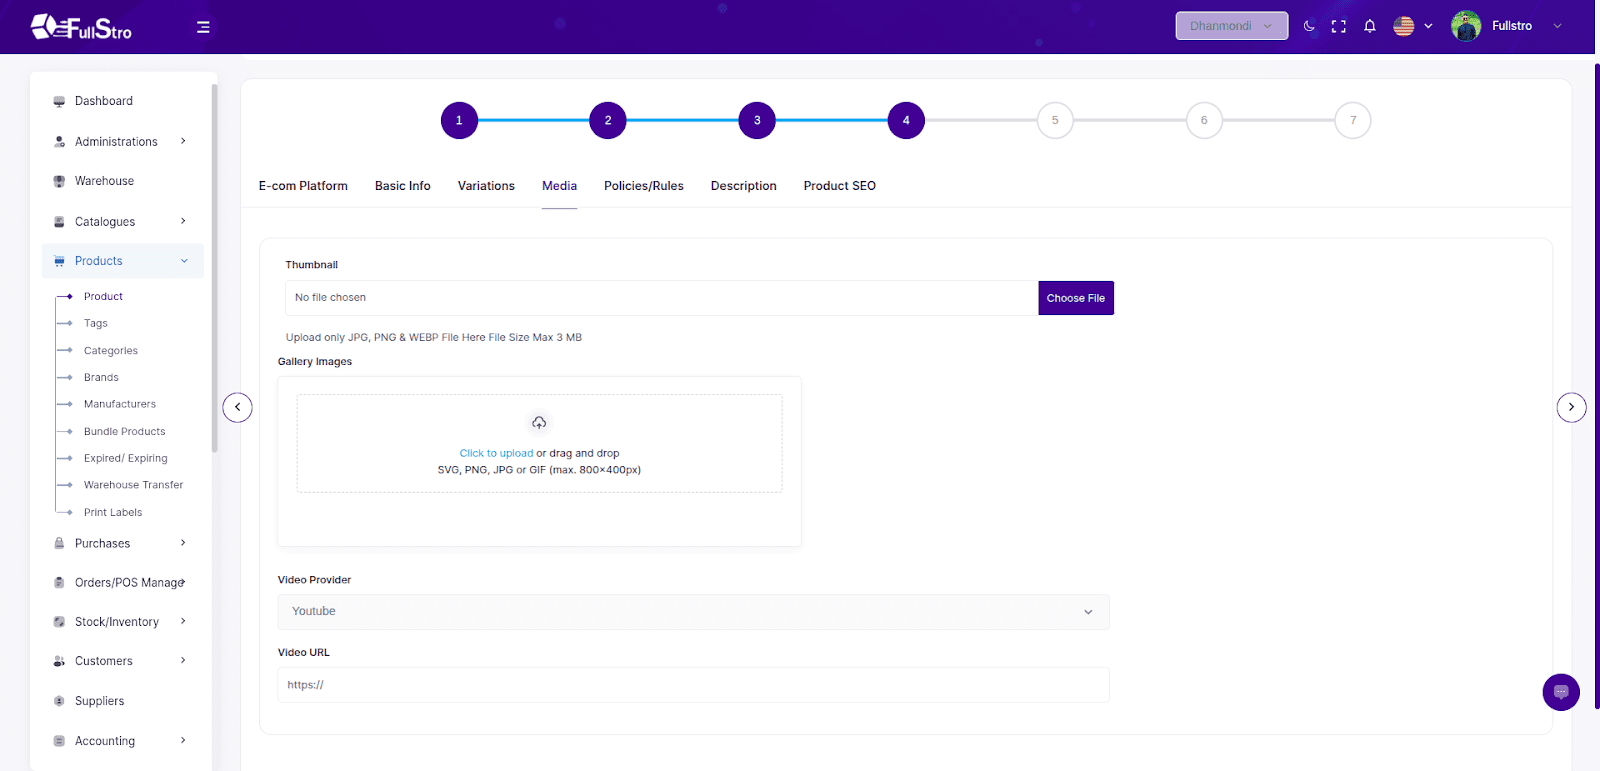
Step 4: Media
Upload product photos and videos in the Media tab.
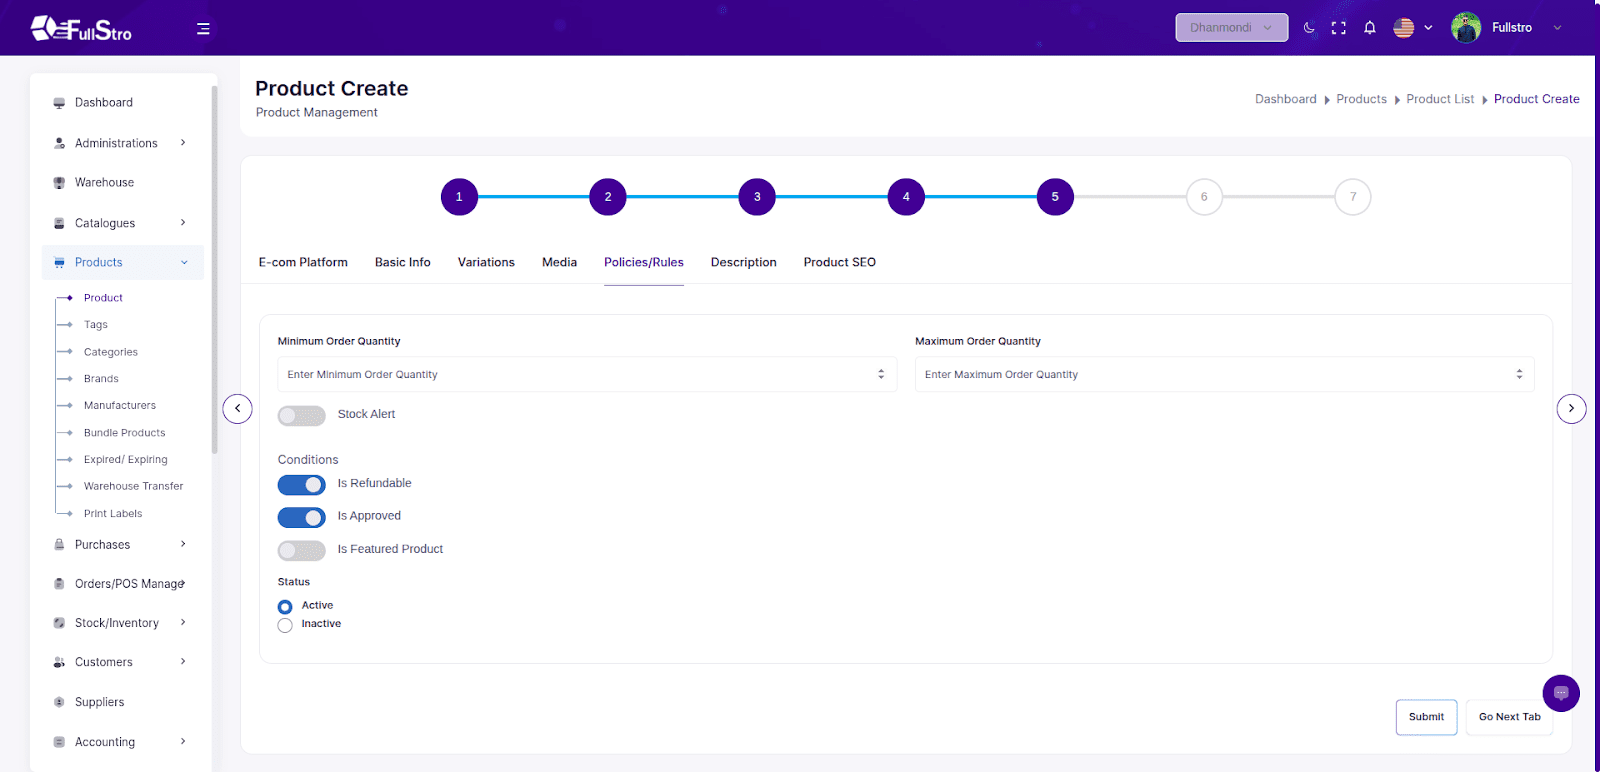
Step 5: Policies / Rules
- Set the following in this tab:
- Minimum & Maximum Order Quantity
- Stock Alert Settings
- Refundable or Not
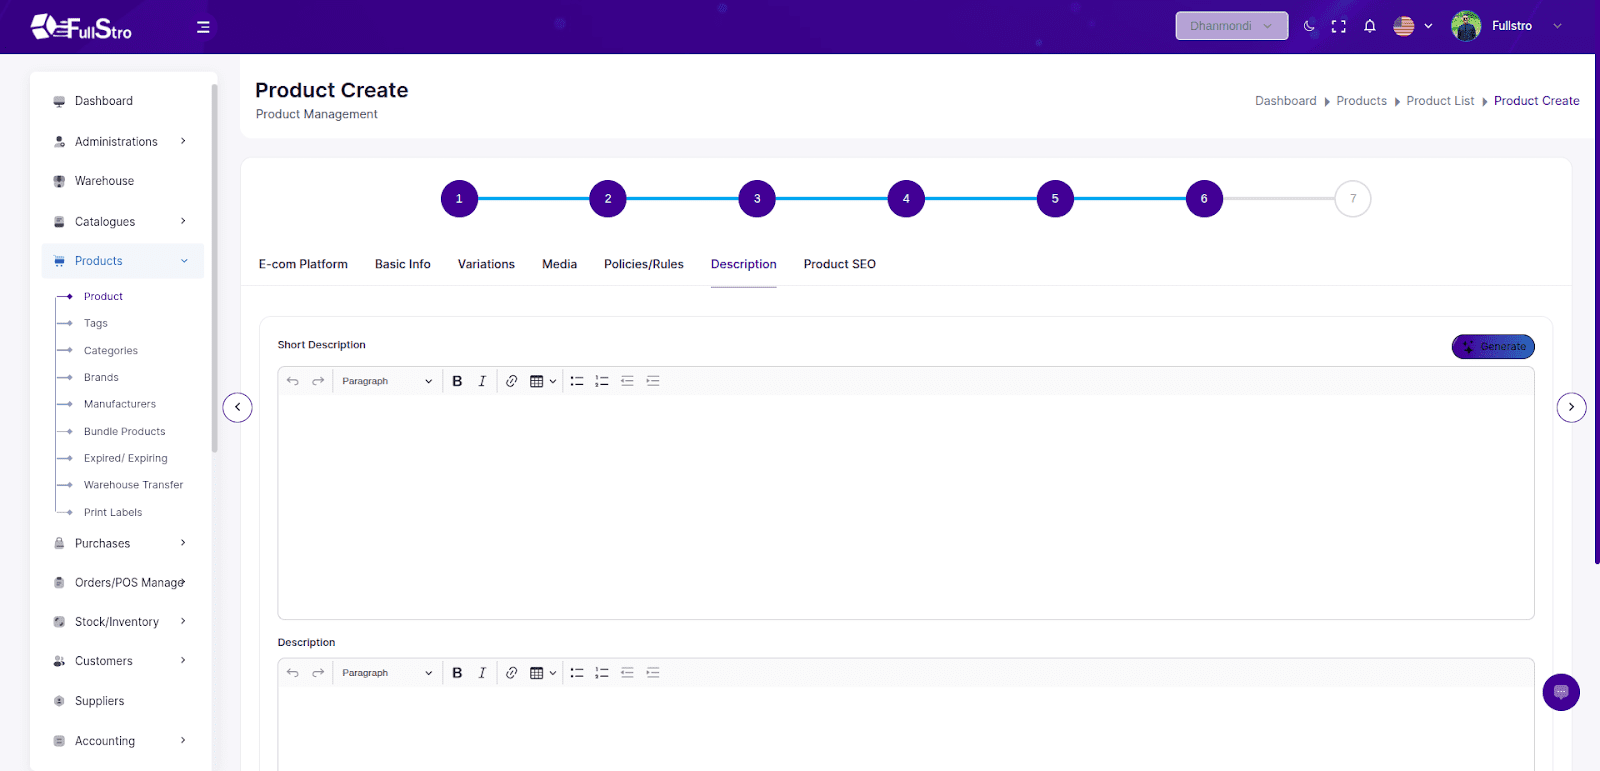
Step 6: Description
Full Description
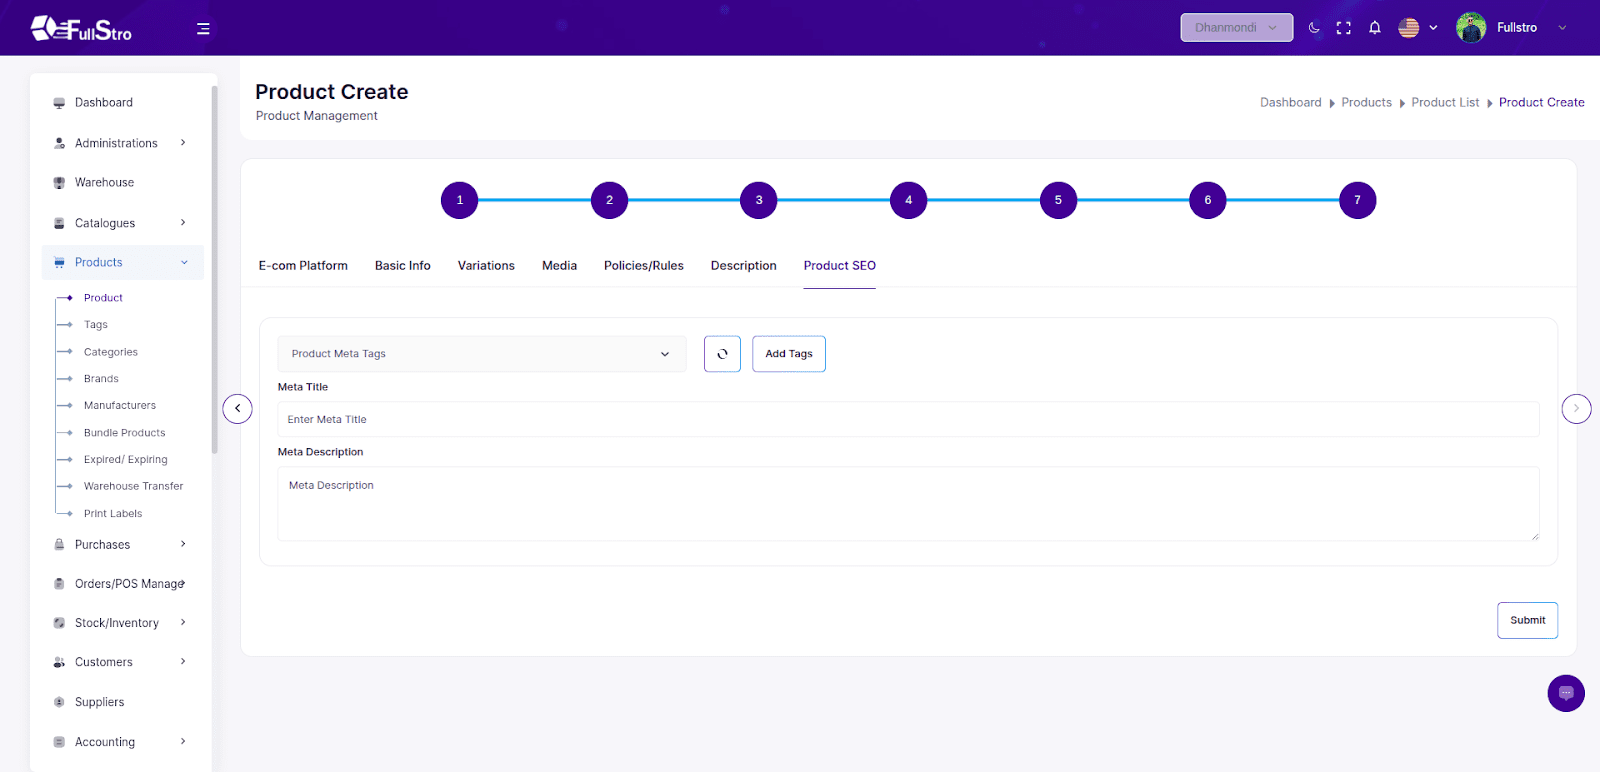
Step 7: Product SEO
Boost your product’s visibility by entering SEO metadata:
- Meta Title
- Meta Tags
- Meta Description
Video Tutorial
Master FullStro Product Management: Easy Guide to Organize, Track & Manage Products
Watch Now on YouTube
Your product is now added and ready for purchasing, inventory management, and POS selling.


