Sell Online Instantly with a Built-in Storefront
The Storefront feature in FullStro empowers you to launch a fully functional online store directly linked to your FullStro account. No third-party platforms are needed—just choose a template, customize it, and begin selling with real-time inventory and order syncing.
How to Set Up Your Storefront
Follow these simple steps to enable and customize your online storefront:
Step 1: Log in to Your FullStro Account
- Go to the left sidebar and navigate to:
Storefront > Storefront
- You’ll be directed to the Storefront Settings page.
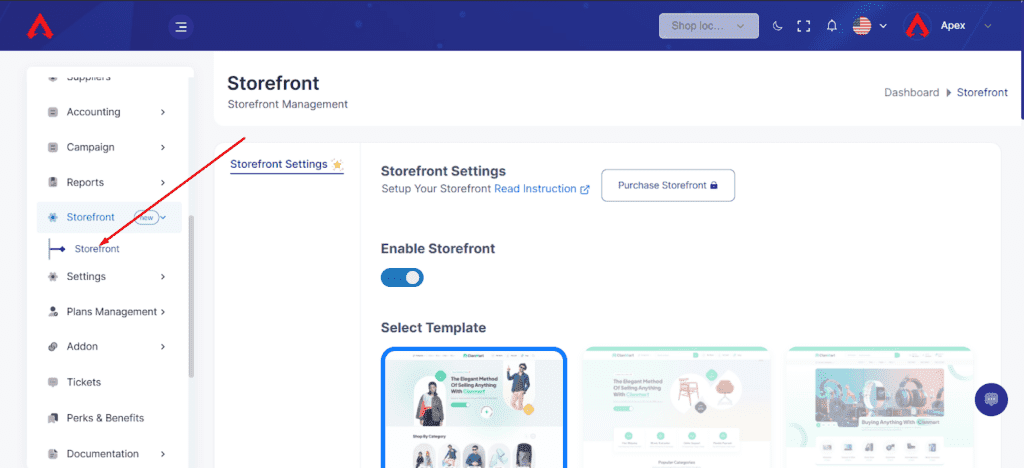
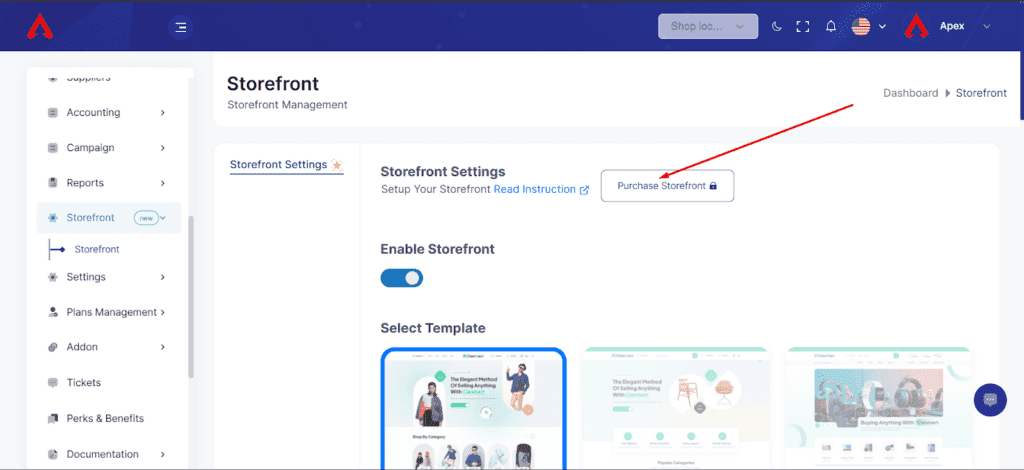
Step 2: Purchase Storefront Addon
- Click on the “Purchase Storefront” button.
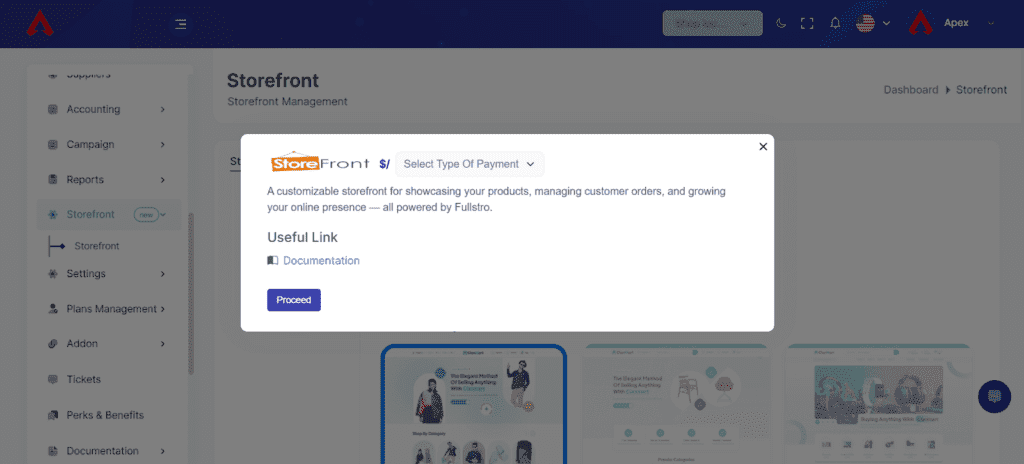
- A pop-up will appear prompting you to enter your payment details.
Step 3: Complete Payment
- Select your Payment Type (e.g., Card, Bank, Wallet).
- Click “Proceed” to complete the transaction.
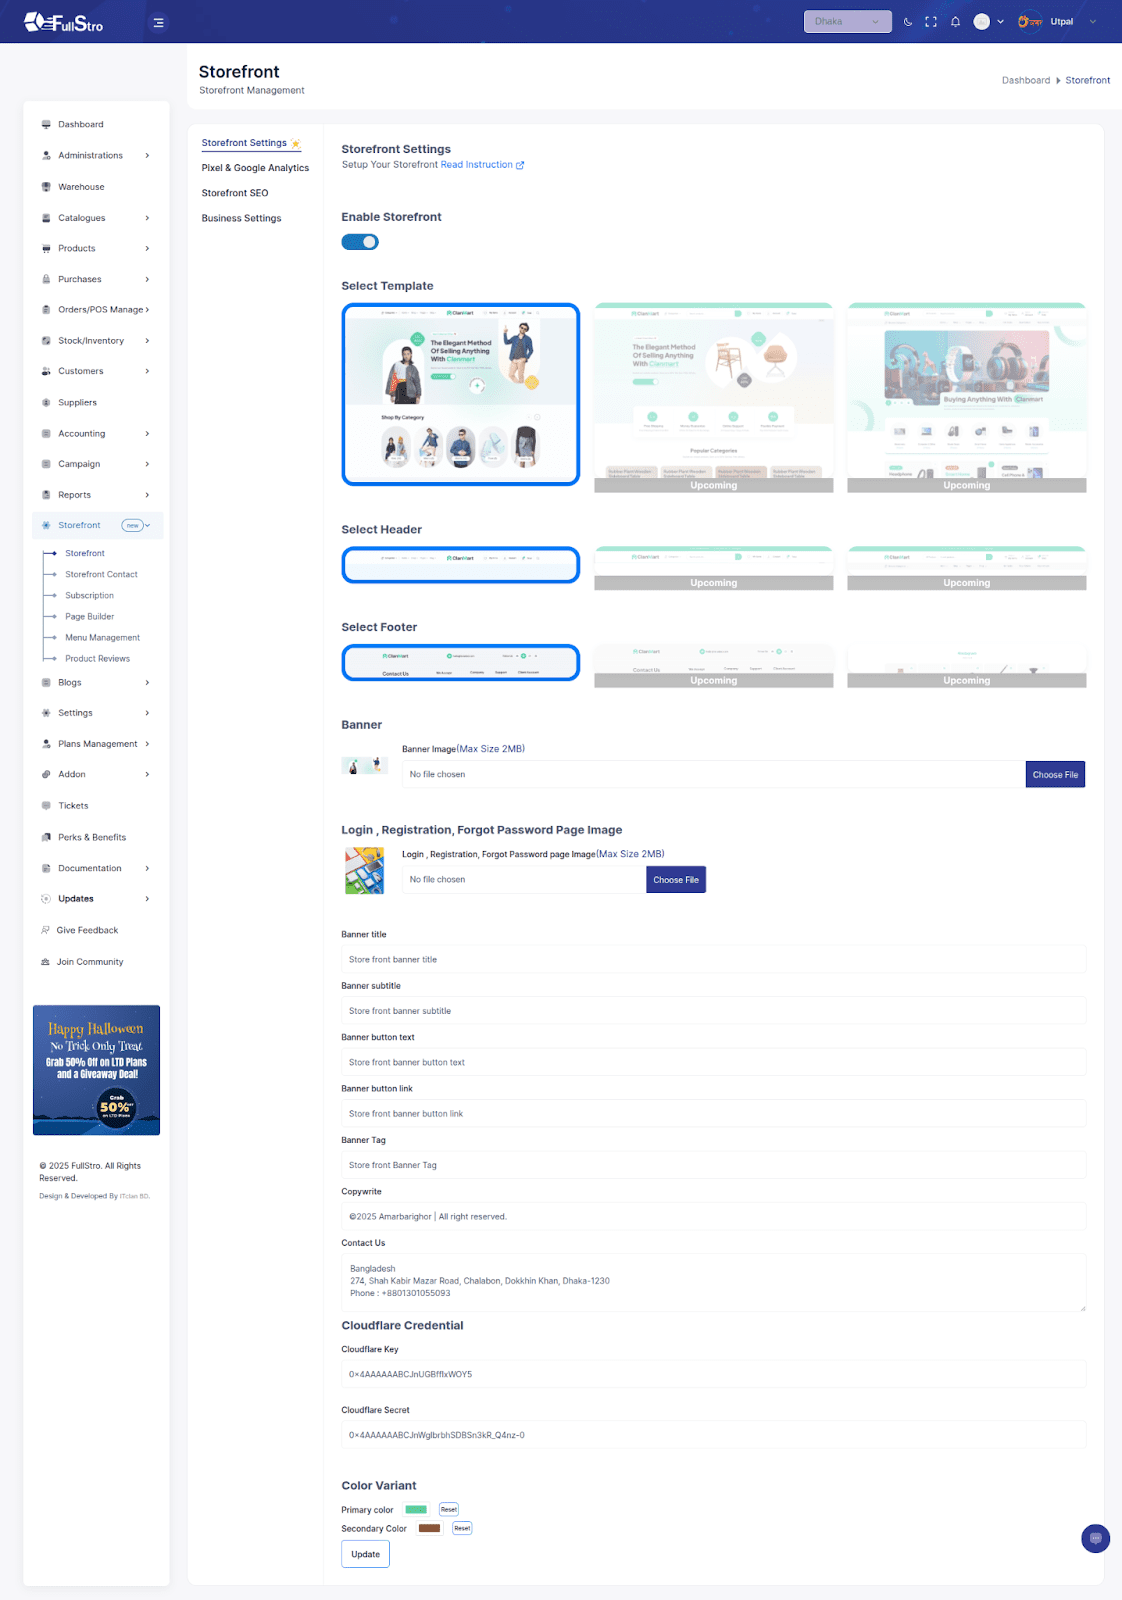
Step 4: Customize Your Storefront
Now that your Storefront is active, it’s time to make it truly yours. Bring your brand to life with custom visuals, sleek layouts, and powerful personalization options—all directly from your FullStro dashboard.
Choose Your Layout
Start by selecting a modern layout template that suits your brand vibe. Whether you’re going for minimal, bold, or elegant, FullStro has you covered.
Pick a Color Scheme
Match your brand identity with a custom color palette. From button colors to backgrounds, every shade matters. Choose what feels like you.
Add Your Brand Elements
Upload your Logo and Favicon to build brand recognition. These tiny details pack a punch in making your storefront feel authentic and professional.
Design Your Homepage Banner
Create a bold first impression with a dynamic banner image. Add:
- Banner Title – Capture attention with a headline.
- Banner Subtitle – Add a short tagline or supporting message.
- Banner Button Text – Drive action with a CTA.
- Banner Button Link – Point users to products, categories, or any custom page.
- Banner Tag – Highlight “New”, “Sale”, “Featured”, or your own tag.
Customize Other Page Visuals
Make your Login, Register, and Forgot Password pages stand out with eye-catching page-specific images.
Contact & Footer Info
Add your:
- Contact Information to make support easy.
- Copyright Text to mark your store’s ownership and professionalism.
Cloudflare Integration (Advanced Users)
Enhance your storefront’s speed and security. Enter your:
- Cloudflare Key
- Cloudflare Secret
This ensures your store loads fast and is better protected.
Publish Your Dream Store
Once everything looks perfect, hit Save & Publish.
Your beautifully branded storefront is now live and ready to sell.
Step 5: Analytics, SEO & Business Settings
Once your storefront visuals are dialed in, let’s plug in the powerful tools that elevate your store’s performance: analytics, SEO, business identity, and social engagement.
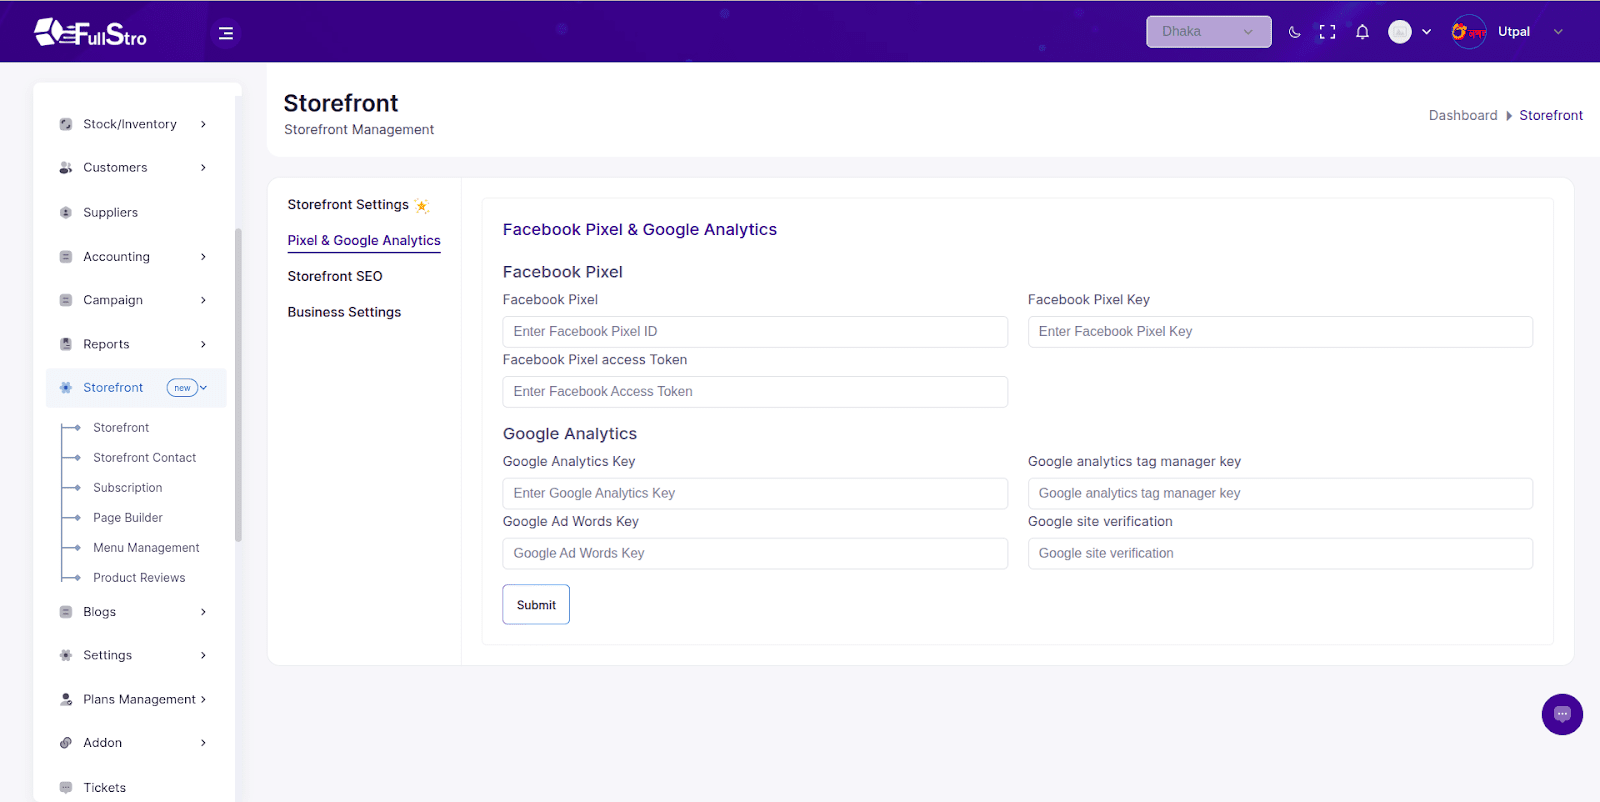
Facebook Pixel & Google Analytics Integration
Track conversions, monitor customer behavior, and power your retargeting campaigns with essential tracking tools:
Go to the left sidebar and navigate to:
Storefront > Storefront > Pixel & Google Analytics
Facebook Pixel
- Facebook Pixel Key – Add your unique pixel ID to track actions and conversions.
- Facebook Pixel Access Token – Ensure secure and authorized tracking.
Google Analytics & More
- Google Analytics Key – Integrate your site with GA for deep performance tracking.
- Google Analytics Tag Manager Key – For those using Google Tag Manager setups.
- Google AdWords Key – Track conversions from your Google Ads campaigns.
- Google Site Verification – Verify your site for indexing and tracking.
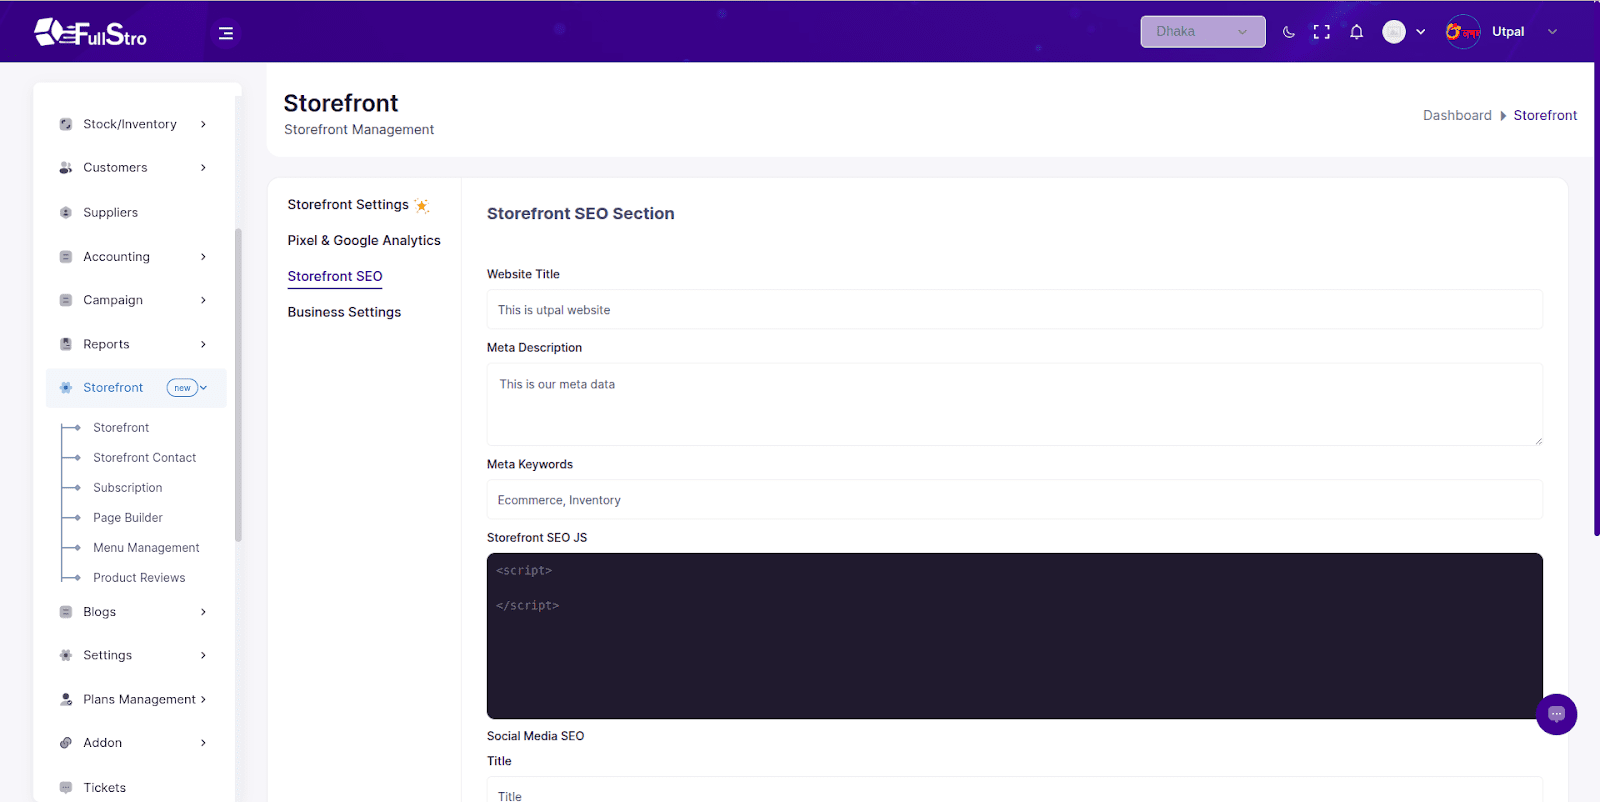
Storefront SEO Section
Improve your search engine visibility by customizing metadata and injecting custom scripts.
Go to the left sidebar and navigate to:
Storefront > Storefront > Storefront SEO
SEO Fields
- Website Title – The main title shown in search engine results.
- Meta Description – Short summary of your storefront shown in search engines.
- Meta Keywords – Relevant keywords that describe your business.
SEO JS Injection
Add any custom JavaScript for advanced SEO, schema, or third-party tools:
<script>
// Add your SEO or tracking scripts here
</script>
Social Media SEO
Help social platforms understand and showcase your storefront better:
Go to the left sidebar and navigate to:
Storefront > Storefront > Business Settings
- Social SEO Title – The headline that appears when links are shared.
- Image Alt Text – Improve accessibility and image indexing.
- Creator – Twitter handle or business name.
- Meta Description – Preview text for social shares.
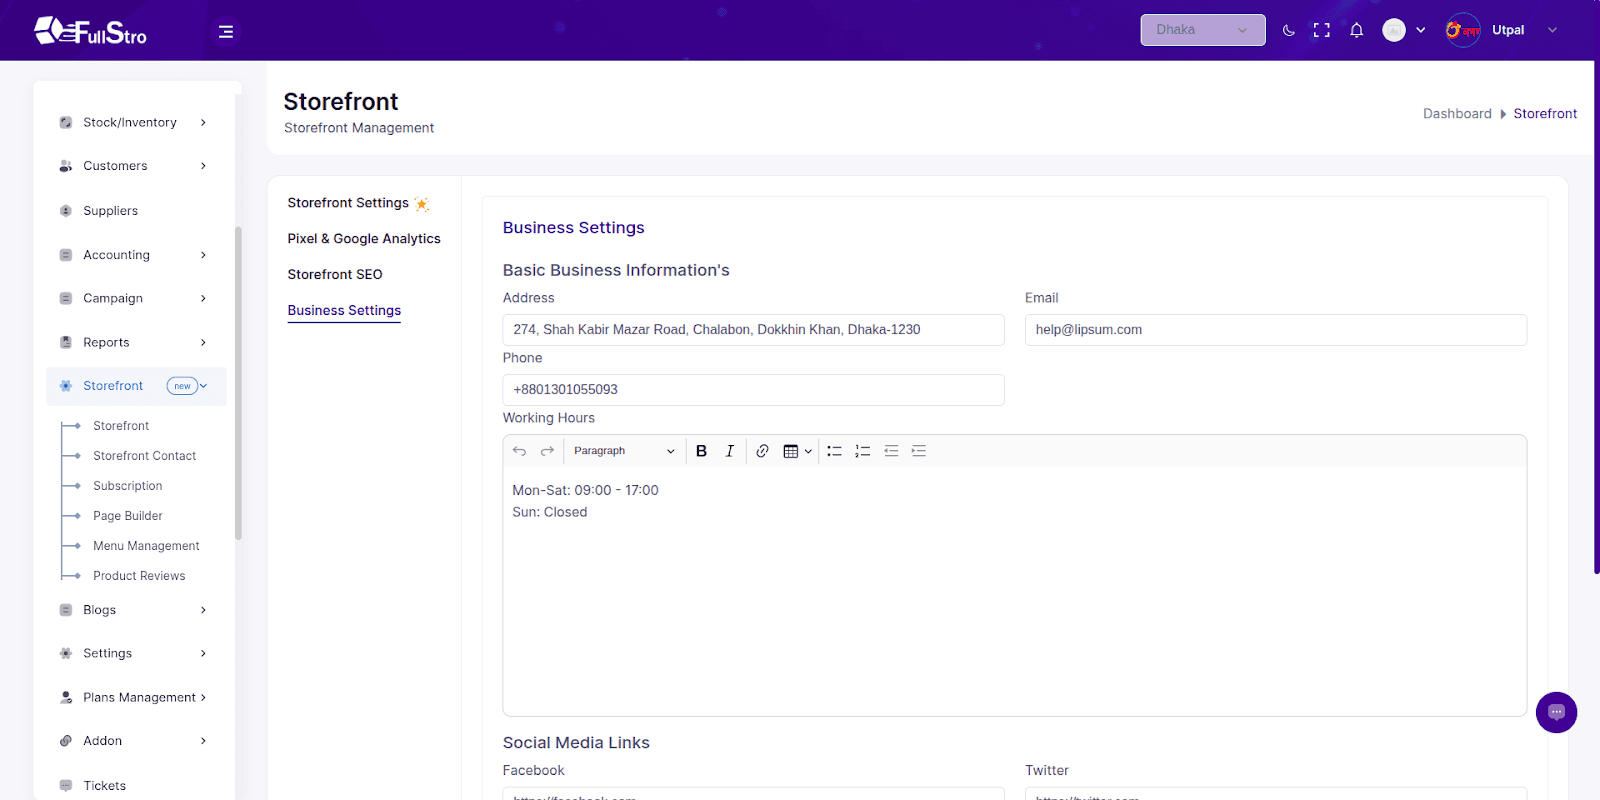
Business Settings
Set up the core identity and operational information for your business.
Basic Info
- Business Name
- Address
- Email
- Phone Number
Working Hours
Set your operating hours to display in footers, contact pages, or widgets.
Social Media Links
Connect your storefront with your social world and build a multi-platform presence:
- Facebook
- Twitter
- Instagram
- LinkedIn
- Discord
- Pinterest
- WhatsApp
- Google Maps – Share your location for real-world store visibility.