Welcome! Once you’ve subscribed and logged into your dashboard, follow these steps to configure your store settings and get started.

Dashboard Customization
After logging into your dashboard:
You can rearrange or decorate the dashboard as you want.
Show or hide widgets, metrics, and components to match your workflow.

Profile Settings
Go to the Profile section to update your personal or business details.

Warehouse
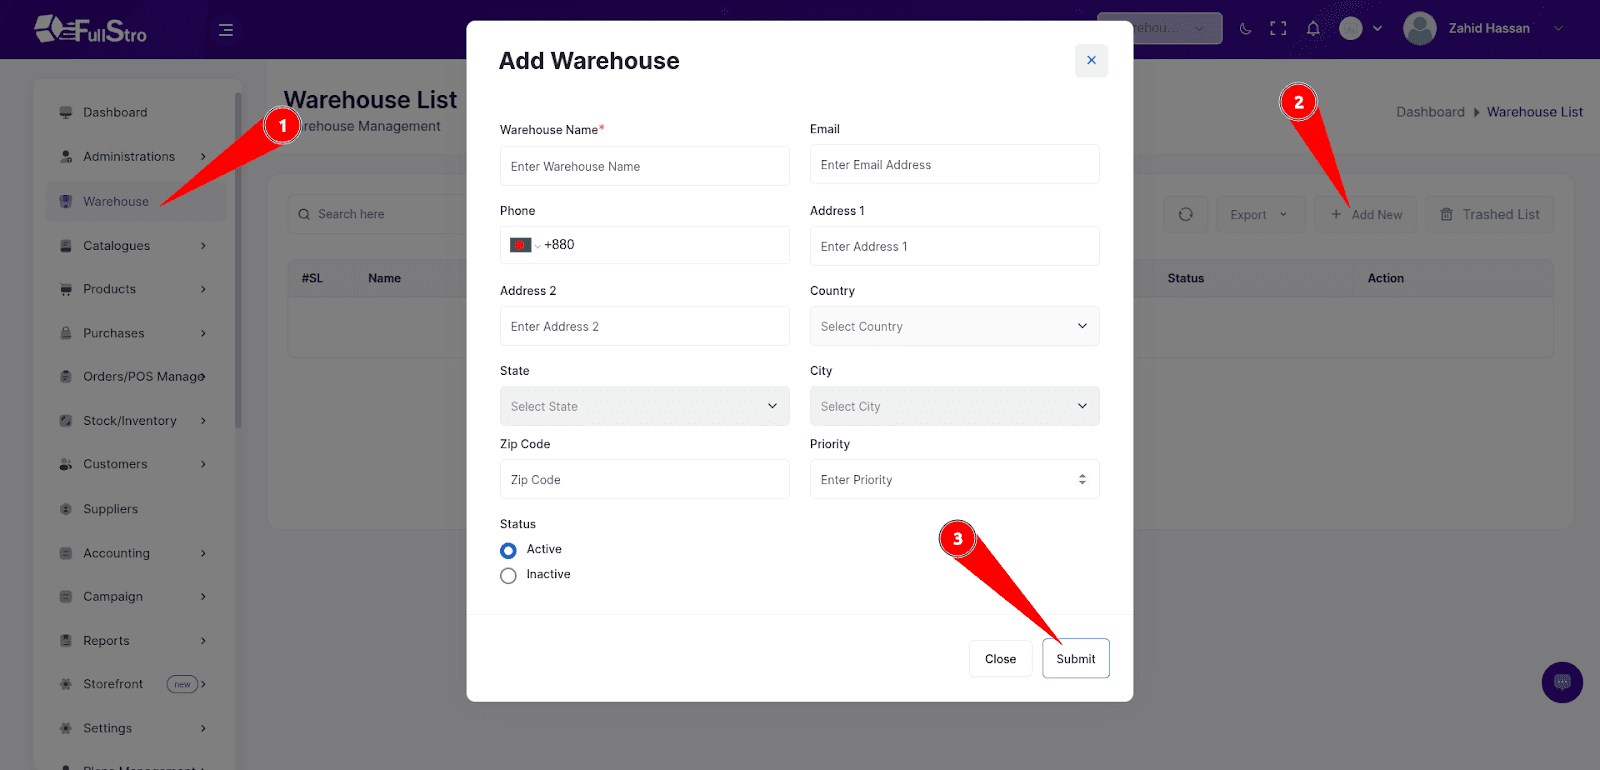
Navigate to Warehouse → Add New to create your first warehouse and manage inventory locations.

1. Basic Settings
General Settings
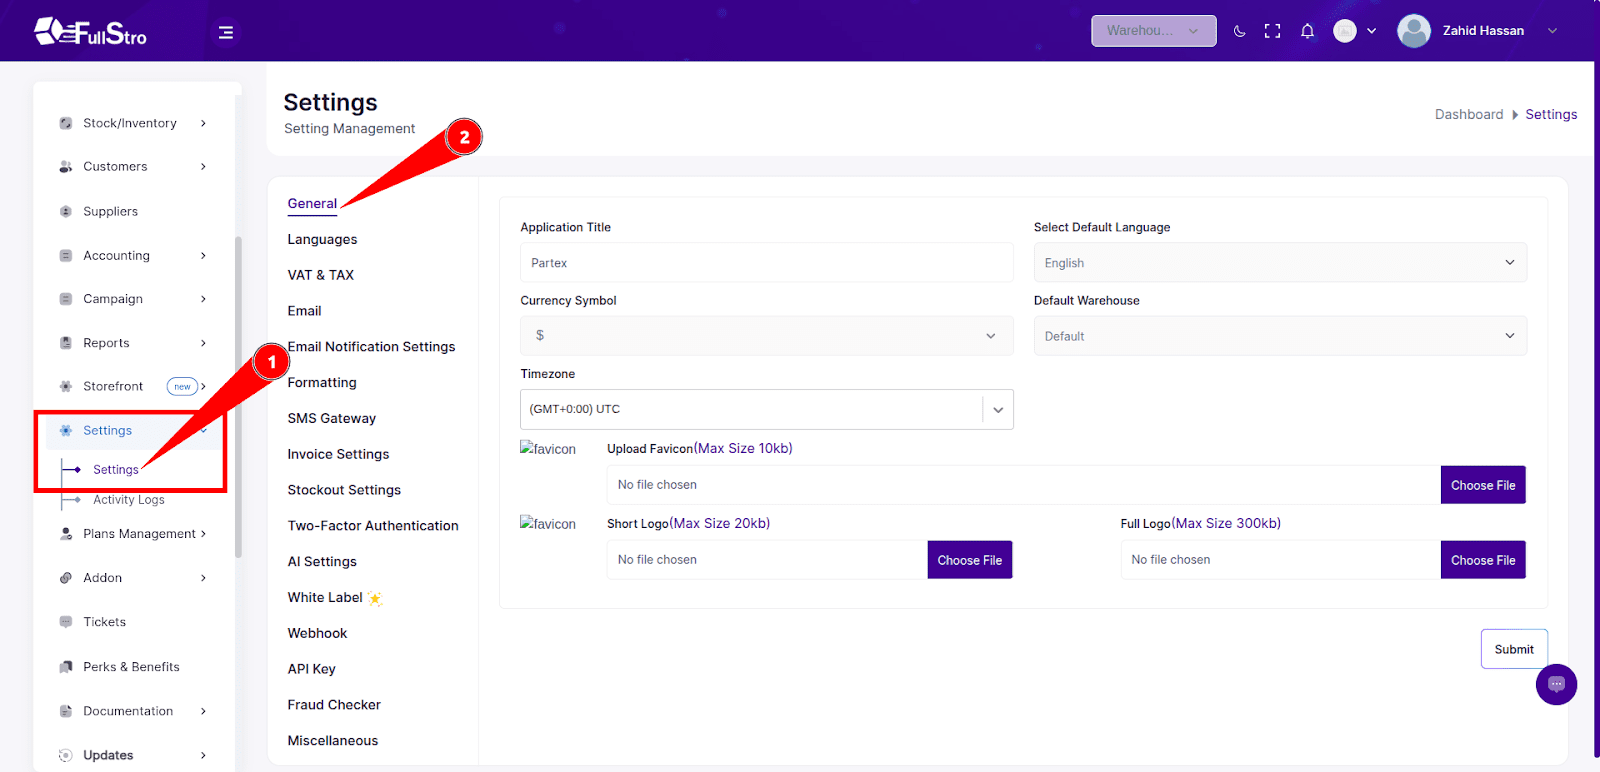
Navigate to Settings → General to update key company information:
- Application Name
- Default Language
- Currency Symbol
- Default Warehouse
- Timezone
- Favicon
- Site Logo

2. Language Setup
Go to the Languages Tab:
- Sync available languages
- Enable or disable languages as needed for your store

3. VAT & Tax Configuration
Under VAT & TAX Settings, you can:
- Enable/disable VAT & Tax
- Choose fixed or percentage-based VAT globally

4. Email Settings
General Email Settings
Set up your email provider under the Email tab to send and receive emails through the system.

Email Notifications
Enable or disable various email notifications from the Email Notification tab.

5. Formatting Preferences
Go to the Formatting Tab to configure:
- Invoice Format
- SKU Format
- Purchase Prefix
- Default Currency Format

6. SMS Integration
In the SMS Gateway Tab:
- Enable/disable Twilio SMS Integration
Enter your Twilio API keys to send branded SMS messages

7. Invoice Settings
Customize invoices from the Invoice Settings Tab:
- Toggle billing, shipping, and invoice visibility
- Edit invoice footer text
- Upload invoice logo
- Add author name, designation, and signature

8. Security
Enable Two-Step Verification for added account protection.

9. Supplier & Auto Order Settings
Configure:
- Supplier notifications
- Auto Order Placement Rules

10. AI Product Description (Optional)
Under AI Settings, you can:
- Enable automatic generation of product descriptions using AI during creation or updates.

11. Reset Database
Warning: Resetting your database will erase all data. Only do this if necessary.

12. Addons
Visit the Addons Tab to:
- Purchase additional features
- Manage your active subscriptions
- And you can see your purchase history.
