Create and manage campaigns to promote products with discounts across POS and storefront.
Step-by-Step Guide:
Step 1: Navigate to the Campaign Module
- Log in to your FullStro account.
- From the left panel, go to: Campaign > Campaign
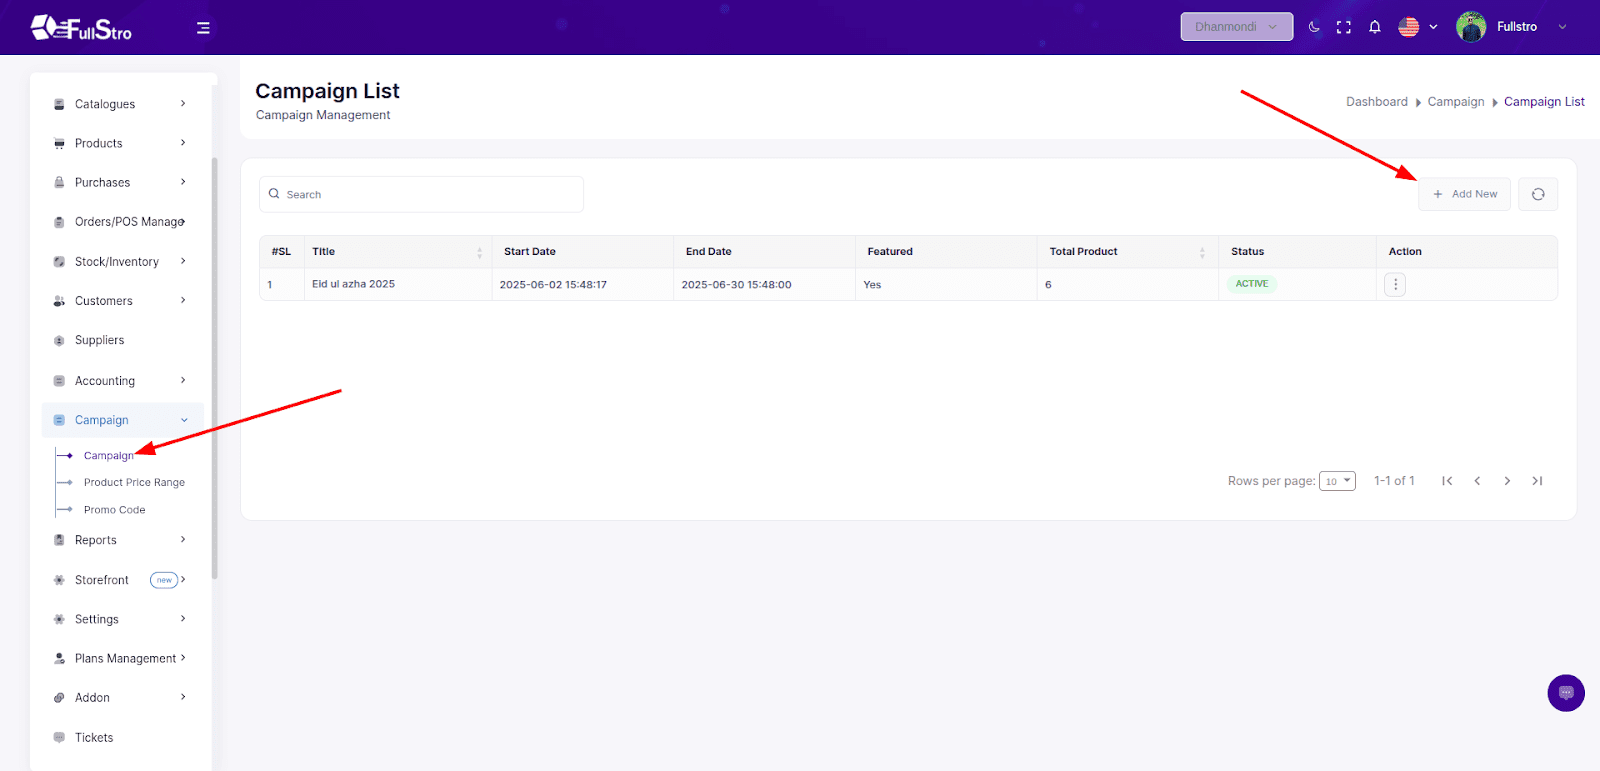
Step 2: Add a New Campaign
- Click on the Add New button.
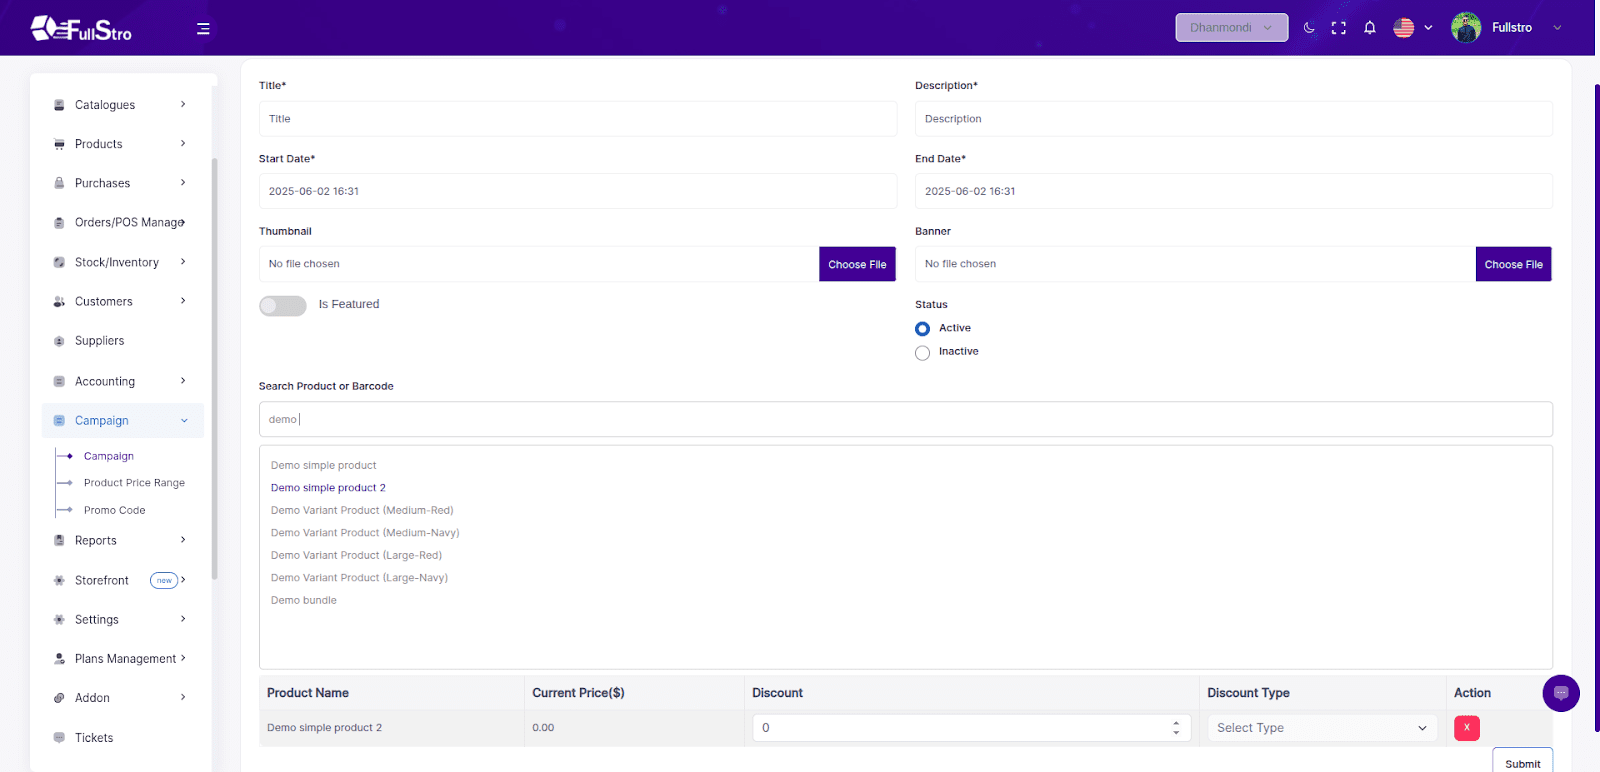
- On the Add Campaign page, fill in the following fields:
Campaign Details:
- Title* – Name of the campaign
- Description* – Details about the campaign
- Start Date* – Campaign start date
- End Date* – Campaign end date
- Thumbnail – Small image for list or card views
- Banner – Banner image for campaign display
- Is Featured – Checkbox to highlight the campaign on the storefront
- Status – Choose between:
- Active – Enable campaign
- Inactive – Disable campaign
Add Products to Campaign
Under the product section, you can search and add products using:
- Search Product or Barcode
- Once products are listed, you can enter:
- Product Name (auto-filled)
- Current Price ($) (auto-filled)
- Discount
- Discount Type – Fixed or Percentage
- Use the Action button to remove a product
Step 3: Submit Campaign
Once all the information is filled out, click the Submit button.
Step 4: Campaign Listing & Availability
- The campaign will now appear in the Campaign List.
- Products in this campaign will automatically show the offer pricing:
- On the Storefront (If Storefront feature is active)
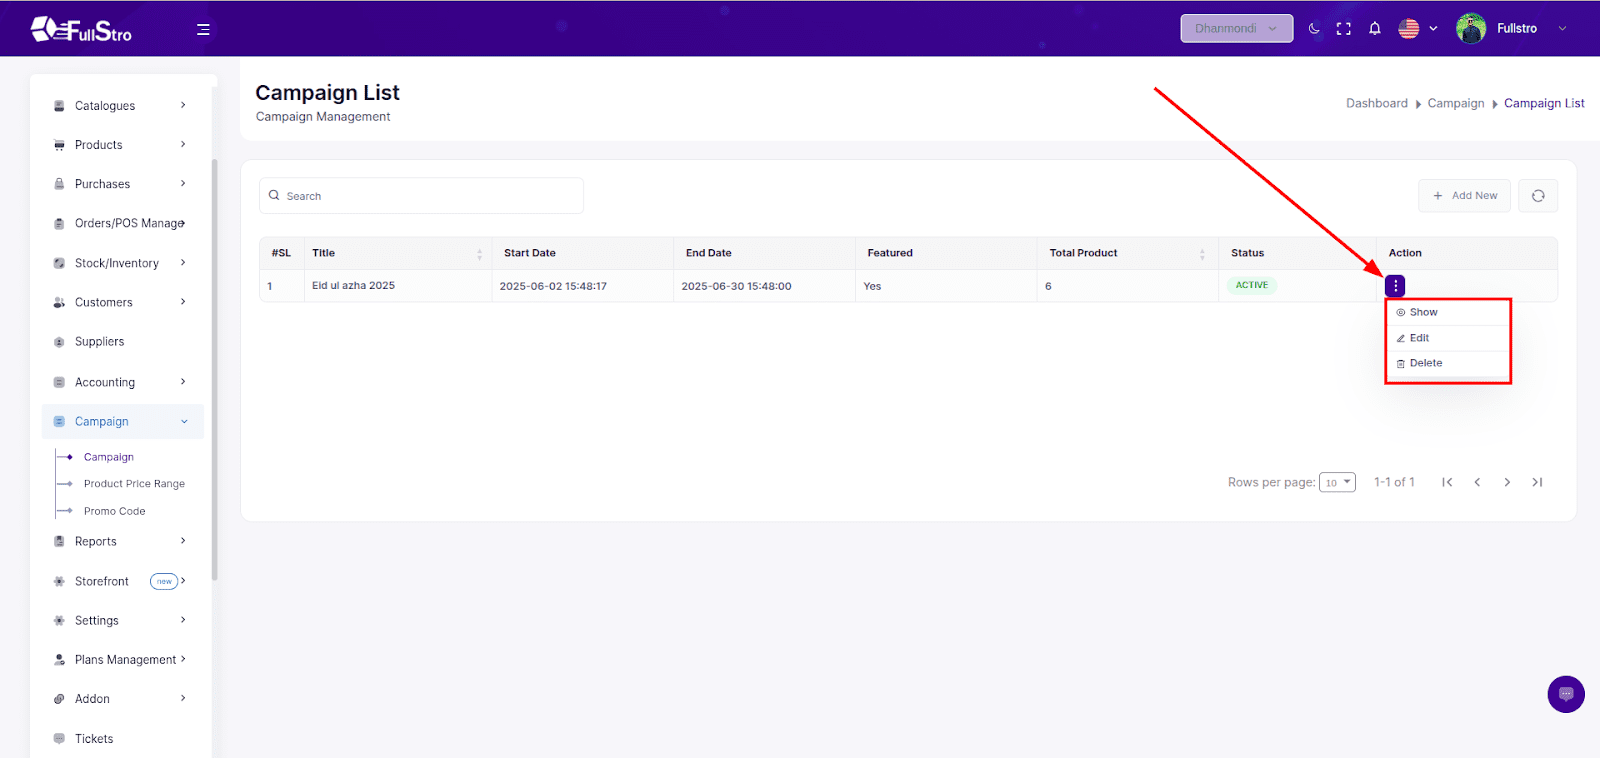
That’s it! You’ve successfully created a campaign. Your promotional pricing will now automatically apply at checkout during the campaign period.
Set promotional pricing for products within a specific date range to automate discounts on POS and storefront.
Step-by-Step Guide:
Step 1: Navigate to the Product Price Range Module
- Log in to your FullStro account.
- From the left panel, go to: Campaign > Product Price Range
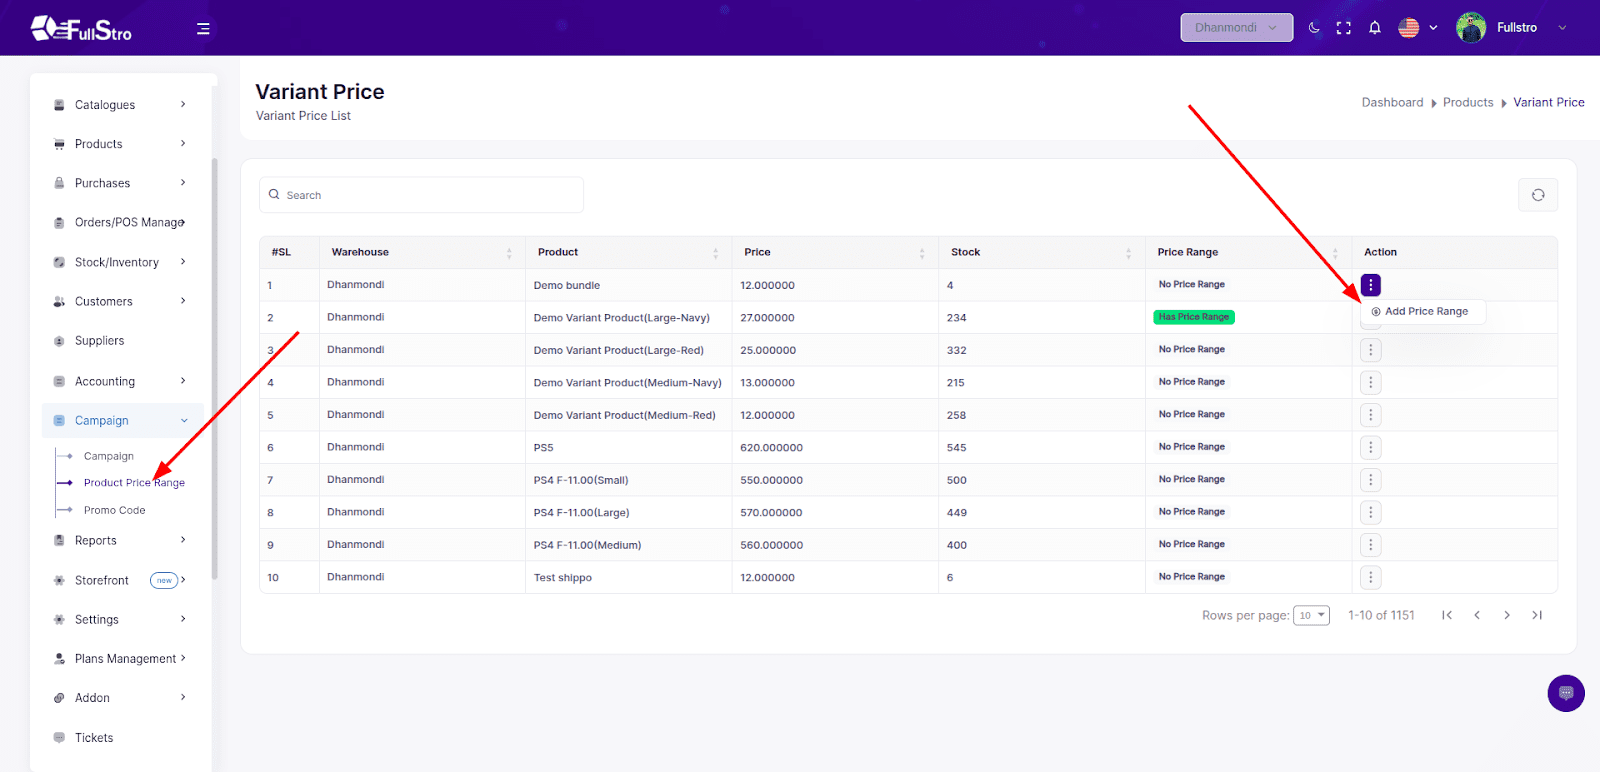
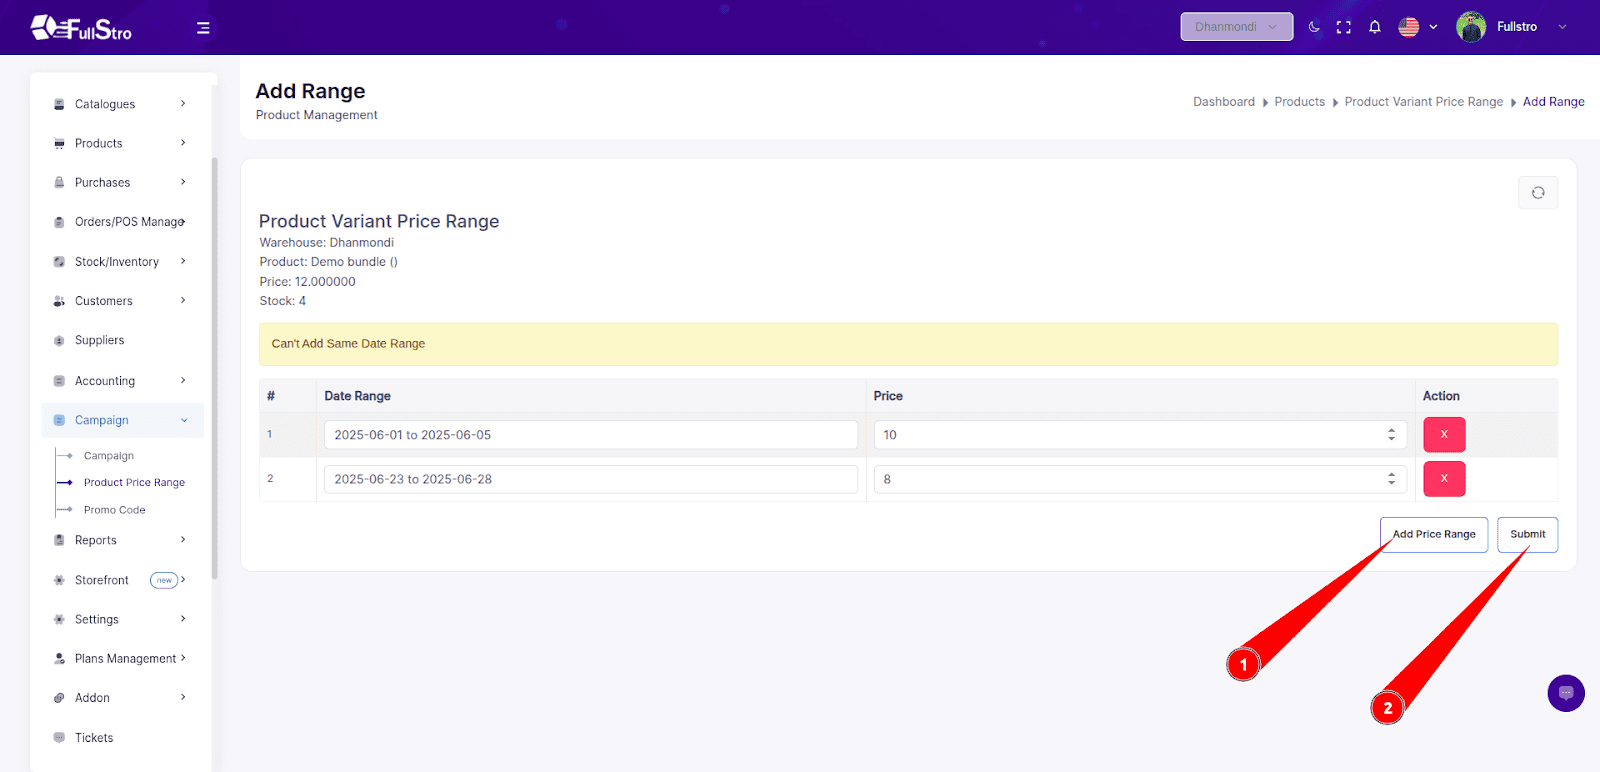
Step 2: Add a New Price Range
- From the Product Price Range list, click the Add Price Range button from the action dropdown beside the product you want to set a price range for.
- On the Add Price Range page, fill in the following fields:
Add Details:
- Date Range – Select a start and end date for the promotional price
- Discounted Price – Enter the price that will apply during the selected date range
Step 3: Submit
After filling in the required information, click the Submit button.
Done!
You’ve successfully set a Product Price Range.
The discounted pricing will now automatically apply during the selected date range at checkout in:
Storefront (If Storefront feature is active)
Easily set up and manage promotional codes to apply automatic discounts on POS and storefront transactions.
Overview:
The Promo Code Module allows you to create discounts based on order totals, specific products, or customer types. These codes are valid within a selected date range and can be applied at checkout, automating your discount campaigns.
Step-by-Step Guide:
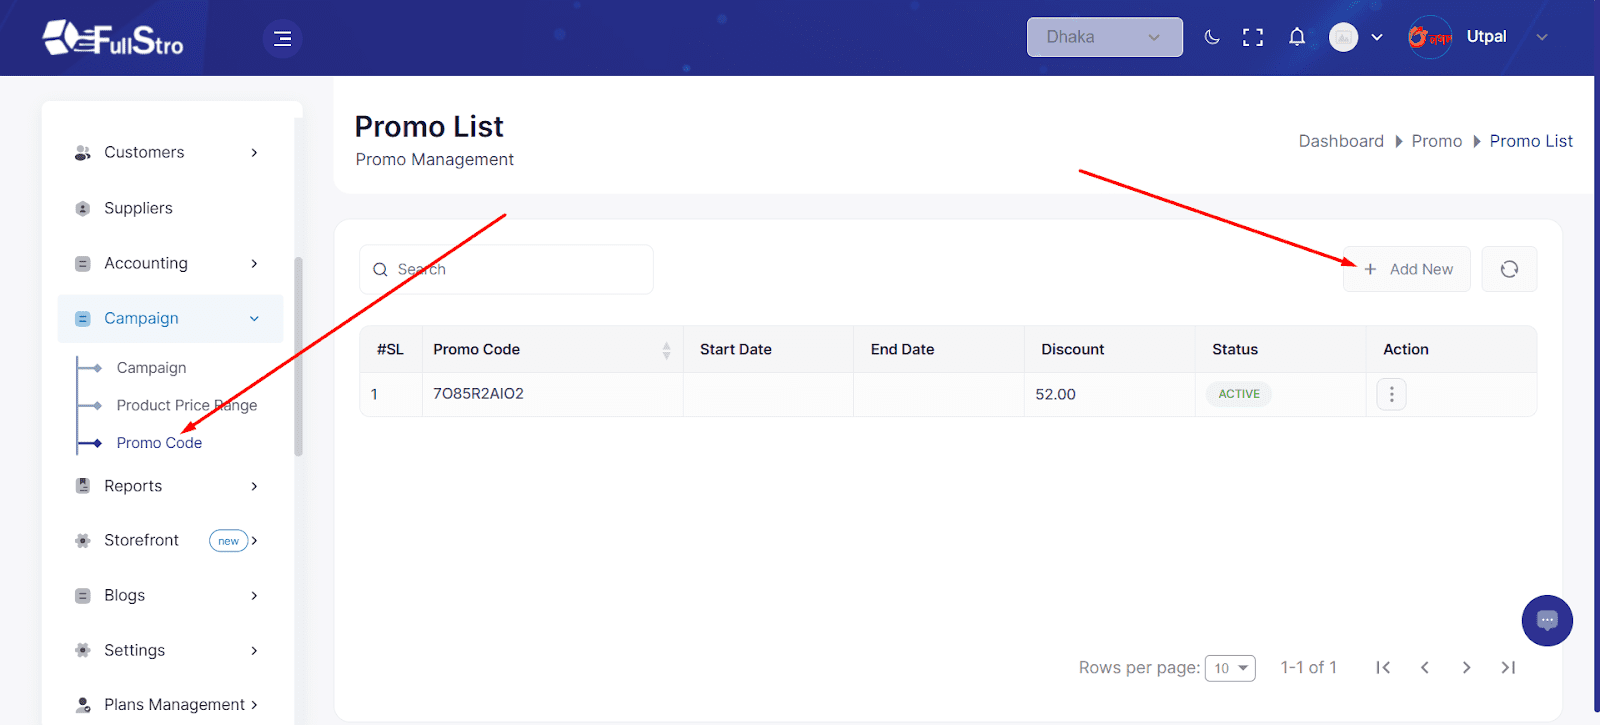
Step 1: Navigate to the Promo Code Module
- Log in to your FullStro account.
- From the left sidebar, go to:
Campaign > Promo Code
- Click the “Add New” button to start creating a new promotional code.
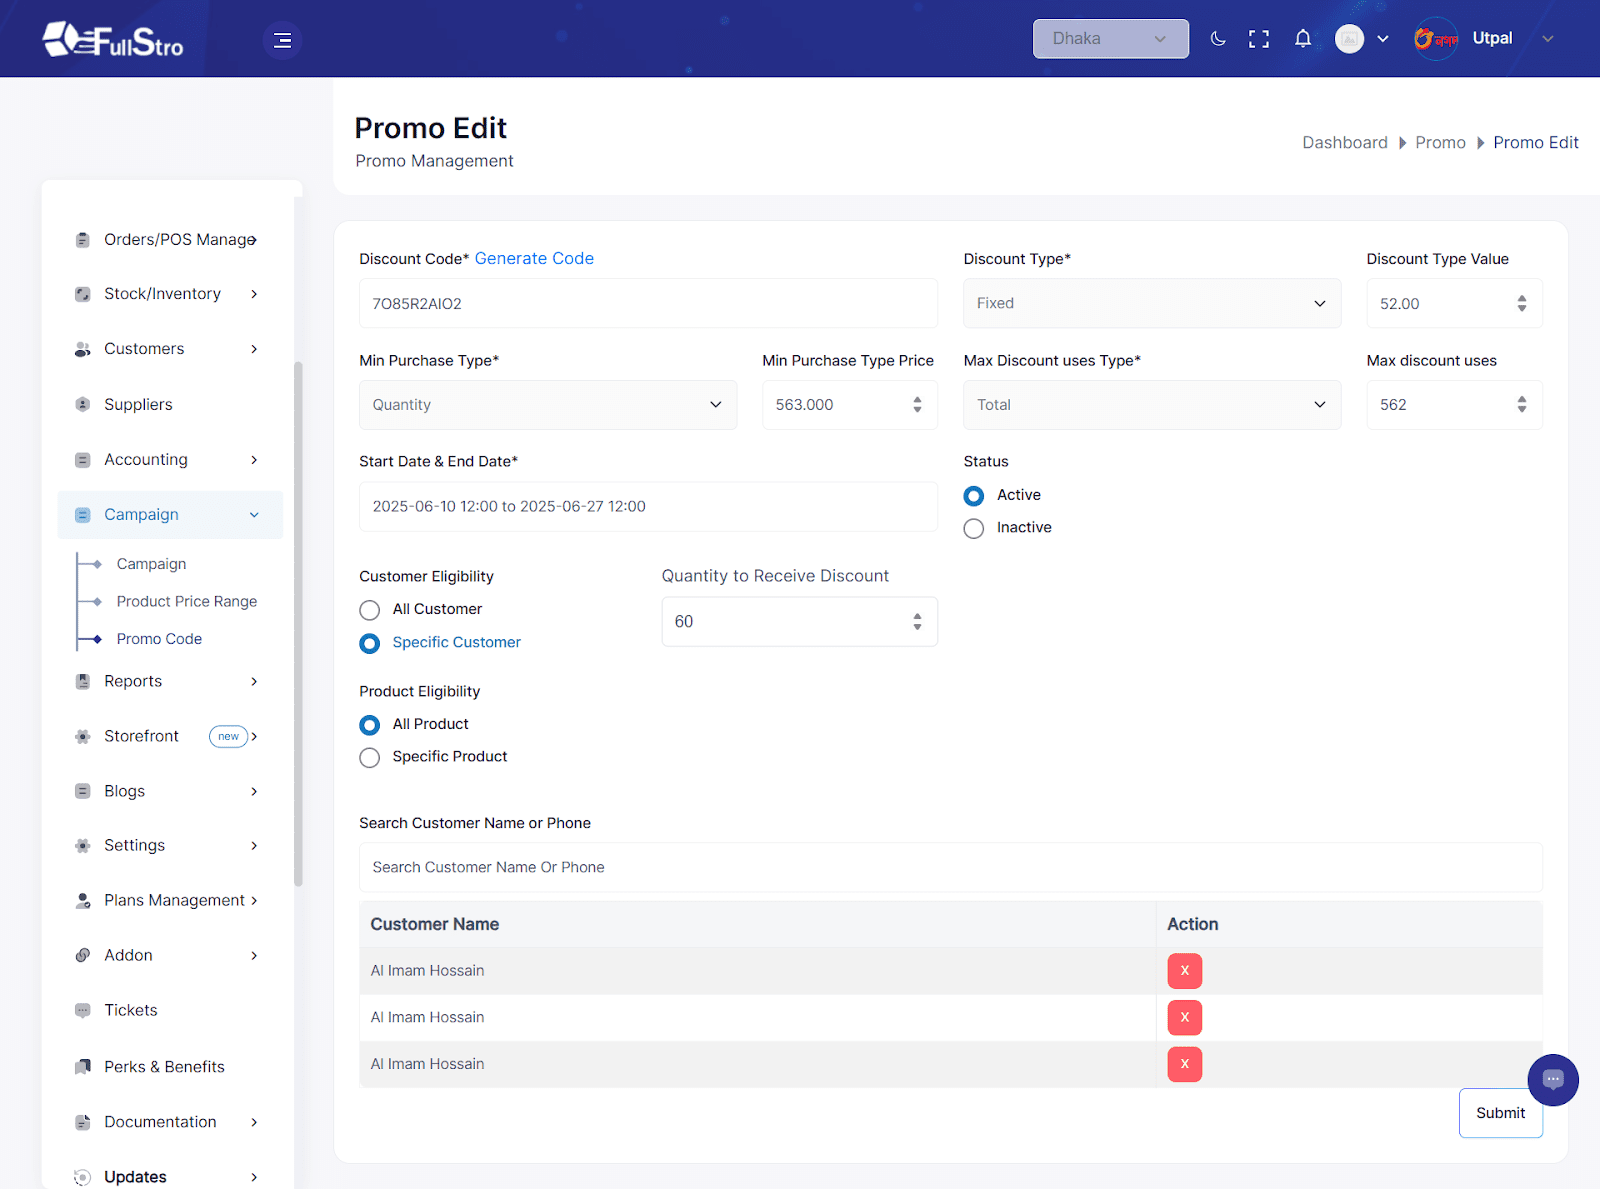
Fill in Promo Code Details:
| Field Name | Description |
| Discount Code* | Generate or enter a custom promo code |
| Discount Type* | Select either Percentage or Fixed discount |
| Min Purchase Type* | Choose if the code is valid based on Quantity or Amount |
| Max Discount Uses Type* | Set limit by Total, Per Customer, or both |
| Max Discount Uses | Define the maximum number of times the promo code can be used |
| Start Date* & End Date* | Select the promo’s start date and expiration date |
| Status | Choose Active or Inactive |
| Customer Eligibility | Apply to All Customers or only Specific Customers |
| Product Eligibility | Apply to All Products or only Specific Products |
After Submission:
Once submitted:
- The promo code will be listed in the Promo List.
- You can View Details, Edit, or Delete the promo using the Action button.
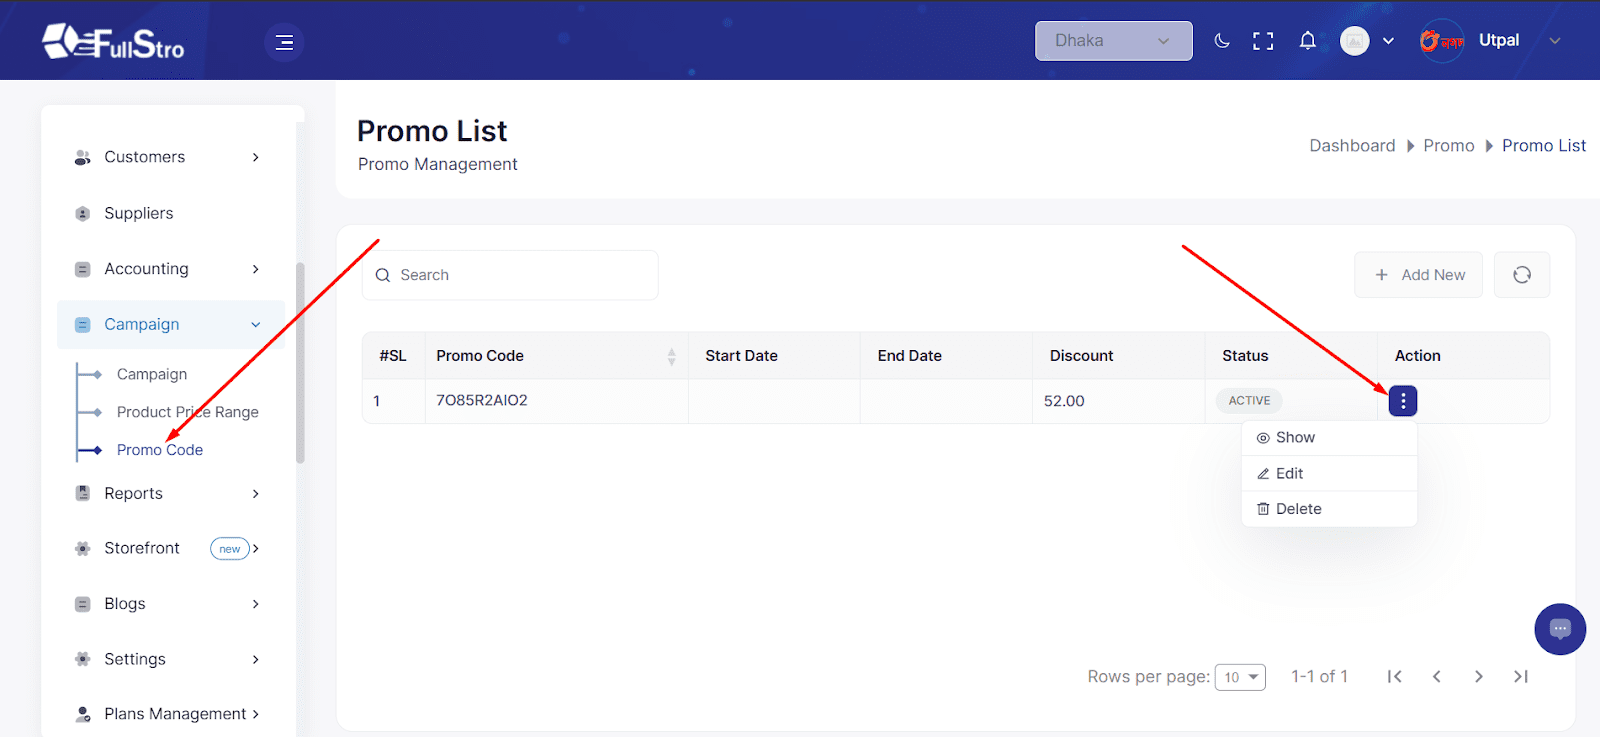
Edit a Promo Code:
To update any conditions of a promo code:
- Click the Edit button on the Promo List.
- Modify the promo code details as needed.
- Save changes to update the promo logic.
Using Promo Codes:
Promo codes will now automatically be applied:
- In the POS Module at checkout.
- On the Storefront during online purchases.
- Eligible orders and customers will receive the discount based on your configured rules.


